• Happy Marine Mammal Rescue Day! 🐳🐬🦭🦦

(Finally) starting from scratch.

@stripperguy, I am very pleased with it so far and I am happy that all the lurking / reading build threads seems to be paying off. I'll get it wet (and, from what I understand, give it a pretty good beating) at the end of the month. Hoping to get a day trip or two in first to make sure I don't swim more than paddle but we'll see. Worst case, it goes, untested, on a 120 mile(ish) paddle.

Put a sharp bevel on the bottom edge, to make it easy to glass, and blend with the hull.
Glass both sides of the insert also !
Jim, I glassed the backside of the bulkhead panels previously and put a bit of a bevel on where needed to get a decent fit. As usual, you've outdone yourself with fit & finish and I may get there eventually. I went for "close enough" and I'm pleased. Kinda wish I'd paid more attention to the centerline of the bulkhead & the placement of the Cherry strip but... Wait... I'm starting to care way too much what this looks like! :ROFLMAO:

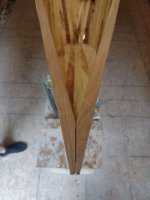
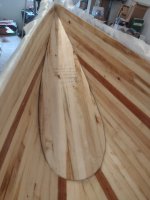
I took a picture of the bow bulkhead tonight. I could probably get the bottom tighter (and I would if I were making it to sell) but it'll do...
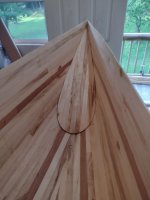
image000001 (2).jpg


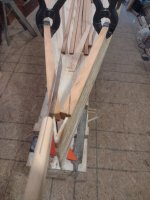
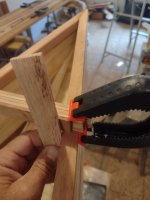
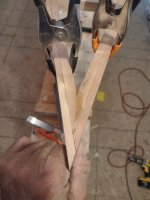
While I was there, I also removed the seat strips from the forms, buttered both sides of the strips pretty liberally with epoxy and re-clamped them in the forms. There are 4 Cherry strips and 3 White Oak per cross rail. (probably overkill but I am more likely to gain weight than lose it at my age so...)
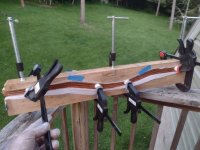
image000000 (40).jpg

The white on the bar clamps are 1 inch pvc cut about an inch long and then filed smooth so the epoxy can't (hopefully) get hold of them. They seemed to do well aligning the strips and I tightened the c-clamps most of the way, squeezed the pvc / bar clamp combo to align the strips and then finished cranking down the c-clamps.

Oh... I didn't have clear packaging tape over there yet and I have a (what may be a lifelong) distrust of blue "clean release" tape so I used wax paper on the forms. I'm hopeful but I also realize that I can burn all of it if it's a disaster.

Hoping to enlist the help of my friend with the sawmill (he IS a woodworker) to help finish the seat and figure out a way to do the inwales / thwarts as I'd like them. Planning a marathon, epoxy the inside and install all trim (except, possibly the seat) this weekend or next.

Certainly starting to look like I'll get to scratch her up the last week of August.
 
Looking good! I would strongly advise you not to try to glue the trim on after 3 hours, that could take you into a whole new world of hurt. Most epoxies have a 72 hour window for chemical bonds, but as Stripperguy says, I have epoxied things to older hulls many years after the initial build. If you wait until at least the hull has cured, like 24 hours, you will still get your desired bond, without worrying about glass shifting around.
 
I've always been of the School, that the sooner you can apply epoxy, the clearer and better bond you will get.
Obviously, that isn't always possible !
Even though manufactures give you a 72 hour " Window " before you need to sand for a Mechanical bond, It's not like a switch goes off at 72 hours ! It's a gradual thing. Thus the sooner the better.

The main thing with the flotation chamber, is it will make reentry, in a swamped canoe easier, in the event.

It's coming together ! I know how anxious you are to get it in the water !

My first canoe hit the water in the middle of the Winter here in Iowa. Just couldn't wait until Spring !

Keep at it !

Jim
 
@stripperguy, I am very pleased with it so far and I am happy that all the lurking / reading build threads seems to be paying off. I'll get it wet (and, from what I understand, give it a pretty good beating) at the end of the month. Hoping to get a day trip or two in first to make sure I don't swim more than paddle but we'll see. Worst case, it goes, untested, on a 120 mile(ish) paddle.


Jim, I glassed the backside of the bulkhead panels previously and put a bit of a bevel on where needed to get a decent fit. As usual, you've outdone yourself with fit & finish and I may get there eventually. I went for "close enough" and I'm pleased. Kinda wish I'd paid more attention to the centerline of the bulkhead & the placement of the Cherry strip but... Wait... I'm starting to care way too much what this looks like! :ROFLMAO:

I took a picture of the bow bulkhead tonight. I could probably get the bottom tighter (and I would if I were making it to sell) but it'll do...

View attachment 136695


While I was there, I also removed the seat strips from the forms, buttered both sides of the strips pretty liberally with epoxy and re-clamped them in the forms. There are 4 Cherry strips and 3 White Oak per cross rail. (probably overkill but I am more likely to gain weight than lose it at my age so...)

View attachment 136694

The white on the bar clamps are 1 inch pvc cut about an inch long and then filed smooth so the epoxy can't (hopefully) get hold of them. They seemed to do well aligning the strips and I tightened the c-clamps most of the way, squeezed the pvc / bar clamp combo to align the strips and then finished cranking down the c-clamps.

Oh... I didn't have clear packaging tape over there yet and I have a (what may be a lifelong) distrust of blue "clean release" tape so I used wax paper on the forms. I'm hopeful but I also realize that I can burn all of it if it's a disaster.

Hoping to enlist the help of my friend with the sawmill (he IS a woodworker) to help finish the seat and figure out a way to do the inwales / thwarts as I'd like them. Planning a marathon, epoxy the inside and install all trim (except, possibly the seat) this weekend or next.

Certainly starting to look like I'll get to scratch her up the last week of August.
This is looking great… excellent work Gamma!
 
Trying to finish this & get it on the water, I haven't been posting as regularly as I should...

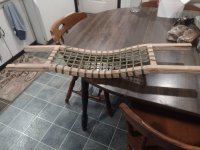
I took all the seat frame pieces to my buddy's woodworking shop and he ran them over a joiner to square them up and then cut for the spacers with a dado blade. I epoxied all the pieces together and then used plumber's 120 grit emory cloth strips to round all the edges.

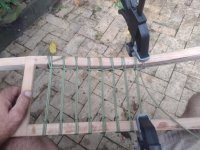
I had a 100 foot roll of green, 3/16 paracord that I was unlikely to use for anything else (I try to use only orange in the woods so I can find all of it when I leave) so I tied it onto one end of the frame and started wrapping. I chose to wrap the frame rails instead of drilling them as the rails would be stronger without the holes and I could get started faster without precisely measuring the hole locations. I wove this one a little differently than I had the prototype as I didn't like the looks of the string running at an angle across the bottom of the seat. This weave was more of a PIA but I like the look better.

IMG_20230806_171048998.jpg
IMG_20230812_183811071.jpg

I will have to be extremely careful cutting the seat to fit as, given the time involved and my projected launch date, I'll be hard pressed if I screw up badly enough that I have to make another .

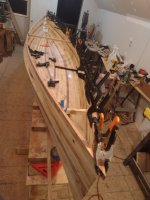
We also ran some laminated thwarts across the joiner and cut inwales and outwales out of Cherry. The inwales are 7/8x 3/4 cut down so there will be a 3/8x 7/8 edge inside of the hull and a 1/4x 3/8 piece overhanging the glassed hull. I'm figuring on using a trim router w/ a flush cut bit to trim the excess and then epoxying a 3/8x 7/8 outwale in place.

I cut the inwales to fit the bow and stern by slowly tapering and test-fitting until I had them close and then set them aside to glass the inside of the hull.

IMG_20230811_200121926.jpg
image000000 (41).jpg

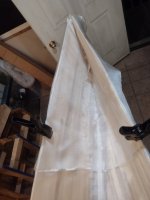
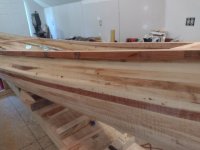
I used 30 inch wide, 4oz e-glass running across the hull and overlapped the cloth about 2 inches. (note: it took a little less than 10 yards to glass the hull this way) I had some leftover pieces of 6oz s-glass that I cut about a foot wide and ran down the inside of the bow and stern. I then cut the 30 inch e-glass so that it would cover one side of the bow (or stern) and overlapped those in the bottom of the canoe. I tried to get it as smooth as possible but didn't sweat it much as it will all be hidden under the bulkheads.

IMG_20230811_212159379.jpg

On Saturday afternoon, I spent about 3 hours epoxying the inside of the hull. Overall, it went well although squeegeeing from the bottom was an exercise in patience as the the glass was far easier to "scootch" out of position than it was to move it back to where it belonged. I found that, by working gently, I could get it wet out well and still have the cloth in place.

The other tricky spot was the chine. I could gently squeegee up the hull to the chine but, when I tried to go past or above it, the cloth would pull loose. My solution was to use a 2 inch paintbrush to gently epoxy above the tumblehome and use a combination of paintbrush and (gloved) epoxy-covered fingertips to press the cloth firmly into the chine.

The overlapping pieces at the stems were, as expected, a PIA but I wet them out using the paintbrush, tucked them in where needed and moved on. I worked from bow to stern across each 30 inch piece and, when I reached the stern, I returned to the bow with the bulkhead and a piece of 4 oz e-glass that I'd cut to fit it plus about 2 inches all the way around. The hull was sticky enough to hold the cloth in place and I smoothed it out and epoxied the bulkhead in place then did the same for the stern. I used a pencil on the stern bulkhead to indicate the model, manufacturer of the plans, my name and the time frame in which it was built. I probably could have centered it better but 🤷‍♂️

IMG_20230812_160001424.jpg
 
I trimmed the excess glass the following day and the epoxy was still very soft allowing it to cut cleanly and easily. I then put the inwales back on and drilled small pilot holes through the hull so they would catch the inwale. I used a larger drill bit to make a counter sink that was roughly the size if the screw head so the #4 x 1/2 inch screws would draw down flush with the hull.

IMG_20230814_215836662.jpg

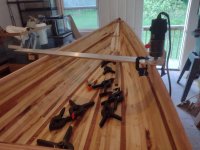
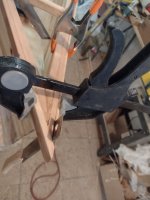
I then used a paintbrush to apply epoxy to the top inch of the hull and the inside edges of the inwale, clamped and screwed it into place and allowed it to dry.

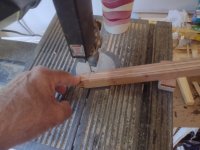
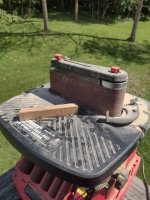
Next, I marked two grab handles for the bow and stern and the center thwart and cut the rough angle with the band saw. I used some scrap to elevate the stock on the table so the angle was close, cut the thwarts and then used the sander to fit them to the inwale.

IMG_20230818_100534092.jpgIMG_20230818_100655860.jpgIMG_20230818_110259984_HDR.jpg

I then drilled pilot holes and countersinks and attached these to the hull using 1 3/4 inch deck screws. This stabilized the sides of the hull nicely and allowed me to mount the jigged router.

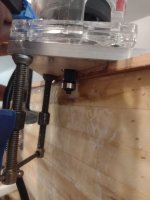
I'd picked up a small trim router and a flush cut bit from Harbor Freight. I clamped a piece of scrap inwale to the hull and tried it out but the inwale was too narrow to allow the router to sit on it and I wound up with a very wavy edge.

The solution was to clamp the router to a 3 foot(ish) x 4 inch x 3/8 piece of aluminum bar stock with a hole drilled for the router bit. This worked to fixture the router and, by resting across the top of both gunwales, it allowed me to trim fairly smoothly flush with the outside of the hull.

IMG_20230818_180751785.jpgIMG_20230818_175509011.jpg

I did find that I needed to take thin cuts and work slowly toward the hull as there were 2 places that the router grabbed and split the inwale. Of course, as it was glued and screwed, it couldn't be replaced (I thought I might be royally screwed). I used some wood glue on the splits, clamped them while I routered the rest of the hull and came back to them. I gently worked them smooth with the router and feel they cleaned up ok.

Note: a woodworker friend tells me that the bit dug in because the blade was rotating into the wood and caught the grain. He tells me that it won't do that if I draw the router toward me in a way that the blade is rotating in the direction of movement (so the chips fly off instead of being forced into the work). I'll have to watch for that on the next if I decide to gunwale in this manner.

IMG_20230818_181530521.jpg

There were also spots where the clamps kept me from reaching all the way to the stems and I couldn't cut past the thwart and handles. I cleaned those areas up with the farrier's rasp and I also ran the rasp all along the outside of the hull to get it as even as possible. If I choose to do the gunwales like this on future builds, I'll probably permanently fixture the router using countersunk bolts so I can get closer (if not all the way) to the stems and scoot right over the lateral supports. I'll also add some tape or heat shrink tube to the bearing on the bit so that it leaves the lip a few 1000s proud (even after rasping there were areas that weren't as smooth as I'd like them... which is ok... I'm not selling it, just paddling it but I feel the extra material, removed by hand, would give a better fit)

IMG_20230818_182806761_HDR.jpg

I then dryfit the outer gunwales. I spliced them with the shorter piece toward the bow so the splices in the inner & outer will be about 4 feet apart. For now, I cut the tips as I did when stripping the hull. I'll have to figure out what to do with them... I like the sharp, pointy look but also know that they wouldn't look like that for long.

IMG_20230818_192350843.jpg

At this point, I removed the outer gunwales, set them aside and removed the screws holding the thwart and handles. Using a 15/64ths bit (no reason, it was the first I grabbed in the approximate size range), I drilled both the lateral supports and the inner gunwale where they attach. I went just beyond full diameter figuring that the dimples would strengthen the epoxy joint.

IMG_20230818_203746283.jpg
(yes, I picked this one to photograph because I hit the center with the screw. The others weren't bad but this one was most photogenic :))

Using a 1 inch paint brush, I then painted both sides of the lateral support unions, reinstalled the screws, taped the bottom and sides of the joints & applied a drop of epoxy to the top of each. I then painted around the sheer and the back of the outer gunwales and held them in place with clamps. I'll have to buy more clamps as I only had enough to do one side.

IMG_20230818_213058897.jpg

I had some leftover epoxy so I dripped some extra on the lateral support joints (especially if it looked like any had seeped in) and then dribbled the rest down the union of the inner & outer gunwales. I got that far as of Friday and returned today to attach the other outer. The tape came off well, I scraped the excess epoxy, rasped & sanded the sheer, and rasped and sanded the lateral supports to round the edges.

I'll have to return tomorrow to scrape, rasp and sand the other half of the sheer and figure out exactly where to mount the seat. At this point, I think it's just a matter of configuring my seat attachment and coating with the varnish.

I did grab some oil-based Helmsman on the way through WV this week. I always prefer to buy local but my local hardware store said the gallons of oil-based were unavailable in PA due to the high VOCs. Seems silly that I could buy 4 quarts but not a gallon (for double the money and the same VOCs) but it worked out.

It certainly looks like I should have it on the water by next weekend and getting it scratched up pretty well shortly thereafter.
 
Last edited:
Well, I had to run over today and fix a screw-up that I did last night. I had attached one outer gunwale on Friday night but lacked the clamps I needed to do both on the same day so, after working all day Saturday, I swung by to get the clamps off and the other outer on.

I checked the fit one last time and then laid the pieces on top of the canoe, mixed up some epoxy and grabbed a small paintbrush. The front gunwale went on without a hitch but, when I picked up the rear one, I realized that I had flipped it over and I had painted the epoxy on the outside of the gunwale. I mixed up a little more, painted the hull side and clamped it in place hoping that I wouldn't have clamps and bits of bicycle inner tube permanently attached to the boat by morning.

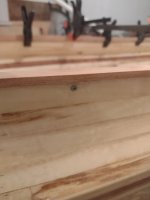
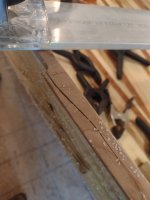
I went over this morning and found that all of the clamps came off but most did not come off cleanly

image000000 (42).jpg

I wanted to minimize color differences on the gunwales so I was planning on sanding the epoxy off anyway but I'm really glad I went over and got the clamps off. As it was, they were in place for about 12-13 hours. 2-3 days would have probably been much more of a project. (moral of this story: "green" epoxy seems friendly... fix mistakes early.)

I took a file and rounded the upper edge of the outer gunwale all the way around the boat and then lightly sanded to smooth the radius so the gunwale was comfortable to grab. I left the lower edge sharper and just hit it very lightly to ensure that there were no splinters and to clean up the spliced areas.

I had measured the outers in a way that the starboard side overlapped at the bow and the port would overlap at the stern. This allowed me to be less precise in measuring for the spliced 45s and I clamped a short piece of oak scrap to hold the backside of the pull saw against the gunwale and produce an even cut.

image000001 (3).jpg

At that point, it was time to verify if my seat / thwart / portage arrangement was actually going to work or if I was going to have to cut off the thwart (and the deck screw buried within the attachment.) For this, I'd brought a couple of paddles over & I carried the canoe outside into the yard.

Now, I'm from a backpacking background and, while I've never been an ultralight guy, I'm weight conscious and I also hate to lose things in the field. The simpler the better IMO so I was not planning on taking a removable portage yoke.

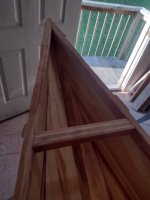
Any who may be familiar with the Freedom solo, may have noticed there is a thwart missing (there should be one just behind the seat and another about 5-6 feet in front of that). I felt the flex in the hull, decided (based on a month or so of experience building boats) that one would be sufficient as I'm also gluing the seat to the hull for lateral support instead of hanging it.

In addition, I'd moved the single thwart rearward to just in front of the balance point of the bare hull. I prefer a bow light trim, even my travel tackle box weighs 40 lbs and my base weight on the last canoe trip (the one I actually took a tent on) was a little north of 50# so there will always be substantial weight in the bow when I am paddling this boat. If conditions get rough, I can kneel (for improved stability but it also facilitates prayer) and pull the pack(s) rearward but I wanted the seat back further.

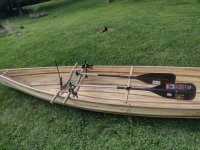
Shoving the boat out of the doorway on the second floor, I was very pleased that there was virtually no oil canning of the hull (I expected to be able to see where the boat was resting on the railing) and I laid it in the grass, put the seat on top of the gunwales and knelt against the thwart. I then, without moving my toes, raised myself onto the seat and checked the distance between seat & thwart to be sure my shortest paddle could easily span it.

I found that, with the seat 28 inches behind the thwart (which is the physical and gravitational center of the boat), I could easily go from sitting to kneeling without having to worry about putting my feet under the seat. It is also a comfortable distance to sit with the arches of my feet resting against the thwart. All that was left was to verify that this spatial arrangement would lend itself to portaging so I clamped the seat against the top of the gunwales, tied the paddles to the seat and the thwart (which now serves in a carry bar capacity) and took her for a stroll around the yard.

image000003 (2).jpg

One other nice feature of building canoes in the upstairs of Dave's garage is that he has a pond so my stroll went down the driveway to the pond below his house.

Now, bear in mind that the plans clearly state that the boat was designed for intermediate to advanced paddlers and I was (still am a little) concerned that I might have spent months building a boat which I am soon to take 15 hours from home on what should be a week+ trip and I may find that I can't stay in it. It seemed to me that, with the seat attached to the top of the gunwales, my center of gravity couldn't possibly be worse so, if I didn't swim with that arrangement, my confidence level should be buoyed (pun intended).

image000002 (3).jpg

In all, I think this arrangement will work well. The bow was a little lighter than I might prefer on an empty boat but, as stated previously, I expect that this boat will rarely be empty except on wood runs if I collect away from camp like I (usually) had to in the BWCA. In those instances, if it becomes an issue, I can always kneel until I acquire some burnable ballast.

So far, the boat seems like it will be very fast and easy to paddle but, as advertised, it feels twitchy and I almost swam when I turned sharply and one of the clamps holding the seat came loose. That quickly led to the seat shifting (on top of the gunwales, remember) and the other two clamps falling into the bilge along with the first.

I carefully paddled back to the launch rock (yep, I scraped it), hauled the boat back onto shore, reattached seat clamps and paddles and carried it back to the boat shop.

I'll leave small lengths of paracord attached to the seat and the thwart in the approximate portage locations of the paddles and, once I'd reattached the seat, all 4 knots to attach the paddles securely took about a minute to tie.

I'll certainly want the seat lower than it was on the test paddle but I'm thinking of only dropping it an inch below the gunwales in the rear and (maybe) 2 inches in the front. I'm hoping to do that early in the week and then getting quick and dirty with some spar varnish.
 
Last edited:
Just a general comment about seat placement.......in that type of canoe, 28 inches from center is quite a distance. I like to place my seats further from center than most, and the furthest I have gone is 12 inches to the front of the seat. If you have a chance and you havent cut your seat yet, maybe try a few different positions.
 
I haven't cut the seat yet and I was surprised that the "sweet spot" for kneeling without my feet under the seat and sitting was that far from center. I can probably throw it back out in the yard tonight & try it a little closer but I doubt I can go less than 24 inches without compromising something relative to comfort & ease of transitioning to both paddling positions. (and, yes, I'm aware that many on here would say I've compromised control already and they'd probably be correct if I intended to use it empty. It will certainly need to be loaded to handle properly unless the paddler remains kneeling.). Moving the seat forward could (potentially) allow me to lean my butt against the seat when kneeling but my feet are then under the seat and, without a lot of freeboard, I'd rather not.

I'm limited on this one due to the central thwart and that's ok as I think it will be fine with 45-50 lbs (or even a load of firewood) in the bow. On the next build, I may install the thwart a few (like 6 or 8) inches further forward to creep the seat forward but that will change the balance point using paddles for portages and I'll have to carry the boat facing the stern or I'll be holding the bow up the entire time (which won't happen).

I suppose the smart thing to do would be to grab my bag with a reasonable proximation of tripping weight, put some tape on the gunwales to keep the seat from sliding loose again & throw it back in the pond. That's easily done.
 
I use foam blocks or something similar when test paddling unfinished canoes. It's easy to add/remove blocks for different heights and it's super simple to move them forward/backward to test different locations.

The nice thing about paddling a solo canoe is the ability to control either the bow or the stern. I'd be a little concerned that with the seat so far back your ability to control the bow would be greatly diminished. But that doesn't mean it can't work out great for you. There are those who happily paddle from the stern seat of a tandem.

Alan
 
Looking great! Anxious to see the wood with some epoxy/finish on it. That Aspen/Cherry combo should look outstanding.

I bent my seat frames using a similar fixture. I didn't soak or steam the layers. All slightly less than 1/4" thick. Worked just fine. I used wood glue, not epoxy, and kept them clamped for 2 days to avoid "creep". I've done it with Walnut and Cherry. Pretty sure any moderately soft closed grain wood would be fine. Open grain, going to have to steam/soak to avoid splinters I believe. Also, with wood glue, be "liberal" and clean up the excess squeeze out. Otherwise, it'll tack up before finished clamping. A little extra glue acts as lube for curved laminations.
 
Regarding waxing: I wouldn't do it anywhere visible, like all of the station forms. My one and only build (so far) I used paste furniture wax on the stem form so I wouldn't get stuck to it. The form was wider than the inner stem, and had to be tapered as the stem approached the shear. I did this a little at a time, staying 3-4 strips ahead of what I was currently installing. The wax kept it from getting stuck, but I had a little soak into the strips in a couple spots. Minor, but noticeable. Wax soaking into bare wood is going to be pretty hard to get out without discoloring the wood. In the stem area, where you're not going to notice it, especially with float chambers, it did work great.
 
I'd be a little concerned that with the seat so far back your ability to control the bow would be greatly diminished.
Yes Alan, I'm absolutely sacrificing bow control (in the seated position) for the aesthetics of seeing more of the canoe. By sitting the stern deeper, however, I'm increasing tracking so I'm figuring, maybe it's like riding a street bike... In town where control is more critical, I'll kneel and keep my toes near the shifter / brakes but, cruising the middle of a long lake, maybe kick back, relax a little and put your heels on the road pegs. (?)

I took my (base weight) canoeing pack out this evening, put the canoe in the grass again and moved the seat as close as I felt was comfortable moving from seated to kneeling and wound up trying it 24 inches behind the thwart. I clamped the seat (with bits of inner tube between the gunwale & the seat frame), tied the paddles on and single portaged everything to the pond. As expected, it carried better if I was facing the stern but that's not a deal breaker for me.

I put the canoe in the pond, threw the pack in the bow and took a couple of laps.

When seated, tracking is very good but bow control and turning radius are sacrificed (but not terribly IMO). Kneeling, it was far more maneuverable but I had to slide the pack toward the center to maintain trim. In either position, it seems easy to get (and keep) moving and I still have not gone swimming (wading, actually... I doubt the pond is deeper than 4 feet right now)

I'll know a lot more after my fall trip but I suspect that, in the future, the seat may stay well behind the center but the thwart could move forward a bit. The 28 inch spacing just felt better.

I'll have to cut & fit the seat this week.

Notes: the innertube pieces worked great to keep the seat in place while portaging and paddling today (sorry, I failed to get any pictures). I was able to easily single carry the boat and my base weight pack so I shouldn't have to double port everything with this boat (I'm estimating weight right now around 45-50 pounds but that's with (probably) 3 pounds of clamps and no spar varnish. I was hoping for under 50 on this so... maybe...). The "paddles as portage aids" is probably as keeper. I like the simplicity and I can adjust trim on a carry by sliding the boat forward or back on my shoulders. Again, time will tell but I'll know for sure within the month.
 
Last edited:
I'm nearing the finish line and fitted the seat yesterday. I'd chosen to epoxy the seat to the hull because the seat, having not been hung from the gunwales, would act as an additional lateral support to (hopefully) compensate for the thwart that I'd eliminated. I figured I'd drop it about an inch below the inner gunwales (3 inches lower than my test paddle) so I used outer gunwale cut-offs as spacers & laid out the contact points with pencil.

I had a ton of stuff going on (as always) so my buddy figured out the reference angles while I was fixing the plumbing at my daughter's new house. By the time I was done, so was he and I had some rough angles to fit the seat to the hull.

One nice thing about doing it this way is that, if I screw it up, I can simply move the seat back. As the hull gets narrower toward the stern & narrower in the tumblehome, I can move the seat up or rearward without needing to make another.

I almost needed to do that as I wasn't terribly careful with my measurement when I cut the seat. (haste makes waste, right?)

DSCN1397[1].JPG

As you can see from the pencil marks, I wound up 3/8 inch from making contact with the hull on the rear cross rail. Happily, my error was in leaving the front rail too long so I didn't need to move the seat back or up.

I cut an additional 3/8 inch off the front rail and then started sanding whichever support seemed long with the spindle sander. I had to try to hold the seat close to the reference angle while sanding in a radius and that took a lot of patience and quite a bit of time. In hindsight, I will probably fit the seat before I install the thwart in the future just so I have more options to fit but it worked out this time and I feel good about the final fit.

DSCN1398[1].JPG

I put a piece of scrap outer gunwale between the inner gunwale and the seat, used a spare thwart lamination and a 4 foot level for support and epoxied the seat to the hull.

DSCN1400[1].JPG
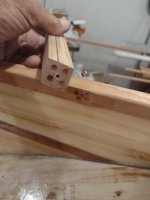
I'd also made 2 seat supports which were 8 inch pieces of leftover outer gunwale with notches filed into them to allow a tight fit to the bottom of the seat frame and they should limit the seat's ability to move backward / forward when paddling (should the epoxy joint at the end of the cross rails fail). I considered sanding or filing a radius into the back side of the supports but decided they were flush enough without. They were a little more difficult to get clamped as I was getting pretty far down the hull but it worked.

DSCN1402[1].JPG

I allowed the epoxy to set up overnight then removed the clamps and the spacer blocks above the seat. There did not appear to be any large voids between the seat frame and the hull (if there were, I was going to tape the sides to form a well and then use a syringe to squirt a little epoxy in there) and everything seemed secure.

DSCN1406[1].JPG

I lifted the canoe, reinstalled 2 of the station forms (closer to center than their original positions) and added a couple of short pieces of scrap to lift the hull above the strongback enough to reach under it while keeping it low enough to paint on the spar varnish. I did this so that I could varnish the bottom of the thwart, seat, grab handles and inner gunwales without painting upside down and, in the future, all but the gunwales will be varnished after fitting them & before they're installed (the seat will be fit, then varnished, then woven before being installed)

DSCN1411[1].JPG

One thing I'd neglected to do before flipping it was to sand off the alignment marks I'd made (in pencil) on the gunwales. Luckily, I remembered about them before I started with the spar varnish and, while sanding them off upside down was less than ideal, it certainly beats letting everyone who ever sees it know that I missed my marks. (but not by much)

DSCN1408[1].JPG

In all, it didn't work badly and I cleaned up a few drips I'd created gluing the outer gunwales on, sanded the outside of the hull once more with 220 grit and and started painting the spar varnish on the outside of the hull. I also reached inside to paint the bottom of the inner gunwale figuring that, if there were any voids, the spar might fill them.

Outside fully coated, I killed some time running errands and, 4 hours later, I scuffed it lightly with a scotchbrite pad and applied another coat. I didn't have time to wait 4 hours for the next coat so I waited about 2 hours, decided it was somewhere between tacky and dry and I slopped the last of the quart on for the 3rd coat. (OK, I didn't "slop it on" I painted it gently while brushing as little as I could and still get good coverage)

DSCN1410[1].JPG

I'll have to get at least one coat on the rest of the bare wood done this week but I probably won't have time to get the inside varnished before launch. I'm throwing it out the door on Thursday night as my Dad and a few others want to see it before it gets scratched all to heck (scratches just add character IMO... similar to scars: just like tattoos except better backstories)

Tonight I'm planning my work load for the week to see if I can get three 12+ hour days in there and earn an early quit for the week. :)
 
I'm nearing the finish line and fitted the seat yesterday. I'd chosen to epoxy the seat to the hull because the seat, having not been hung from the gunwales, would act as an additional lateral support to (hopefully) compensate for the thwart that I'd eliminated. I figured I'd drop it about an inch below the inner gunwales (3 inches lower than my test paddle) so I used outer gunwale cut-offs as spacers & laid out the contact points with pencil.

I had a ton of stuff going on (as always) so my buddy figured out the reference angles while I was fixing the plumbing at my daughter's new house. By the time I was done, so was he and I had some rough angles to fit the seat to the hull.

One nice thing about doing it this way is that, if I screw it up, I can simply move the seat back. As the hull gets narrower toward the stern & narrower in the tumblehome, I can move the seat up or rearward without needing to make another.

I almost needed to do that as I wasn't terribly careful with my measurement when I cut the seat. (haste makes waste, right?)

View attachment 136979

As you can see from the pencil marks, I wound up 3/8 inch from making contact with the hull on the rear cross rail. Happily, my error was in leaving the front rail too long so I didn't need to move the seat back or up.

I cut an additional 3/8 inch off the front rail and then started sanding whichever support seemed long with the spindle sander. I had to try to hold the seat close to the reference angle while sanding in a radius and that took a lot of patience and quite a bit of time. In hindsight, I will probably fit the seat before I install the thwart in the future just so I have more options to fit but it worked out this time and I feel good about the final fit.

View attachment 136980

I put a piece of scrap outer gunwale between the inner gunwale and the seat, used a spare thwart lamination and a 4 foot level for support and epoxied the seat to the hull.

View attachment 136982
I'd also made 2 seat supports which were 8 inch pieces of leftover outer gunwale with notches filed into them to allow a tight fit to the bottom of the seat frame and they should limit the seat's ability to move backward / forward when paddling (should the epoxy joint at the end of the cross rails fail). I considered sanding or filing a radius into the back side of the supports but decided they were flush enough without. They were a little more difficult to get clamped as I was getting pretty far down the hull but it worked.

View attachment 136983

I allowed the epoxy to set up overnight then removed the clamps and the spacer blocks above the seat. There did not appear to be any large voids between the seat frame and the hull (if there were, I was going to tape the sides to form a well and then use a syringe to squirt a little epoxy in there) and everything seemed secure.

View attachment 137002

I lifted the canoe, reinstalled 2 of the station forms (closer to center than their original positions) and added a couple of short pieces of scrap to lift the hull above the strongback enough to reach under it while keeping it low enough to paint on the spar varnish. I did this so that I could varnish the bottom of the thwart, seat, grab handles and inner gunwales without painting upside down and, in the future, all but the gunwales will be varnished after fitting them & before they're installed (the seat will be fit, then varnished, then woven before being installed)

View attachment 137003

One thing I'd neglected to do before flipping it was to sand off the alignment marks I'd made (in pencil) on the gunwales. Luckily, I remembered about them before I started with the spar varnish and, while sanding them off upside down was less than ideal, it certainly beats letting everyone who ever sees it know that I missed my marks. (but not by much)

View attachment 137004

In all, it didn't work badly and I cleaned up a few drips I'd created gluing the outer gunwales on, sanded the outside of the hull once more with 220 grit and and started painting the spar varnish on the outside of the hull. I also reached inside to paint the bottom of the inner gunwale figuring that, if there were any voids, the spar might fill them.

Outside fully coated, I killed some time running errands and, 4 hours later, I scuffed it lightly with a scotchbrite pad and applied another coat. I didn't have time to wait 4 hours for the next coat so I waited about 2 hours, decided it was somewhere between tacky and dry and I slopped the last of the quart on for the 3rd coat. (OK, I didn't "slop it on" I painted it gently while brushing as little as I could and still get good coverage)

View attachment 137005

I'll have to get at least one coat on the rest of the bare wood done this week but I probably won't have time to get the inside varnished before launch. I'm throwing it out the door on Thursday night as my Dad and a few others want to see it before it gets scratched all to heck (scratches just add character IMO... similar to scars: just like tattoos except better backstories)

Tonight I'm planning my work load for the week to see if I can get three 12+ hour days in there and earn an early quit for the week. :)
Looking great!!!
 
Back
Top