• Happy Marine Mammal Rescue Day! 🐳🐬🦭🦦

Pearl the Kevlar Plug

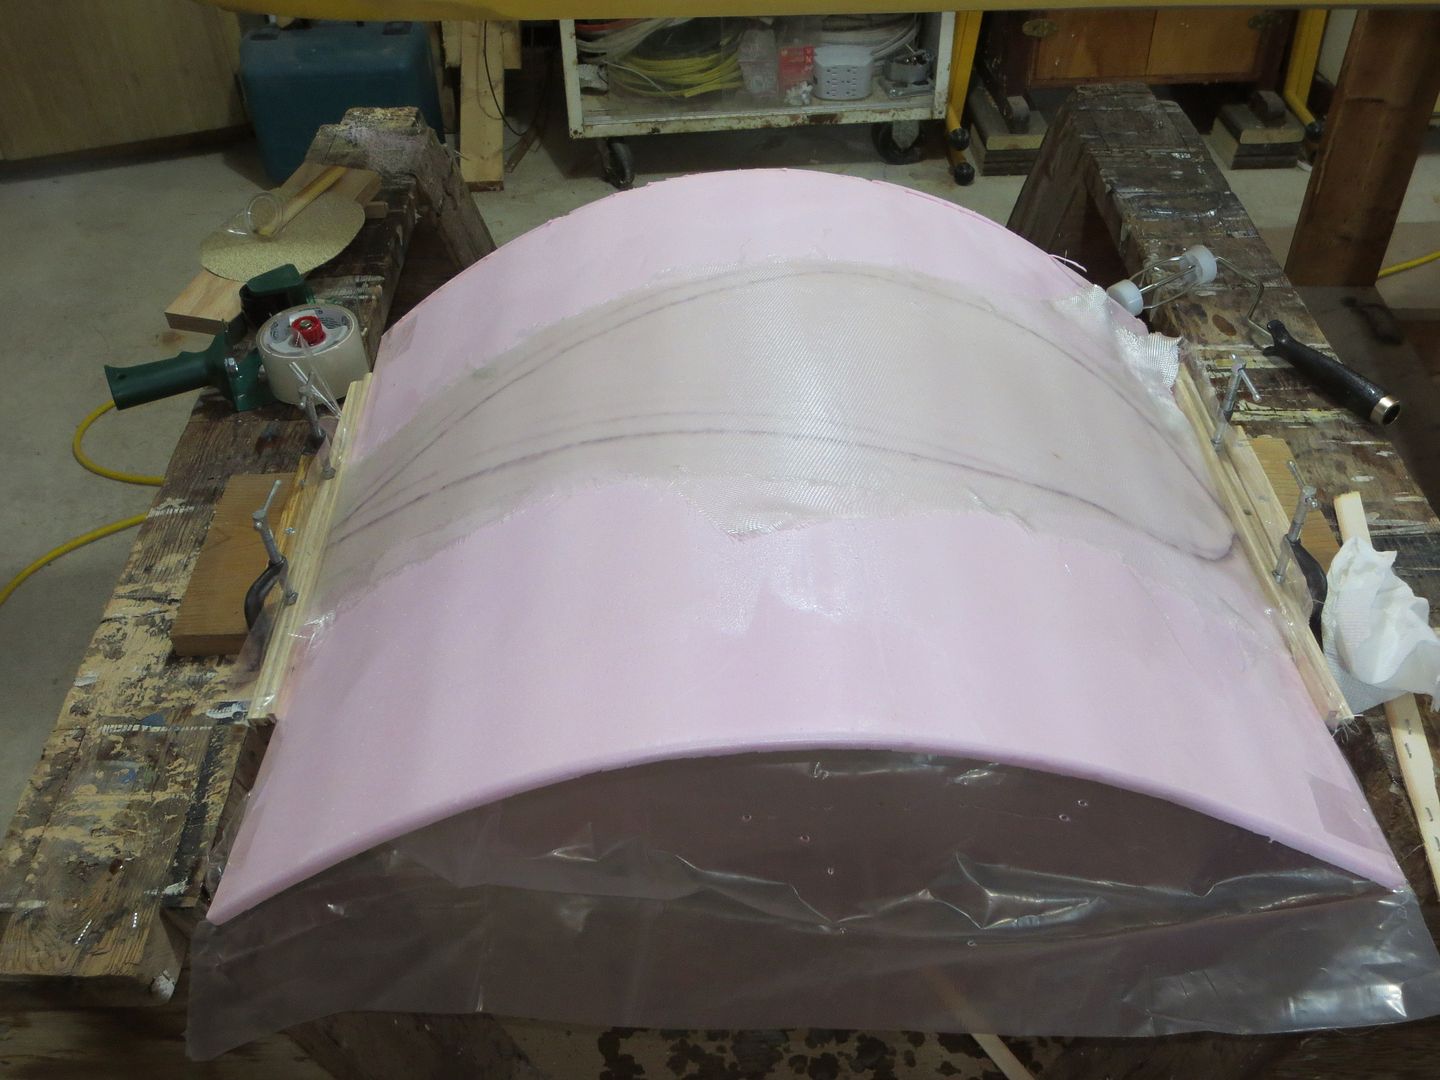
I also sanded into the weave around the insert. Thought the seal coat would tame the fibers, but they protruded enough, that I had to scrape, before laying cloth down.
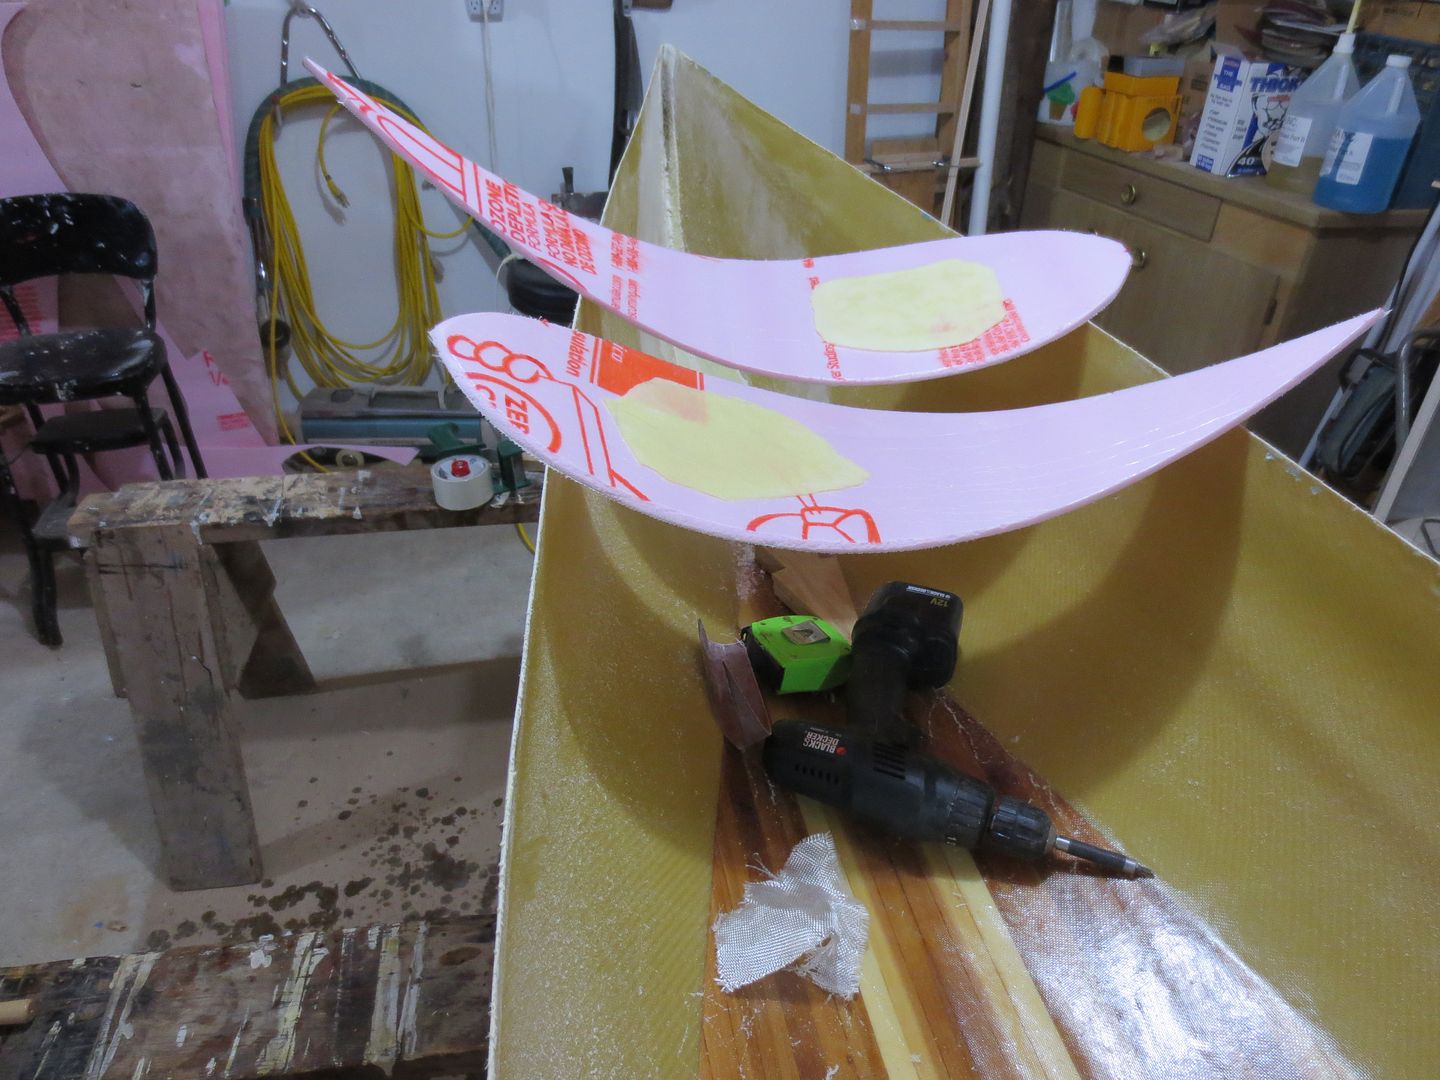
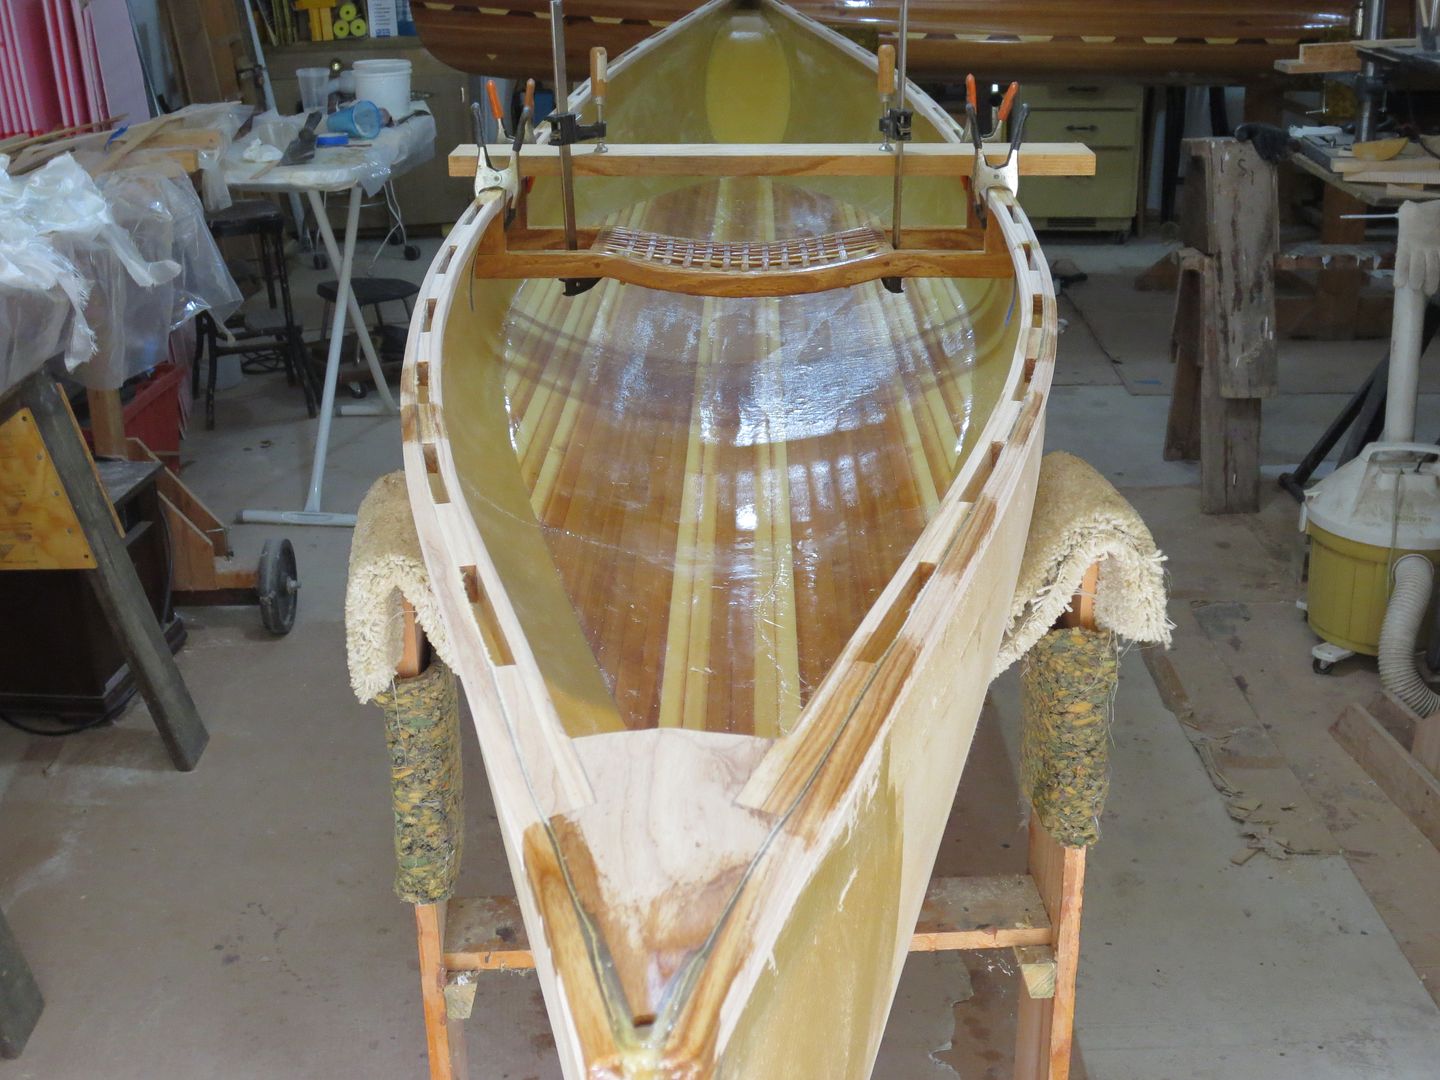
The batten and clips were just to hold the shear shape, while the epoxy set.

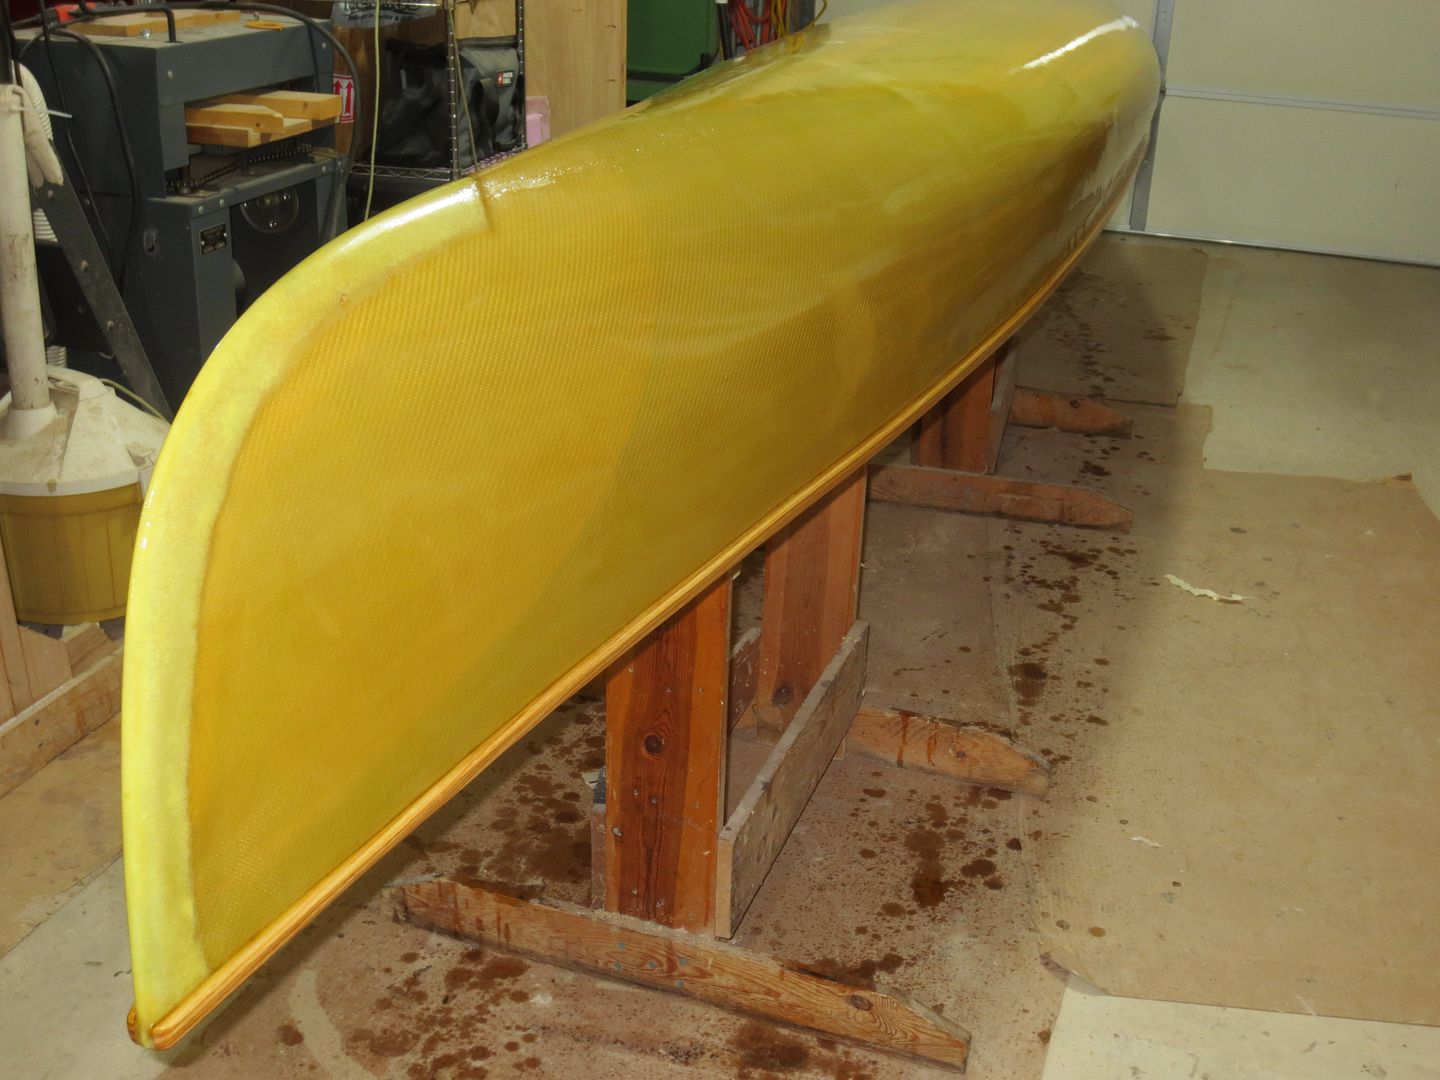
The wrinkles were fine after I scraped them smooth. They just made extra work.
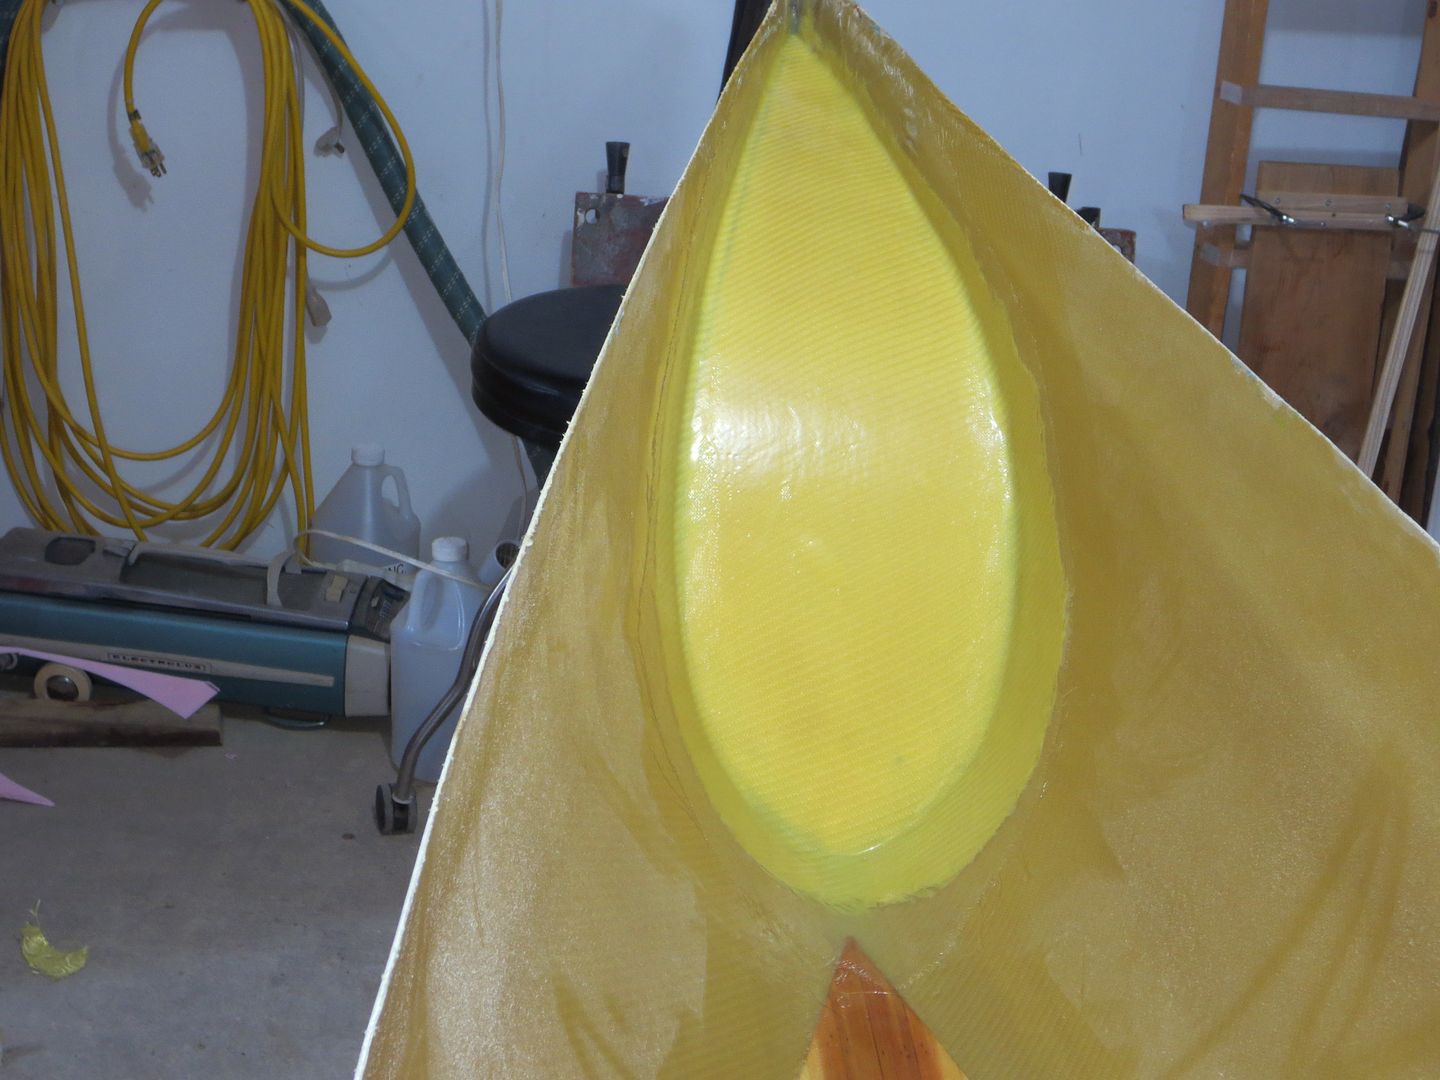
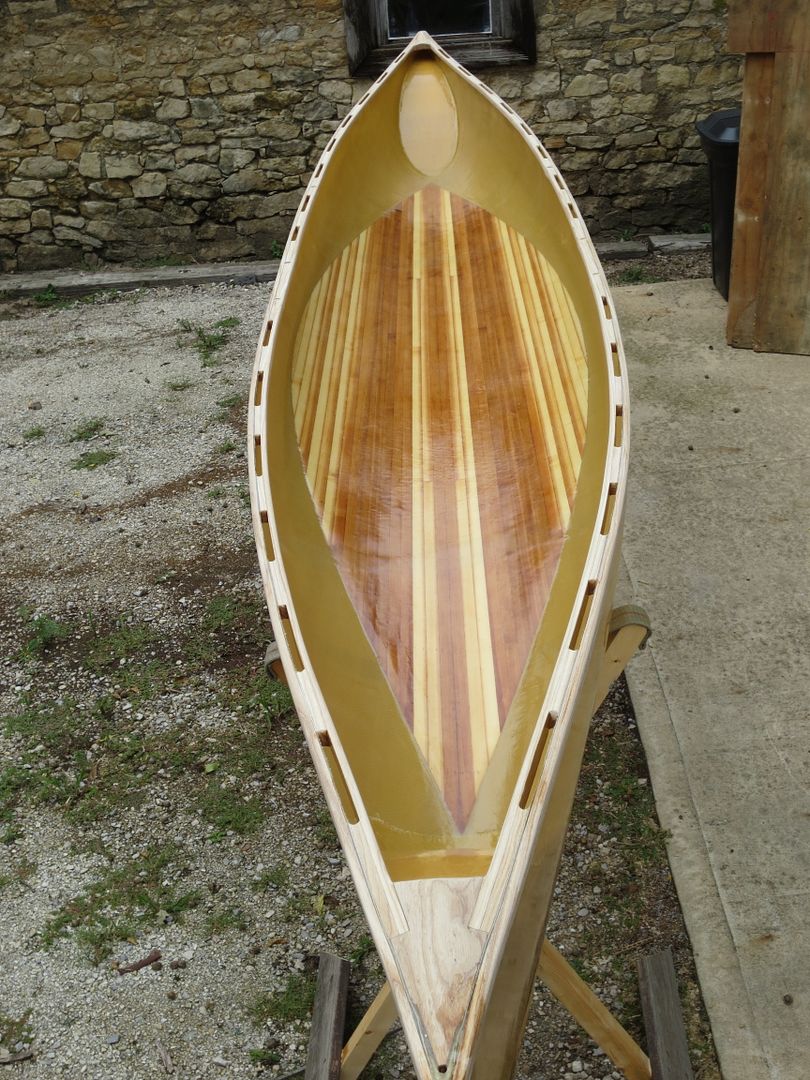
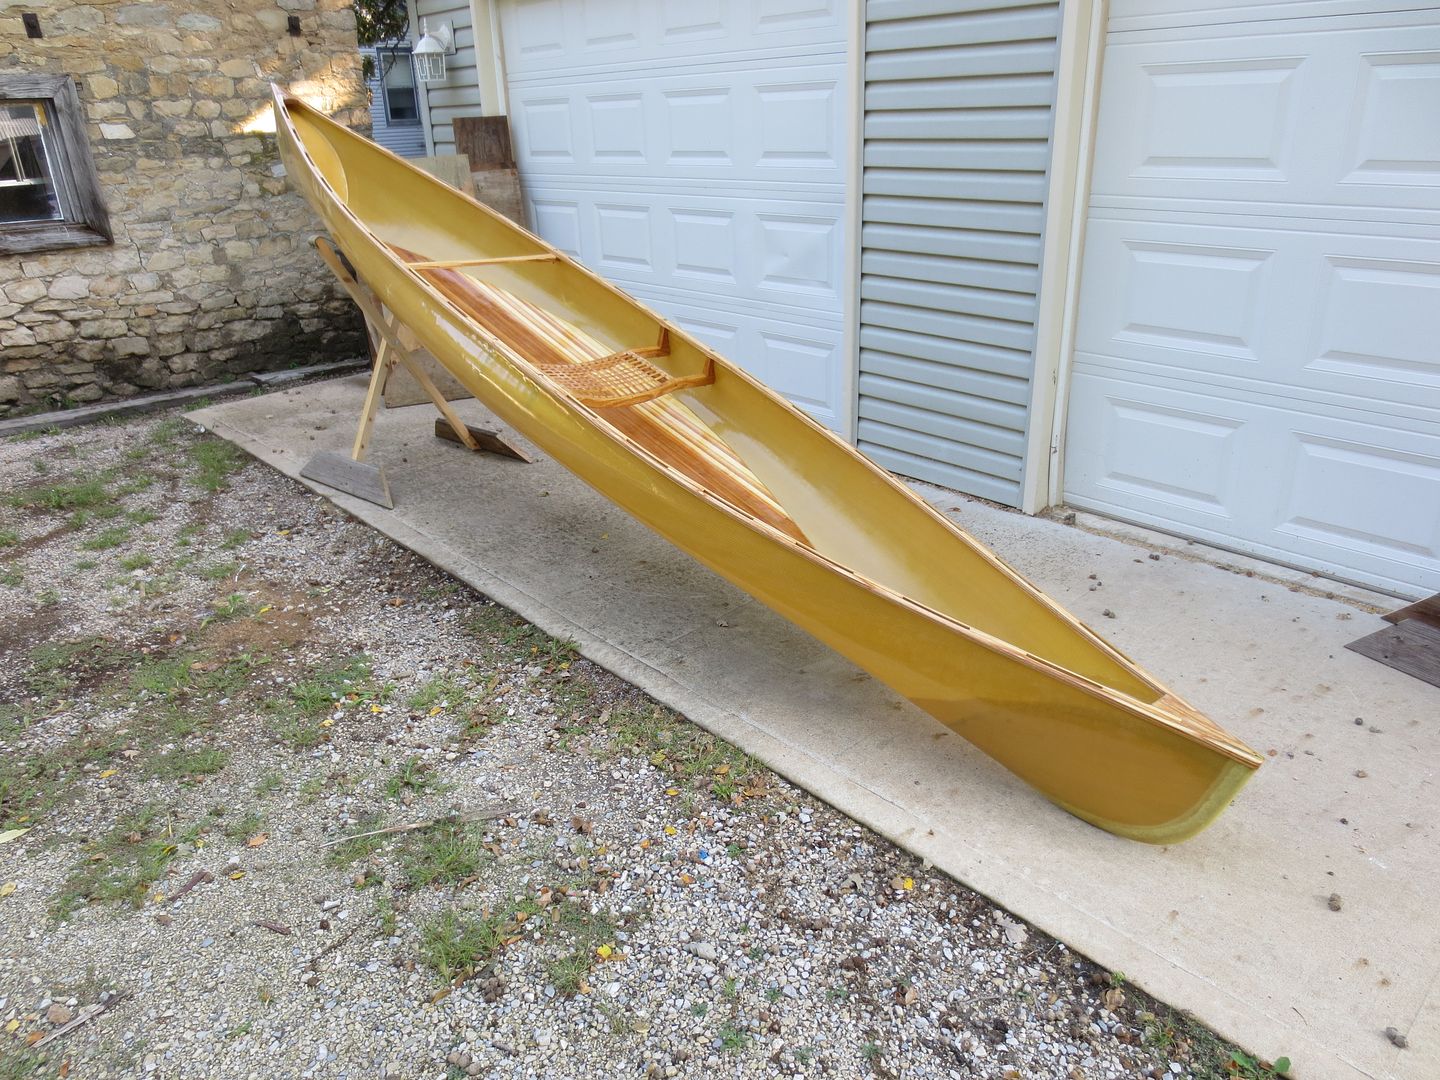
With one layer of 8.9 oz Woven Kevlar. Two full layers of 6 oz E-glass, and two near full layers of 6 oz S-glass plus the 1/8" cedar insert. I'm happy with the stiffness.
I realize vacuum bagging, or infusion, would have save a lot of resin ! I need to advance my method.

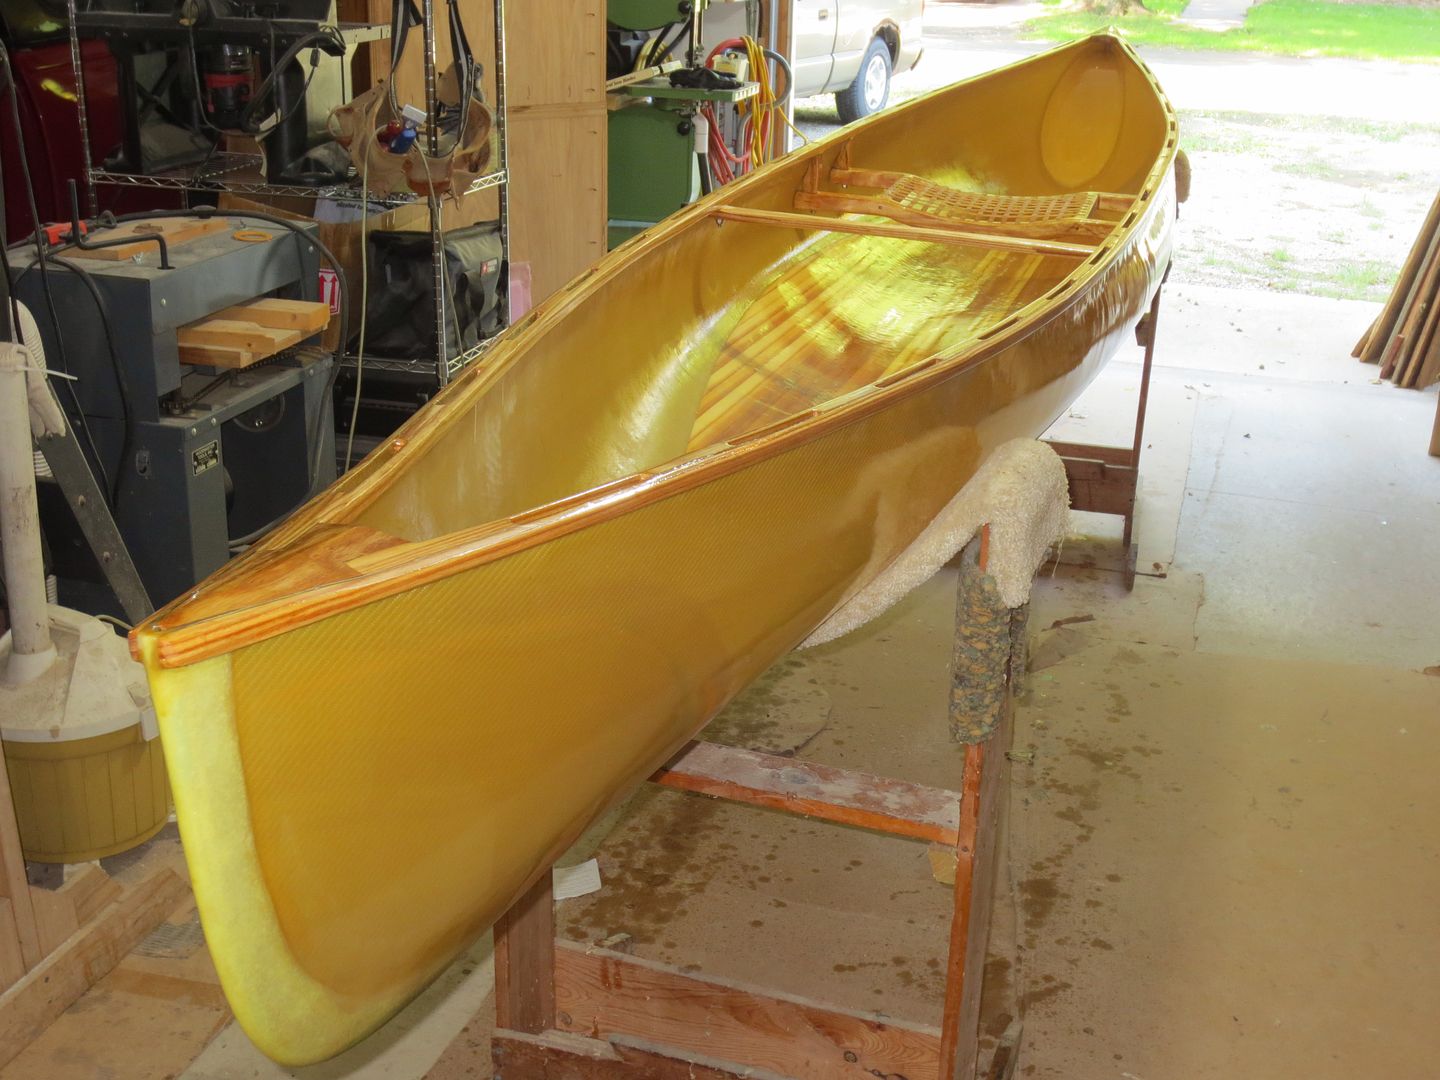
I will weigh both hulls before installing trim.

Jim
 
Last edited:
Finished gluing and screwing gunnels on Pearl.
So on to Flotation chambers for the Kevlar Pearl.
With the help of Alan Gage, I weighed the two hulls without trim.
Cedar strip Pearl weighed in at about 40#
Kevlar Pearl at 30#.
Here's a few pics of my flotation chamber progress.
IMG_0750_zpsysyxldgw.jpg
IMG_0748_zpsp8pc3rt9.jpg

I am curving the flotation chambers to gain the needed buoyancy for the Kevlar hull.


Jim
 
Chambers glassed in. Need to drill holes for bilge plugs. Then off to trim.
I will trim basically the same as Pearl, and compare weights.
Here's a few pics so far.
IMG_0759_zpsh4pn6jeo.jpg
IMG_0763_zpsdsjjznnu.jpg
IMG_0770_zpsbayweb60.jpg


Jim
 
Nice work! How did the whole float tank process go? Did it go smooth or a hassle? Will you do curved tanks again? It looks like it went well but I know that can be deceiving.

Alan
 
It went quite well !
My first thought was to make the curved tank with 1/8" cedar strips, but was afraid they wouldn't hold shape.
The foam worked great. I put two layers of 6 oz- E-glass on , and let the resin set for a day, transferred the pattern, and cut out with a band saw. It was easy to shape.
Once shaped, and wedged in place, It was time for the Kevlar. Just after wetting the Kevlar, I laid on another layer of E-glass, This saved trying to smooth the Kevlar later.
I'm guessing It would have been close to the same weight as a strip tank.

Oh, the yellow Polyester on the underside is for when I drill the bilge plugs.

Jim
 
Last edited:
Now that Pearl is done, I'm back on my Kevlar.
Have the decks and gunnels on. I'm fitting the seat. It may seem a little low, but I'm going to try it here for awhile. It's easy enough to raise if need be.

Here's a pic.
IMG_0906_zpssxtmnyan.jpg


Jim
 
Last edited:
IMG_0941_zpsuomvdl9a.jpg
Kevlar Pearl is wearing a coat of Spar varnish, and I just finished putting Watco on the gunnels.
I saturate the gunnels while the canoe is upside down, to keep the Watco from running down the sides. Looks like I have as much Watco on the floor as I do the gunnels.

In a few days, maybe a week, I'll bolt the seat and thwart in place.
One more pic
IMG_0940_zpspjxwpsqv.jpg
 
Last edited:
Wow. That's looks awesome Jim. You're motivating me do some varnishing.
 
Thanks Muskrat.

The Kevlar is done, I'm just waiting for the last coat of Watco to dry.
IMG_0969_zpsvvds4fj4.jpg
IMG_0965_zpsskuxgqp0.jpg


I would recommend to anyone wanting a light weight version of they're favorite cedar stripper to try this ! I know Kevlar and S-glass are expensive.

As I get older, I know this Kevlar will get the most use.

Thanks for following along with this build !

I'll post some in the water pics soon.

Jim
 
IMG_0974_zpshsz2ctzy.jpg
IMG_0976_zpsvurecnyj.jpg
IMG_1005_zpstuxuhsez.jpg
The Watco was barely dry enough, and I could wait no longer ! Was lucky enough that a kind girl took a photo of me and the Kevlar. Surprised the camera worked after that !

Here's a few pics. Now I can get to that Honey do list, that I've been neglecting !

She handled great I'm sure I'll be spending more time with her. I love how you can see the waterline through the hull.
Thanks again for all that have followed this thread !
Jim
 
Last edited:
Jim.

Can you tally up your costs for that build?
MDB has been bugging me for years to build something like your kevlar Pearl.
Now hat you've had it in the water, do you think the stripped football was necessary?
I need lighter and lighter boats as the pages on the calendar go by. I can't see my strippers getting any lighter without compromising their integrity and I'm not willing to switch to a pack boat...

BTW, the boat looks great, thanks for posting all along.
 
Jim.

Can you tally up your costs for that build?

I can give rough estimates.
Kevlar 8.9oz (from Noahs) 6yds at about $32/ yd.=$200
S-glass 6oz, 11yds at $25/yd. = $300
E-glass 6oz 11yds at about $6/yd. =70
Resin RAKA UV inhibited, 3gal= $200

Incedentals. Glue, rollers, fillers, tape, plastic film, brushes, gloves, etc = $200

Roughly $1000

Don't tell my wife ! HA !

Weight ? I haven't weighed it yet, but will. Guessing at about 40#

Thanks guys ! It was fun ! And I'm pleased with the results !

Jim
 
Jim,

Can you tally up your costs for that build?
MDB has been bugging me for years to build something like your kevlar Pearl.
Now hat you've had it in the water, do you think the stripped football was necessary?
I need lighter and lighter boats as the pages on the calendar go by. I can't see my strippers getting any lighter without compromising their integrity and I'm not willing to switch to a pack boat...

BTW, the boat looks great, thanks for posting all along.

Jim,
Thanks for the cost info.
It usually costs me about $200 for cedar, so it's pretty much a wash cedar vs kevlar.
I'm really leaning towards a plug build, thanks again.
 
Stripperguy

The cedar insert was cut 1/8" thick, edge glued, no B & C. If you don't use the cedar, you will need reinforcement, More cloth, or foam. Only trouble with foam, is it will delaminate, the cedar won't. I used foam on my first Kevlar. Using Pink Owens Corning 1/4" foam. I wouldn't recommend it.

You might try either more S-glass (2 layers), or carbon fiber, I have never used it, so can't say how much.

Sorry I missed this question, but I'm just leaving on a short trip. Will post more later !

Thanks again !

Jim
 
Jim,
Thanks for the quick response..I was just looking at some 12K carbon from Soller. It's nearly the same cost as that 8.9 oz kevlar. I would just have to be careful about abrasion with the carbon, but wrapped in glass, it wouldn't be much different than cedar. Hmmmm....
 
The carbon might just work in place of the cedar insert. I'd do a test sample.

This Kevlar is with a layer of S-glass and one of E-glass, inside and out.. The sides were stiffer than my first Kevlar, that I just used E-glass.

You're getting me thinking about another build ! Thanks !

Jim
 
Jim,
How easy or hard was it to get the hull off of your Pearl plug?
Did you pop it off while the resin was still not fully cured? I'm thinking about a carbon, carbon, e glass layup over my Kite. The Kite has that stem to stem "crease" that might pose a problem removing the shell from from my existing hull. I'd hate to waste a few hundred dollars in material while ruining my existing boat...

Mike T.
 
Mike


Popping the tumblehomed hull was no problem. It was more like lifting it off. I had let the epoxy cure for at least two weeks.

Leaving the ends open, made it easy.

I used window heat shrink film, only because I hadn't varnished Pearl yet. I would use a paint on type release agent, Part-all, If the hull had been varnished.

Sticking the plastic tight to the hull was an issue, as well as the wrinkles in the plastic ! That's why I'd recommend a release agent.

I'm no expert in laminating ! But I was thinking if you could find S-glass instead of E-glass, the extra stiffness and abrasion resistance might be worth it ?

I plan on at least one more build this way. I'm also thinking Carbon.

Good luck ! And Keep us posted as you go !

Jim
 
Back
Top