I brought one of my favorite decked boats into the shop for some maintenance, a 1971 Old Town Sockeye, aka the Sea Wimp. I love that 50 year old boat, but it needed some touch up painting and other work.
16’5” long x 31 ½” max wide, 15+ inches deep and it carries that depth to both stems, with a 81” x 20 ½” cockpit. Someone once called it “The Winnebago of decked boats”. I took that as a compliment; the Sockeye can haul a massive load of glamper stuff.
Old Town’s 1971 catalog prose offers:
“Two man kayak for team paddling, cruising, camping. Adjustable front backrest, foot control rudder lifts over obstacles.”
The “adjustable front backrest” was designed by the Marquis de Sade and the “seat” was a well aged crustydusty epidermis-rasping piece of 80” long x 18” wide ethafoam.
The “foot control rudder” must have involved holding knotted rudder lines between bare toes; there was no sign the Sockeye ever had foot pedals. A lot of those 70’s tandem decked “European-style touring canoes” had no pedals, the one of the paddlers manipulated a contiguous through-pulley rudder line, held in hand (or toes?) on either side.
The Sockeye was the first decked boat I ever rebuilt, originally taking it back to OEM factory outfitting; horrible foam slab tandem “seat” replaced with half bun of minicel, using the same rudimentary no-pedal, no-retraction-line early ‘70’s joke of a rudder.
That original rebuild was done so long ago that I was too nervous to do epoxy work on my own, and had a more experienced friend come by to help. Had he only known then what I know now.
None the less we raced that rebuilt Sockeye a couple times in tandem rec class, as did a niece in two races, and all did well. I came to appreciate the peculiar hull shape in rough water, waves and boat wakes.
On the second go-round rebuild, turning it into a dedicated solo decked sailing tripper with a raised seat, I was a little more experience; among other upgrades the Sockeye got a comfortable solo seat, a utility thwart and a modern Feathercraft rudder with Werner pedals.
It has since had bias weave Twaron skid plates added and a bottom paint upgrade. The Sockeye, to this day, remains our finest downwind sailing boat. It is something about that hull shape.
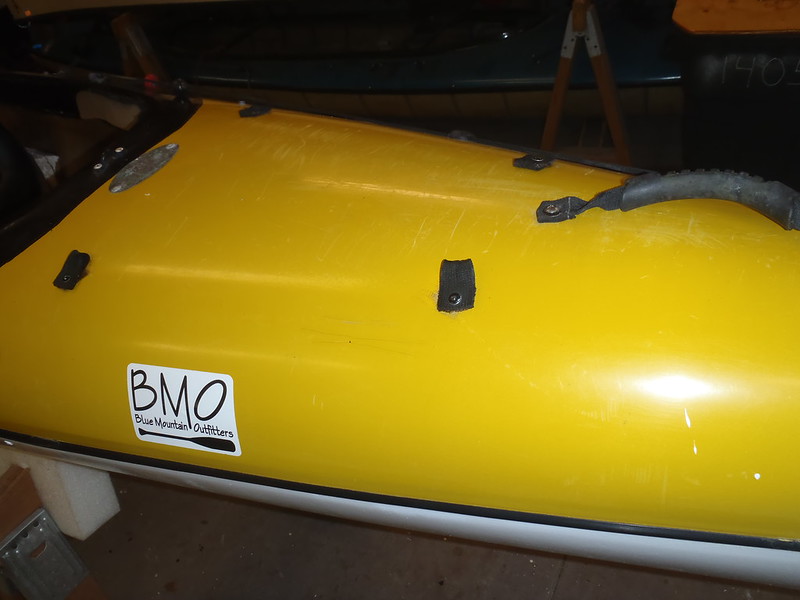
Time to straighten out those flakey black accents. Sanded unflakey smooth. To assure I didn’t miss any small accent areas needing black touch up I “flagged” each one with painters tape. I counted, 32 mostly small areas of flaky lifted spray paint. I still missed a few. F$#& spray paint ever again.
The touch up accent painting took but a few minutes, and the Sockeye looks much better.
There were a couple miscues even in that simple touch up painting. One strip of painter’s tape took off a swath of old spray paint when I removed it. Spray paint, never ever freaking ever again on boatwork.
The other miscue was that had I wrecked my back, and was so crippled, bent lateral shift sideways, that I avoided the Sockeye touch up paint for a couple days after taping.
Feeling a bit better, still spine cocked sideways, I gingerly circumnavigated the Sockeye, holding a very full can of black paint and a brush, shuffling my aching back way around the hull. Really didn’t take very long. But, at one point, almost finished, something felt oddly amiss.
I looked down and, in my seized-up-back, leaned-sideways crippled state, had tilted the can to the point that black paint was running down the side and splashing on the floor beside my foot.
I now have a peculiar ink blot on the floor. I see a stylized bent shaft paddle. I can’t blame Tom or Willy for that one, so I guess I should own it.
I got an e-mail a couple days ago from yet another person retrofitting a 70’s European style tandem touring canoe, another Klepper Kamerad. That is the second Kamerad rebuild I’ve heard of in the past few months, as well someone else with an 18’ dedicated solo decked canoe of unknown provenance, possibly a one-off where someone cut down and decked the hull of a vintage racing canoe. That one is a very interesting decked canoe, and will be racing in the MR340.
Those conversions to solo decked canoe are pretty straightforward, and between old Klepper Kamerads, Hyperform Optimas, Phoenix Vagabonds, Bavaria Boote hulls and the rarest of the rare (seen two, own one) Old Town Sockeyes, those hulls are out there.
While I am detailing the Sockeye, repainting and replacing exhausted bungee cord, I might as well detail what I did, right and wrong, on that first tandem conversion to a solo decked tripper.
The Sockeye is a weird decked boat; it has no cockpit coaming lip. Which is fine by me; I hate wearing a skirt. Spike heels are more my style.
Or, off season, thick soled, stacked heel Mukluks. God bless high decks if you have big feet and wear boots.
I like the lack of raised coaming lip, I can more easily slide in and out of the cockpit without a curved coaming lip catching my nuts, especially at awkward launches and landings where I am scootching my way into the cockpit on the down low.
None the less I wanted an in camp storage cover, so I could leave all my paddling gear dry inside the hull. Cooke Custom Sewing does include the word “custom”.
I explained what I wanted and Dan asked about “color”. I dunno Dan, I’m colorblind, I don’t really care. Black I guess; the decks are yellow with black accents”.
The not-so-secret trick to installing a nylon CCS cover in low humidity; dunk the spray cover stuff bag in the river, pack your gear in the boat and 5 minutes later the nylon will have floppy relaxed enough to easily snap on. 10 minutes later, after the cover dries out it will be taut enough to bounce a quarter.
Twelve wide spaced snap rivets quick and easy to install. Bone dry inside after rainy nights in camp. Thanks Dan, I really don’t like putting on a wet PFD in the morning.
The Dr Seuss utility thwart fits the sail base mount, bungee vee paddle keeps on either side and bowline painter cleat and lateral run of bungee for miscellaneous keepage, but it is kind of crowded.
I didn’t leave room on that utility thwart for a deck compass, which is too handy to be without when sailing, so it needed be mounted on the front deck
Still readable 5’ away, even with my weak eyesight.
I have, in practice, no need for those front deck bungees; stupid idea, and a cleaner front deck throws less wave spray. The stern bungee cord is shot, and in any case I don’t trust bungee to hold something on the sight-unseen atop rear deck.
So much cleaner, so much nicer. And more useful; I occasionally strap my dry-bagged ThermaRest to the stern deck, but cinched down via two lateral webbing straps around the bagged pad instead of trusting bungee cord. Tightly strapped in place I’m confident it will still on the back deck when I get to camp.
I can use the existing flush mount webbing ties on the stern, run two webbing straps through them and cinch tight. The webbing loops on the bow shouldn’t throw much spray, and aren’t onerously in the way. Those may yet come in handy for something. I have ideas.
The seat in the Sea Wimp was a gift from a friend at Wilderness Systems, a wide pan Wilderness Systems Phase 3. Most Phase 3 seats are too narrow for my comfort. Not for my butt; with my knees bent at a proper angle the sides of my thighs are pushed against edges of the hard plastic seat molding. Standard Phase 3 seats are intolerable for me, and for a lot of other people. That one is perfect.
The hollow molded seat pan itself is a couple inches high, the seat padding adds a bit more, and that seat was installed atop a custom carved slab of 3” minicel, so it is raised to a comfortable paddling height for the deep Sea Wimp hull. Ok, that seat does weigh close to 10lbs, but lordy is it all-day comfortable, a never-need-to-get-out Barcalounger of a seat.
Both the back rest and the thigh support pads have adjustable elevation. At full raised extension the seat back and thigh supports are crazy high.
I have the back and thigh supports in that photo adjusted to near their extremes; my comfort positioning with both is much lower; with the seat back all the way down and minimally reclined, and thigh supports slightly raised.
I need lower back support, not a recliner. A couple pulls on the webbing straps for fine tuning adjustments and all is perfect. I didn’t really want a 10Lb seat in any of our boats, but that fully adjustable back and thigh support has proven an all day wonder, and changeable in seconds on the fly.
Coupled with custom carved minicel knee bumpers – I can lock in against or brace underneath those knee bumpers – that is one dang comfy seat.
Woody, if you, and fellow Komerad converter Mark W, are still with me (running long as usual) some rudder business. I know Woody was having some rudder parts fitment issues, and the stems on those 70’s era touring tandems are peculiar, as were the OEM rudder parts and design. “Design” used loosely.
The factory rudder on the Sockeye was comical. Crude hard plastic housing and square plastic rudder blade. No in-boat retraction possible, not even a simple pull cord; to adjust it up or down you had to beach the boat, get out and manually flip the rudder. No foot pedals, just a continuous hand line around pulleys.
That was the same rudder design on our Kamerad and Optima (and Doug’s Optima). A what-the-hell-were-they-thinking comical design.
We have Kruger-ish rudders on several decked boats. The Monarch has the Mad River version, a lesser cousin of Kruger’s Sea Wind rudder. The Optima and Kamerad have their original housings and non-retractable rudder blades, but I reshaped the blades at the pivot point and re-pinned them a little higher, so I could use a simple Kruger-esque pull cord & cleat to hold them retracted, and let gravity deploy them when released.
While I like the simplicity of that no-pulley system gravity system there are times when I would much prefer that the rudder blade pivot 180 degrees over to rest flat on the stern deck. Definitely prefer that in roof racked transport, with the fully retracted rudder lies flat on the deck, held in place by a bungee.
I had an old Feathercraft pulley housing and blade in the shop and put it on the Sockeye, with some housing adaptation. There are dozens of different style rudder housings adaptable to different stem shapes and attachment points. Especially if you want to fabricate your own wide/deep blade.
And a bit of a jury-rigged vee block rudder trap the retracted blade centered, level and off the deck. The raised rubber cushion helps lessen the resounding KABLAM! produced when the rudder retracts 270 degrees onto the rear deck. That rear deck has the harmonics of a bass drum.
That rudder blade is a Feathercraft single; Feathercraft made other longer/wider blades for double kayaks. We had the same 17” long x 3 ½” wide blade on another decked hull conversion, and it was barely adequate. For some reason, maybe the rounded everywhere waterline, that seemingly underwidth rudder works well on the Sockeye, even when sailing with a loaded boat.
Woody, FWIW our OEM Kamerad rudder is massive bulbous teardrop, 16” long x 7 ½” wide, and I can feel noticeable drag with it deployed. The OEM Opitma rudder is 13” long x 8 ½” wide, but far less draggy feeling. Those 30” wide tandem European style touring canoes needed a big arsed rudder blade, the Sockeye oddly excepted.
That same rounded-all-over aspect makes the Sockeye devilish even for assisted two-person carries from roof rack to water, each holding the bottom of the curvaceous hull best they can.
Carry handles, bolted through the deck, with fender washers below, resolved that problem. Not just for grab-the-other-end carrying assistance; with someone helping hoist it and oh-its-heavy flipping it upside down to put on the roof racks those carry handles provide at least one hand always securely holding onto the hull. If you drop a heavy decked canoe on your sideview mirror the mirror will lose.
That carry handle installation involved some crawling halfway inside the boat, to affix the fender washers and nuts as far as I could reach in the stems. As did getting the rudder housing affixed even farther deep in the stems.
God bless the pair of 4’ tall sawhorses. Handy temporary yard storage for visiting boats as well.
There were a lot of mistakes made on the original Sockeye rebuild. Some on the second rebuild
Using a utility thwart had not occurred to me until after the second rebuild. I epoxied block of epoxy coated hardwood to the floor a couple feet forward of the seat, between my legs, and attached the Spirit Sail base mount to that.
It was solid as could be, but the top of the small sized Spirit Sail was barely above my head, so I always used the larger Spirit Sail. It worked, but even set that low it was too much sail aloft at times.
30 years ago I expect we used auto-store poly resin and E-glass on the original repairs. S-glass and epoxy resin would have been better. Maybe some Dynel, G/flex, graphite powder. Didn’t even know what those were back then.
The bungee cord on the decks were a mistake; way too cluttered. Stretched bungee doesn’t last long, and I don’t trust bungee to hold any critical gear in place.
The Sea Wimp has seen a lot of salt water action, and this round of maintenance I discovered some galvanic action corrosion with aluminum pop rivets and stainless steel washers or brass studs, mostly aluminum rivets decaying and breaking inside the thick hull material. Easy enough to drill out and replace.
The spray paint was a huge mistake. Still paying for that one.
The replacement of the OEM seat on the first rebuild was a mistake. The giant piece of factory installed ethafoam “seat” stretched the length of the cockpit opening, and had turned crustydusty. It was replaced with a nearly-as-uncomfortable slab of 4” thick minicel. I found a half bun of white minicel for sale unused cheap, and used nearly all of it.
I’m still using some of that half bun, because someone, that someone being me, elected to adhere those huge slabs of minicel to the boat using. . . . .Hard as Nails construction adhesive.
Early on a half bun of minicel blew out onto the road two miles from my home. Fortunately I saw the cars behind me swerving and recovered it.
Unfortunately the Hard as Nails adhesive left an expanse of needle sharp stalagmites on the floor. That crap really does set up hard as nails. After considerable labor grinding and sanding I gave up ever getting off all of the now smooth residue, and contact cemented exercise mat as a massive floor cushion to hide the ugly.
I’ve heard similar tales of construction adhesive failing catastrophically. Just no.
Even some early mistakes installing simple nylon pad eyes; I was drilling two holes to put those on the decks, and should have paired them with another pad eye under the deck, a Kruger trick I have come to appreciate.
dang that spray paint, I just found another area flaking off.
Unlike a lot of decked canoe designs the Sockeye carries full deep decks all the way to both stems, so a crapload of gear fits inside. Or, on a winter Gentleman’s trip, a gigantic crapload almost fits inside.
Even with that insane Glamper load the Sockeye still paddled and sailed well enough.
Some of the decked canoe designs have very shallow stern sterns, which is nice for windage, but, if you miss load them stern heavy, well. . . .something is wrong with this picture.
 P7110051 by Mike McCrea, on Flickr
 Mike M Sailing 01 by Mike McCrea, on Flickr
 P7110052 by Mike McCrea, on Flickr
 P7190004 by Mike McCrea, on Flickr
 P7200007 by Mike McCrea, on Flickr
 P7200010 by Mike McCrea, on Flickr