• Happy Marine Mammal Rescue Day! 🐳🐬🦭🦦

Decked Kruger Seawind style build

I hadn't thought of using square edges along the sides, maybe I'll give that a shot next time. Are you saying you are now doing the entire hull that way? The rolling bevel is a little intimidating to me, but I know lots of people are building that way.

The rolling bevel is pretty simple and on most strips it's not needed anyway. Usual it's just one or two sections of the strip that need beveling. I use a small, cheap hand plane (local hardware store) that fits in the palm of my hand. Set the strip in place to see where the corners are hitting, maybe mark it with a pencil for reference if there are multiple spots, and make some quick swipes with the plane (holding strip in the other hand). Check and refit if necessary. As long as the strips are quarter sawn they plane very easily.

I really dislike routing the bead and cove on strips and am happy to omit that step from the process. I don't think hand beveling takes any more time in the long run. Admittedly I'm not looking for perfection and am happy to use thickened epoxy to fill some gaps. And the bead and cove does help keep strips indexed properly between forms but I didn't find the square edged strips too difficult to keep in line. But I'm not afraid of staples either.

Alan
 
With the kidney bean rudder only partially deployed you don't have to worry when paddling up a current about being pushed back onto an obstacle and breaking the rudder assembly since it will just lift up and over the obstacle (tree, gravel bar, etc). The straight vertical rudders will kick to the side in these cases and jam you up or break.

The kidney bean rudder is also sufficient should you decide to put some decent sails on the boat. All of the single kayak rudders I have seen and tried had insufficient surface area and leverage to work as rudders on a sailed kruger or sea kayak.

Greg, several of our 70’s era decked boats had OEM rudders that were at least twice as wide (and considerably shorter, depending on the stern depth and housing mount) than a modern day sea kayak rudder. Most of those had some original sailing possibilities or components, so those wide rudders were likely designed with that in mind.

I replicated those on some boats and modified them on others to provide Kruger-like shape and gravity deployment simplicity. I like that I can hook them partially deployed in shallows via a cleat and even then there is enough width to the rudder to make it effective.

Those wider rudders work better under sail than something more slender, and much better in shallows, even when the uncleated rudder is dragging arse at a 45 degree angle.

The gravity deploy rudder on our Optima is removable, it locks in the housing via a simple pin. Because of the way it hangs I take it off in transport, and I have a replacement pin fastened inside the hull, just in case. I have thought about and probably will make a second rudder for the Optima, with a different size and shape for different anticipated conditions.

The Optima is for some hull shape/design reason the most rudder dependant decked canoe we own; I had a foot pedal issue on one trip and needed to paddle a mile to someplace land-able to fix the problem. It was quite breezy, and it was no fun.
 
Mark, you make it look easy :)

thanks Deerfly, I'd like to think I've learned something since this is my 3rd strip boat in the last year. At this point theres no thinking about the next step, so i get right to it instead of having to look something up. Building the coaming and joining the 2 halves will be new territory for me, so there's still a lot to learn.

Mark
 
There is a sailing reason for that pedal reversal. Even with just the simple downwind sail I want to be able to hike-out towards the upwind side of the hull in a broad reach, while still extending one leg on the rudder pedals further than the other.

Not that leg, the other leg! It helps to body balance the hull while sailing if the leg NOT further extended on the rudder pedal can be hiked up on the cockpit coaming, along with some seat-shifted body weight laid against that side.


Hmmm. Sounds as if your rig is not very balanced it you have to push the rudder over so far on a broad reach, probably because you are not using a leeboard? Consider adding hand line steering, which you can route up and around the cockpit. This gives your legs a break, but also allows hiking out, to the point where I sometimes sit on the upwind coaming and can still hand steer. In the photo the hand steer lineis the candy stripe line .

G0030605 sitting on coaming.jpg
 
. Building the coaming and joining the 2 halves will be new territory for me, so there's still a lot to learn.

Mark

indeed, I under estimated the difficulty of mating the two halves, especially with the extra layer of carbon on my hull. Not very forgiving and required a few temporary cross braces in the hull to hold the dimensions to get a perfect match up with the deck. The deck was more flexible and forgiving the hull not so much. The braces along with a good bit of packing tape were mandatory operations to make it work.

In my limited experience with this build you can't be too careful with those halves off the form and maintaining proper widths along each station when glassing the insides. The deck especially will want to lay out a bit, gravity never gets tired. If I built another one I'd probably take the time to make a female cradle at maybe every third station or so for both halves. Easy enough to trace the patterns off a half dozen stations before mounting them on the beam. At a minimum the cradle will make easier to see any variations that need some tweaking. The better you do at maintaining those widths the less stressful the mating operation will be.
 
Nice work Mark ! Those staples are perfectly inline !
That stern form does look like a challenge to strip.

To me The biggest benefits of Bead and Cove is the ease of assembly, and the alignment of the strips, and the great glue joint. To me it's well worth the extra time spent machining strips.

A tip to seal staple holes, if you seal coat. Those holes can be a problem, if not attended to while glassing ! Apply seal coat, wait an hour, mix a small batch of epoxy, and with a small foam brush, paint over the staple holes, with the mixed epoxy. This second coating, really fills those holes ! Best of all, it doesn't show through the glass.

Your hull should track like an arrow. Verlen did a nice job designing his hull !

Jim
 
I moved on to glassing the hull last weekend. First was the layer of 6oz E-glass.....
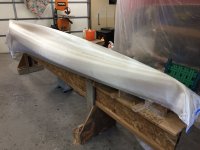
IMG_1868.JPG

I heated up the shop to almost 80 degrees, got the epoxy nice and warm and went for it. I made a point to start on the end of the canoe that is furthest from the stove to avoid having the epoxy kick quickly. It worked well, I'm glad I paid attention to that small detail.
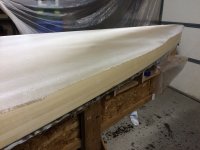
IMG_1875.JPG

I think I mentioned above that this is my third boat in the past year, so fiberglassing the outside of the hull by myself was easy and relaxed. Later that day, once the epoxy was just about ready, I put on my second layer of 4 oz S-glass. I jumped the gun a little and after getting it all on it was essentially stuck to the hull. Not a big deal, there were no wrinkles, but I had planned to run some masking tape along the part line so I could trim that layer when the epoxy was still soft. I've seen Nick Schade do this on his boats and it looks like it leaves a nice line that's easy to address with a scraper. Unfortunately, I couldn't lift the edge of the S-glass without messing it up, so I went ahead and wetted out the second layer with the jagged edge as I have in the past.

The next morning I went out and took care of that edge with a regular cheap long handle hardware store scraper. That s-glass is quite a bit harder to chew through than e-glass. The cheap scraper had to be sharpened often, and finally I gave up and switched to using a big chisel which worked great. I really need to invest in one of those expensive carbide scrapers.
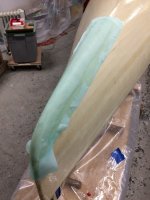
IMG_1868.JPG

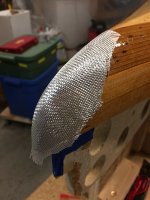
Next, I laid out some glass strips on the stems and a layer of xynole on top of that and gave it and the entire hull a fill coat. On my first fill coat I just pour on the epoxy like the wetout coat and use a wide plastic scraper to move it around. Using a wide plastic scraper is the key to getting an even coat, and making sure there are no streaks of thicker epoxy left on the hull. This gets the weave mostly filled and is really quick. Leaving streaks on the hull means you'll see them later and more sanding will be required (learned from experience).
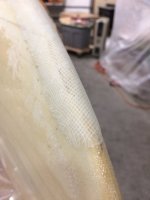
IMG_1868.JPG

Later in the day I went back and addressed the overlap edges from the glass strips and xynole on the stems. I used a chisel and scraper to get those seams as flat as possible. Then, I mixed up some thickened epoxy and applied it to those edges to feather them into the rest of the hull. I started on the remaining fill coats right away.
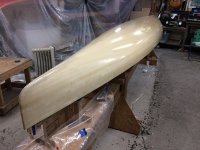
IMG_1900.JPG

For this boat I ended up doing 3 thin fill coats. Two would have probably been enough, but my epoxy usage seemed a little less than expected, so I thought I should go with the third. I do my fill coats by rolling on epoxy in 2 foot sections on one side of the hull. I roll it well and slowly in both directions, then use a dry foam brush to smooth it out. Pulling the brush into the previous section. Much the same way as I apply varnish. To avoid bubbles this method has worked well for me as long as the epoxy is warm, and from experience, doesn't work well if it is cool, or if you apply the resin to a cool hull. I do thin coats because I think it's easier to avoid runs or sags at this stage than deal with them later. I have to say that I'm getting better at this and the epoxy finish on this hull is my best effort to date. In the end, the hull will require much less sanding to get it to an acceptable smoothness, at least for me. Prior to each subsquent fill coat I works on the stems with a scraper, chisel and a little coarse sandpaper so that the rest of the hull and stems are done with the final fill coat.
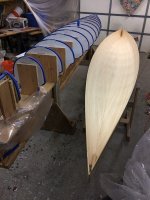
IMG_1910.JPG

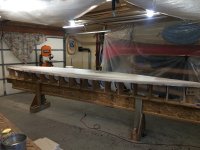
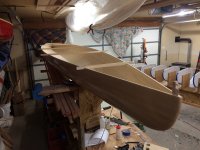
The next day I had a friend help pop the hull of the forms. At first I thought I had a real problem because the thing wouldn't budge, but I realized that I hadn't removed the screws holding the ash stems. After that it literally popped itself off the forms.
IMG_1919.jpg

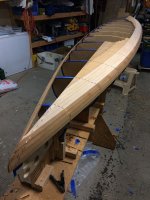
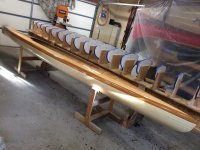
Here's how she sits now, the hull held to shape with strips. I decided to go to work on building the deck next, then when I'm finished with that I'll glass (kevlar) the insides of both halves on the same day. I have the forms all turned over now and am ready to start laying deck strips.

Mark
 
A tip to seal staple holes, if you seal coat. Those holes can be a problem, if not attended to while glassing ! Apply seal coat, wait an hour, mix a small batch of epoxy, and with a small foam brush, paint over the staple holes, with the mixed epoxy. This second coating, really fills those holes ! Best of all, it doesn't show through the glass.

Jim

Another lesson learned Jim. After the initial sanding, while I was filling some gaps, I decided to use some of the thickened epoxy to try and seal some of the larger staple holes. This turns out to have been a bad idea. After my final sanding, the areas where I didn't remove all the epoxy show up as slightly lighter areas on the hull. There are just a few, but I thought I was going to get that perfect finish this time. Lesson learned. I think you're right. Unless you're doing a seal coat it might not be a good idea to try and fill those holes.

Mark
 
Again Excellent work Mark ! Doesn't look like much glue to scrape on the inside either !


Yeah, the thickened epoxy will show, around the staple holes, as it gets worked into the grain of the wood. I started filling staple holes with wood glue ( Elmer's Max). After the first rough sand. It's worked great on the last few hulls ! It's a little more time spent.

As long as you had control of your heat, that should have helped. A Hair dry is a handy tool also !

A Carbide scraper is a great tool, especially with the S-glass ! Next time !

Glad to see the spreaders ! I'm impressed !

Jim
 
On to building the deck..............

IMG_1921.JPG

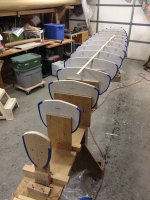
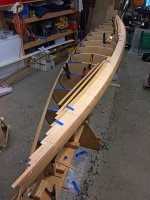
I flipped all the forms and got them set up for stripping the deck.

IMG_1922.JPG

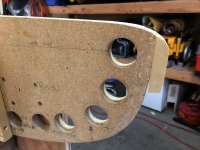
I had to add this small bit to the stem forms for the deck since I had an internal stem on the hull section, but decided to not have an internal stem piece on the deck. In retrospect I can't think of any good reason to have done it this way.

IMG_1933.JPG

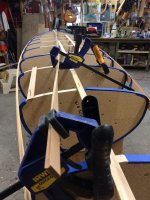
Some of the strips needed to be coaxed into shape before trying to staple them to the forms. I have pre-bent strips with a heat gun in the past, but this time decided to jam the clamps as shown in the picture and heating up the strip and let it cool on its own while I did something else. This helped a lot with getting the bead and cove to fit well towards the stems.

IMG_1935.JPG

The forms make quite a sharp turn coming up the side from vertical to the flat of the deck. To help make the turn a little easier, I used some 5/8" strips I had in storage. I also ended up adding another strip to the bottom, below the part line, which effectively adds another 3/4" to the depth of the canoe. Both the Monarch and Seawind are a little deeper than this design and I want to have as much storage capacity as those canoes.

IMG_1943.JPG

I'm not much for attempting a fancy design with the different colored cedar, but this is what I came up with. The boards I bought were somewhat contrasting, so I thought I should keep the similar colors together. My original intention was to build the entire boat out of the spruce, then paint it to look like a production boat. I can always paint over it if I don't like how it looks in the end.

IMG_1963.JPG

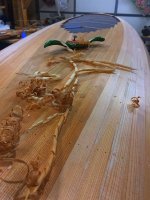
On to scraping and shaving prior to sanding.

IMG_1974.JPG

The hull wetted out to raise the grain and swell staple hulls prior to final sanding.

IMG_1980.JPG

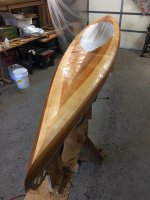
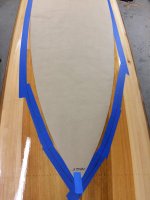
Fiberglass on the deck and ready to take the epoxy. A smartass friend came by and commented that it looked like a standup paddle board. Those are fighting words, and he was quickly ejected from the premises.

IMG_1986.JPG

The 4 oz glass wets out easily and I had it done in no time.

IMG_1988.JPG

Minor disaster this morning. I was ready to do the final 2 fill coats, but I couldn't resist seeing if I could get the deck to release from the forms. Everything went well until I pulled upward a little too hard on the stern. CRACK! I pulled the stem apart on the end. However, it's a wood epoxy boat, so nothing that more glue, epoxy and fiberglass can't fix. Originally I decided to not put down a strip of glass on the ends, thinking that I would end up having to sand through the glass anyway to get the ends of the hull and deck to line up. Bad choice. The stems are stuck on the forms enough to overcome the strength of the bond of the end grain of those strips. Another lesson learned.

IMG_1992.JPG

OK, ready to move on to the next step which will be building the coaming. Sounds a bit tedious, but I like that kind of work.

Mark
 
Yup ! You got it down pat !

Boy ! I'd have a hard time painting over that deck !!!

Nice strip torquing method !

Jim
 
I thought I would tally up the wood I used for building the two halves of this boat for anybody reading this thread in the future, and for anybody wondering about how many strips they can expect to get from a board for any other build. These were all 1/4" strips cut using the skilsaw method with a thin kerf blade. Being very careful, I am able to get exactly 17 strips from a 5.5" wide board (I get 10 strips from a 1x4 (3.5"wide)). I had virtually no waste with the spruce, but the cedar had a few knots meaning I lost a little bit during the milling process. All strips were bead and coved.
BoardLinear Feet of stripsTotals
Hull:
2 - 1x6x16' Spruce (3/4" thick)544
2 - 1x6x12' Spruce408
un-used strips-102
Total used for hull 850
Deck:
2 - 1x6x12' Cedar (7/8" thick)408
un-used strips-24
5/8 " strips I already had100
other filler strips50
Total used for deck 534
Total linear feet used for this build 1,384
I used quite a bit less than estimated in the plans. According to the JEM website, this boat should take almost 2000 linear feet of bead and coved 3/4" strips. On the other hand, the JEM website says this hull has a surface area of 73 ft2. According to the Ashes website I should need 1168 linear feet to plank a boat with that surface area. Hmmmm, not sure about those numbers?

I still have to build the coaming riser, so that might take another 80 linear feet of strips. So the grand total is now up to something like 1,470 linear feet of strips for this build.

Conclusion: you'll need 92 linear feet of 1x6 boards to build this canoe. Total cost of wood was roughly $165

Mark
 
Last edited:
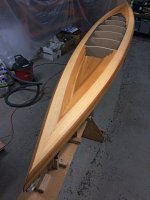
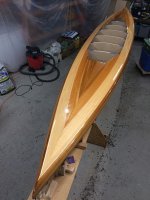
The deck is back on the forms to build the coaming. I compared the cockpit opening template from the plan to the sea wind and found they're a bit different. The seawind opening gets a little wider towards the front (black line on masking tape) while the template gets narrower (brown craft paper). I think I'll go with Verlin's design on this one.

Click image for larger version  Name:	IMG_2023.jpg Views:	0 Size:	233.5 KB ID:	101815
 
Thanks Mason, that's the best offer I've had so far.

McCrea bids $300 and an old compass that doesn’t point north.

Awesome build thread so far, and I am seriously skills-envious.

Any thoughts for a spray skirt with tunnel, or even a simple storage cover to keep the rain out in camp?

Some of the Harmony Pamlico 145T and 160T spray skirts and storage covers fit well on our decked canoes, including the Monarch.

If I have any issue with the Monarch or other decked canoes it is that it’s a long reach up into the bow or stern to retrieve a dry bag (I use a pull string), and the standard sea kayak tapers don’t fit worth a dang.

Custom sized/shaped decked canoe tapered bags made with heat-sealable material are unbeatable in that application.

http://www.canoetripping.net/forums...g-discussions/diy/98705-more-tapered-dry-bags
 
Any thoughts for a spray skirt with tunnel, or even a simple storage cover to keep the rain out in camp?

If I have any issue with the Monarch or other decked canoes it is that it’s a long reach up into the bow or stern to retrieve a dry bag (I use a pull string), and the standard sea kayak tapers don’t fit worth a dang.

http://www.canoetripping.net/forums...g-discussions/diy/98705-more-tapered-dry-bags

Hey Mike, thanks for the suggestions. I'm going with a standard Kruger style spray skirt with the two zippers that radiate outward towards the font from the paddler, and I'll make the cross ribs that slip into pad eyes mounted on the coaming risers. It will be snapped into place since I don't think any kind of bungee system would hold it on in any kind of serious wave. My friend has one that I'll just duplicate with coated nylon or polyester. I'm going to defer to Verlen Krugers solutions to most of the outfitting on this canoe. I have a Seawind available to look at in addition to somebody who has done big trips in one for over 20 years to consult with.

My friend has a standard 6-gallon bucket with a screw top lid that he jams forward in his boats. It fits perfectly and goes all the way almost to the foam flotation. All the cooking gear and tools go in that bucket and it doubles as a camp stool.

Speaking of flotation, it looks like both Mad River and Kruger just bought a can of expanding spray foam at the hardware store and filled the ends of the boat. They topped it off with some spray paint and called it good. It will never be seen, so that would be the easiest thing to do. I don't really want to build bulkheads since it's a bunch of extra work and I may want access to that area someday, which is also a problem with spray foam. Something removable would be ideal. I wonder if I could glue together the blue or pink insulation foam to make a block that I would shape to fit up in the ends, then just epoxy in some loops inside the hull and use webbing or paracord to hold it in.

Then there's the seat system .........................

I've got a few more things to figure out.

Mark
 
Back
Top