• Happy National Audubon Day! 🐣🐦🦅🕊️

Jack's - Morris - Special

Joined
Jan 31, 2013
Messages
2,340
Reaction score
185
Location
Warren, Manitoba
So, the saga begins. I built the strong-back today, going with our traditional ladder frame type. I had pondered doing a T style with 2x10's or whatnot but in the end opted for what I am used to, 1x6 framing with plywood top. The reason I stuck with what I know is due to the fact that until I actually mount the forms it will be used as a bench for stuff like scarfing strips and can be used after the boat comes off the forms for other such uses that require length we don't normally have available. This time around the strong-back will not be disassembled as we plan to build at least one more boat on it.

Last weekend I sent an e-mail to Carrying Place in regards to building a second boat off existing forms and asking about royalties required since when you buy plans you have only bought the rights to build one boat. The responce I received was perhaps a bit of disbelief that someone had actually inquired in the first place about the royalty concept but the actual royalty was only $20 so I will send off a cheque at my next pay day.

As much as everyone has already seen a build thread for a Jack's last Winter with Mem's build, I'm not planning on having anything really in-depth in this thread, but I will be doing things differently in the fact no staples will be harmed during this build and I'm planning on incorporating some old school concepts into the boat. I already plan for pigmented exterior with paint, two tone with some graphic details, but I'm still working the final paint finish design in my head.

I also enjoy the actual building so progress will be slower than you all are used to from Mem or Alan but not twenty years hopefully. I have some idea's I wish to try but this will be an all wood build, no carbon fibre or what not, more traditional as I prefer.

So far I have the strong-back done and laid out half the forms so I could get an idea of the maximum length of strips needed so I can plan how many may need to be scarfed based upon what material lengths I can get. I hope to get out tomorrow to buy some wood and start cutting strips because now that Autumn is upon us who knows when the snow will arrive. We can only cut and mill longer lengths outdoors so need to get as much as possible done before it gets ugly out there.

The space needs to be cleaned up and organized and the Tremblay finished before I can begin in earnest.

Let's go...


Looking forward to seeing this come together. Should be a pretty boat.

Have you done any research on the different ways to pigment resin? I used a liquid pigment but they also sell powdered pigments. The powdered ones claim better performance as there are plasticizers or something mixed in with the liquid pigment. I don't know if it really makes a difference in strength/abrasion resistance but I could tell the epoxy handled and setup differently when using the liquid pigment as opposed to non-pigmented.

The liquid pigments can separate and need some stirring, which can get messy. Measuring and mixing can get messy too (I used a syringe). Seems like powdered might be easier and cleaner as long as you didn't sneeze into the bottle.

Before doing pigmented resin again I'll be checking into it further to see if it really would be better to use powders.

Alan
 
West System is what we can easily get locally and what will be used depending on price of course. Something different, such as System 3 could be ordered in but the shipping cost might negate any differential to what is available locally. One advantage I see with West is that I don't need to buy a specific pigment from them, I could just go by their own directive of using dry pigment which would allow me to mix my own colour for the pigment itself.
Coloring epoxy
For colors other than white, black or gray, powdered pigments (tempera paint, colored tile grout, aniline dyes) and universal tinting pigment can be added to the epoxy mixture. Acrylic paste pigments (available from marine chandleries) are also used to tint the mixture, as long as they are specified for use with polyester or epoxy resin. 423 Graphite Powder will color the epoxy black or impart darker shades to colors.
Generally, coloring agents can be added to the mixed epoxy up to 5% by volume with minimal effect on the cured epoxy's strength. Always make test samples to check for desired color and opaqueness and for proper cure. None of these coloring additives provide UV resistance to the cured epoxy, so limit their use to areas not exposed to sunlight unless additional UV protection is applied.
 
While you were typing that I was off scouring the web and came up with the same thing from West Systems. Interesting little study where they tested multiple types of pigments on resin strength:

http://www.westsystem.com/ss/adding-pigments-to-epoxy/

Synopsis is use whatever you want in a 5% by weight mix ratio. Interestingly enough when they intentionally added too much pigment (20%) for the purposes of testing the adhesion strength actually went up in most cases. They say this is likely attributed to the plasticizers giving the resin a small amount of flex.

Alan
 
Just out of curiosity, have you given any thought to building your canoe "Stemless" ?

In my experience it saves a lot of time and trouble.

Jim
 
Ok Alan, explain it to me the differences in the tested pigments, preferably in english. I have used One Shot enamels muchly in my 20+ years in the sign industry but would not have considered using those for pigmenting epoxy. One shot was far superior as a paint before they removed the lead, it really is no longer one coat coverage.Ok, given I use the West System pumps, I could weigh a single batch of epoxy and work out the 5% extra weight of adding pigment ahead of time so I could add pigment without losing much working time when actually doing coats. All I need do is find the additives I wish to use as a pigment that I can mix to the colour I want ahead of time and preferably have something I can mix in a paint that matches for touch-up after the inevitable scratches that will come.

I can basically look at any colour and tell you what was used to make it and generally in what percentages. I love mixing colours based on what I can envision.
 
You might want to fair those forms before you build. I'm pretty much a wood butcher, so if you use them as is, you might find some wobbles in the hull. As to stems......well, let's just say each to their own, but the Chum definitely needs stems. I'm not sure why people find them unsightly, they actually make me kind of aroused, in a canoe type of way, derivative of wood canvas, plus you can put a nice brass stem band on, which I guarantee is there for more than looks. Holy run-on-sentence batman! I mean, look at the picture down there, that's dang near pornographic!
 
Stems are part of the plan, normal cedar strip canoe build technique. Cedar for inners and normally hardwood for outers. I think you implied in your build you used cedar outers as well and to me that means less grip for the stem band screws. With the vision I have for this boat, the outers will have stem bands, brass most likely since we still have 12 feet of it but they will most likely be painted to match the boat. Outers will need to have some hard or medium hard wood to take the screws. On the one cedar strip I built 5 years ago we used Spanish cedar inners and white ash outers in 1/4" thickness laminated since that is much easier to bend after steaming. I have never had much luck bending ash in a full 3/4" thickness.

I'm going to need to modify station 6 and the stem forms for my intended purpose. I think I need to send you a hole saw for your next build Mem, it makes the stem stations a tad easier to make.
 
Last edited:
Just out of curiosity, have you given any thought to building your canoe "Stemless" ?

In my experience it saves a lot of time and trouble.

Jim

I don't much care about saving time. I work 4, 10 hour days so get 3 days off every weekend. I have oodles of spare time to kill.
As I said, building is what I enjoy more than the finished product. Also, although Alan didn't incur much in the way of stem damage on his Bloodvein expedition, year on year travel on Canadian granite takes it's toll. I like Mem's addition of brass stem bands on a traditional hard wood outer stem.
 
Ok Alan, explain it to me the differences in the tested pigments, preferably in english.

I don't think I can, in English or any other language. But in terms of how they work with epoxy I don't think it's necessary and that's what I found so interesting about the test and the results. Basically the same thing you quoted above from West Systems. Use whatever you want and no problems with weakening the epoxy.

Alan
 
Pretty impressive that you contacted Carrying Place about using the plans to build a second canoe. Have to tip my paddle high to you. There is something to be said about my Canadian friends.;)
 
What will the Morris connection be? Did I miss something already?

Nope, didn't miss anything yet but you will just have to wait and see, however you could likely build several knives before we get to that part...

Got some cedar today. The price on the rack was $7.79 a linear foot for 2x6 clear and at the till it was $8.79 but since they hadn't changed the sign I got it a buck cheaper. You can bet they have it changed before I had the truck loaded, lol. It won't be enough wood for the whole boat but we have some leftovers from the first stripper build 5 years ago and assorted bits Christy has been hoarding and if we still run short, we'll source it when we need it. For now, I have stem work to do first. They had a nice piece of 2x8 but wanted $13 a foot for that... no idea how they can jump up 5 bucks a foot for 2 extra inches of board.

Good clear wood in larger sizes is going to get more and more difficult to come by as time goes on. The sticks they are selling come from big trees out in B.C. that are getting picked out by helicopter which doesn't help keep the price down. I should look to buy a wood lot or two in Western Ontario.
 
Yeah, I was wondering the Morris connection too. I checked the (cool) Carrying Place website to drool over the Jack's plans. No Morris there. I'll sit quietly and wait. For now. Oh, if you're taking a poll on stems...I like em. Especially the brass band.
 
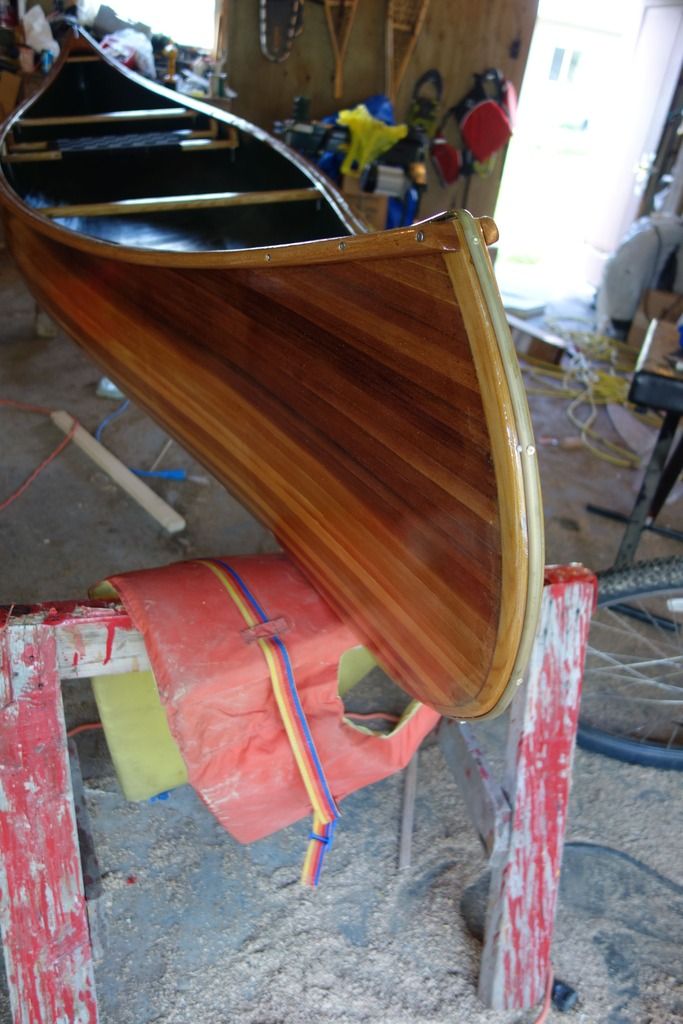
What I am trying to pull off, the first thing, is the most distinctive Morris feature. It is the one thing that distinguishes Morris canoes from all others. Not sure I can do it, but I have modified station 6, added station 5.5 and am making the inner stem pieces. I hope to get them soaking by tomorrow and ready for steaming end of the week.
 
She went over the concepts with me the other day and I LOVE it. This is not going to be your grandfathers canoe....lol. I can only hope that once it is finished that she wont like it ...and gives it to me. I can always fab another one up anyway.
 
I lack Momentum's woodworking skills, he is a Craftsman for sure, I can hack with the best of them, but I will do my best to bring to life what I envision for this little project.
 
So I have my inner stem stock shaped and soaking, hopefully fire up the steamer on Sunday and form them. At this point I haven't chosen a outside stem stock yet but have some Mahogany here I could use, but we all know how difficult it can be to bend it, especially around such a severe recurve.

On another note, my ladder type strong-back is no longer straight. 5 years ago kiln dried wood was 10-12% moisture when removed from the kiln, but now a days, they are pushing it through the kilns faster to be more efficient and it is coming out at between 18-20% moisture content. Bending Ash is generally between 25-30% moisture content so the new KD isn't much off that. We had 2x4 studs twist in place after building walls in the house last Winter.

My strongback is now 1" higher in the center than the ends. Thankfully I saw it before mounting the forms and can deal with it, otherwise it would be a much more severe rocker in the boat.

I'll start cutting strips tomorrow despite a high of only 9C. I had thought of using the J Dodd method for the 3/4" boards but my saw won't accommodate the angle he uses so will just go with the table saw/thickness planer deal and see if I have enough time to bead and cove it as well.
 
Karin, are you going to set it up as a solo canoe? Also, I tried googling pics of a Morris to see the difference but couldn't find much. Are you talking about the sharp entry lines?
 
Back
Top