• Happy National Telephone Day! 🔔☎️📱📶

Tandem Build - Des Moines

Joined
Jun 12, 2014
Messages
3,944
Reaction score
1,336
Location
NW Iowa
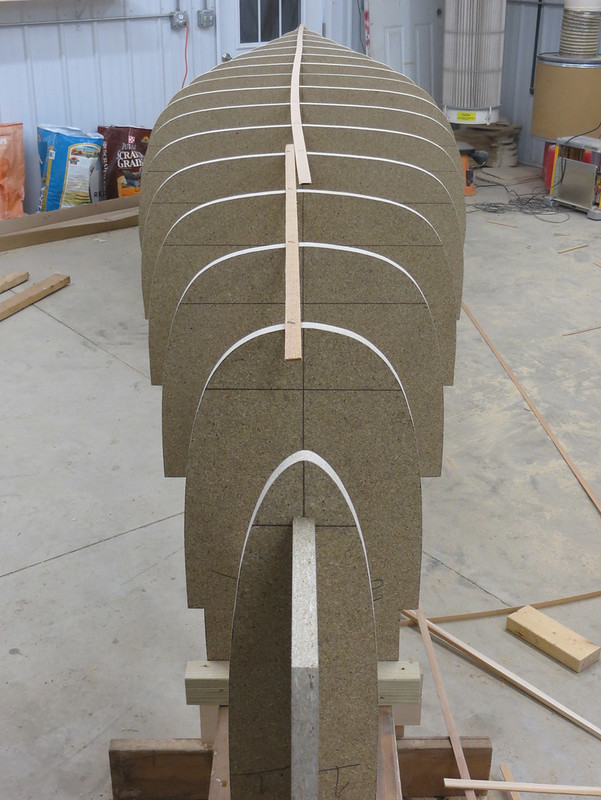
Here we go again! Hoping to start building this week. I'm donating labor on this one to the local nature center to be raffled/auctioned at their annual fund raiser in the spring. Which means I need to take other people into consideration when figuring out what to build. Not many serious paddlers around here with Alumicraft and Grumman being the standard canoes with the odd exotic layup (Royalex). So I'm thinking pretty flat bottomed and fairly wide for plenty of stability but a little rocker for maneuverability and some tumblehome to help out the stern paddler. This will be my first boat with standard wood seats, thwarts, and gunwales with a bit of a "weight be danged" mentality, though I will be working to shave weight where I can. Since the west fork of the Des Moines river is our local waterway, which the nature center is also trying to get turned into a state approved water trail, the canoes name will be, "Des Moines."

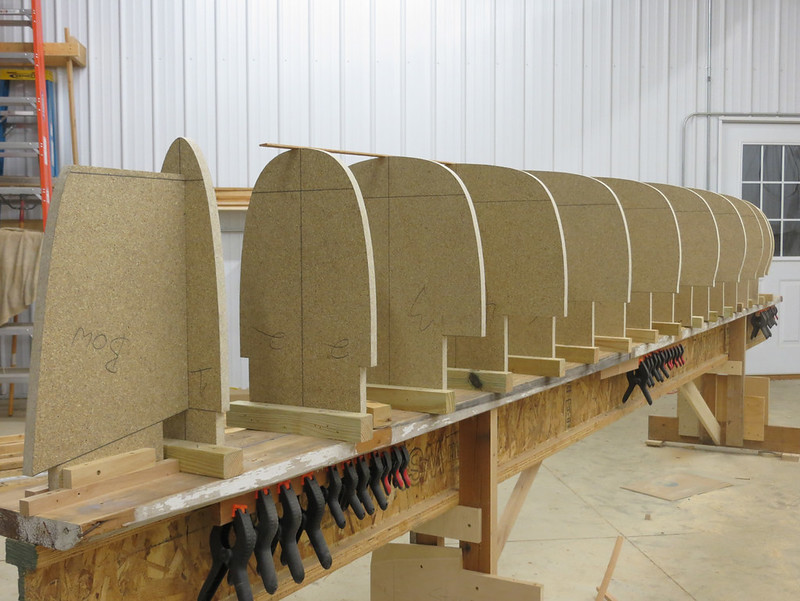
There will be some more tweaking but the design is getting close. 17'x35" max, 33" WL, 33.5" gunwale

Desmoines_v4_Linesplan by Alan Gage, on Flickr

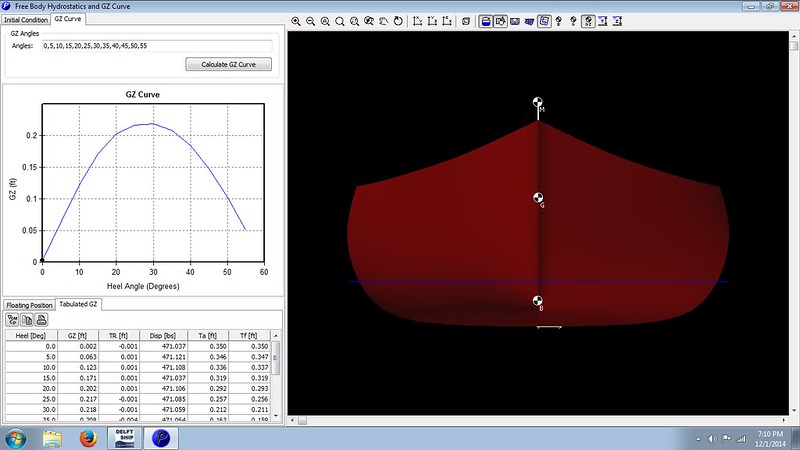
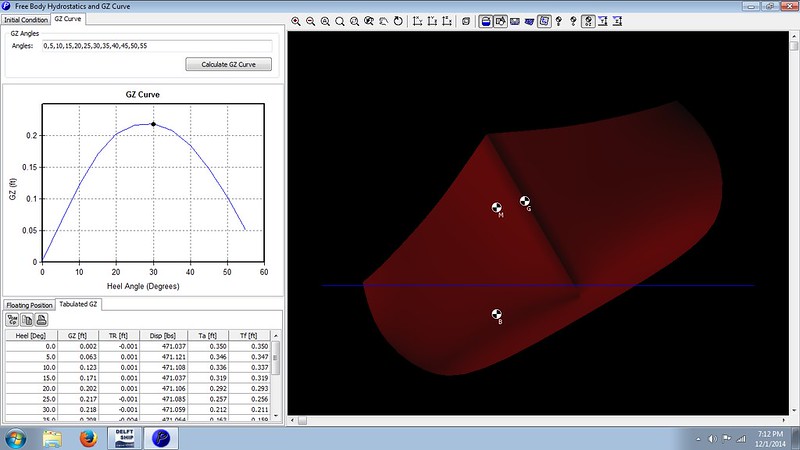
These are the stability curves. The graph on the left shows the resistance to tipping at different angles of heal. In the second picture I tipped the hull to where water is about ready to spill over the gunwales, which is the point of maximum resistance.

V4 stability by Alan Gage, on Flickr

V4_2 stability by Alan Gage, on Flickr

Again, it's difficult to reconcile digital with reality. All I can say for sure is that it's a lot more stable than the solo I just built, but how these numbers compare with reality I don't know. But judging by the hull shape I should be erring on the side of too stable rather than too tippy. This boat has more resistance to tipping at 5 degrees than my most recent solo had at its maximum. :)

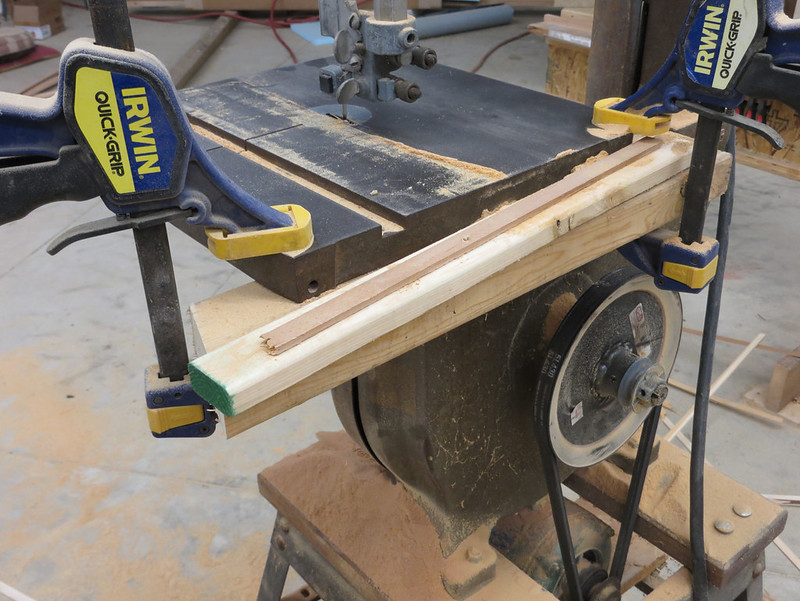
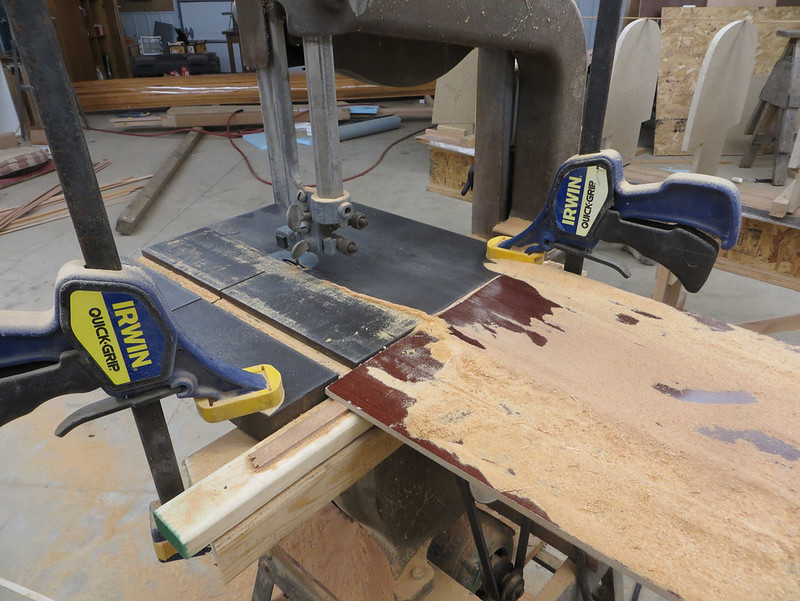
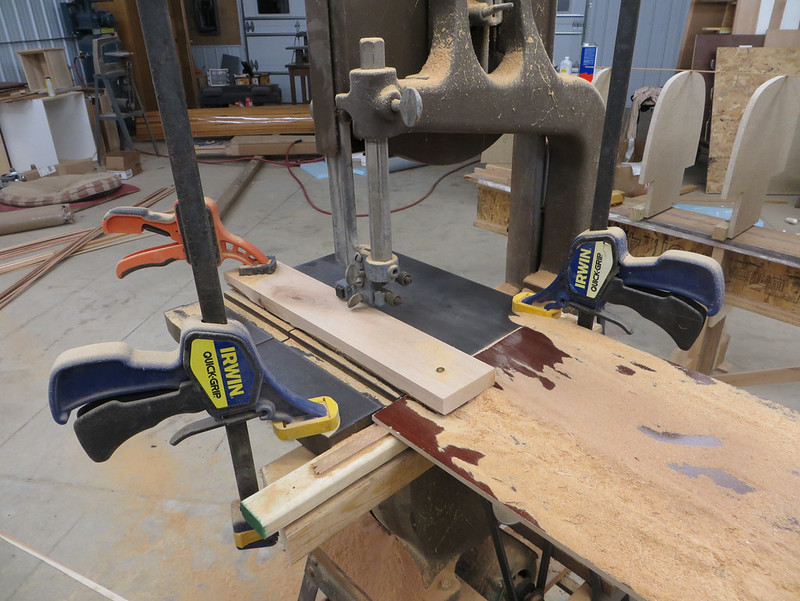
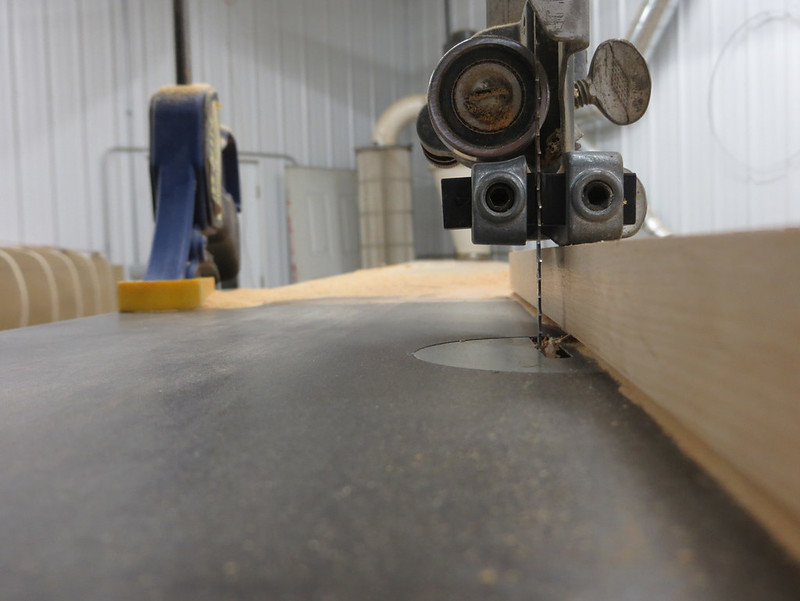
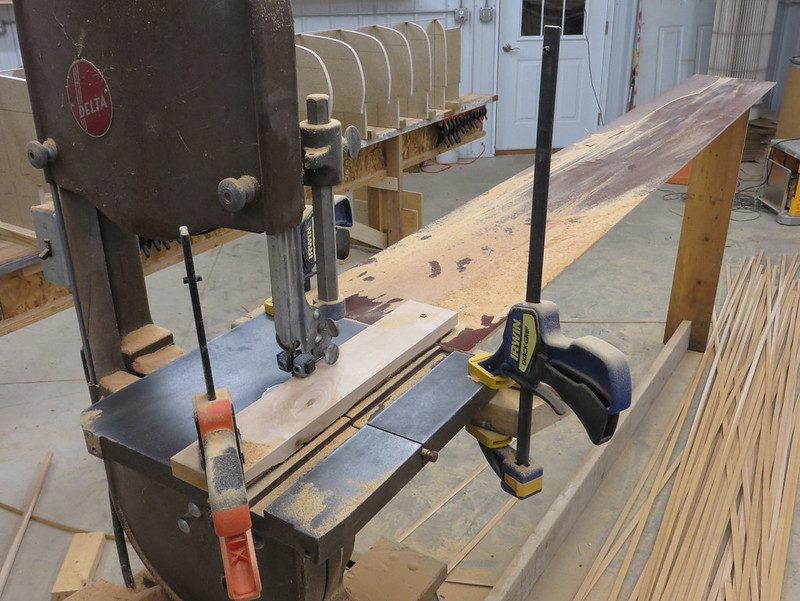
Thinking 3/16" strips with 4oz glass and a double layer below the waterline both inside and out. Trim will be cherry and I might keep the gunwales less than the standard 3/4" and hang the seats from cleats attached to the hull rather than from the inwale. We'll see. Unfortunately the boat isn't likely to see water more than a couple times/year and only short outings in calm water at that.

Alan
 
As for serious paddlers in the Des Moines area, I used to paddle some with the Central Iowa Paddlers. I agree most paddlers are of the Grumman-in-the-back-yard type, but CIP didn't meet that description. What nature center are you supporting? Sounds like a great raffle item.

Pam
 
We're about 3 hours from Des Moines in rural NW Iowa. There are some active paddling groups in central and NE Iowa but not around here. Emmet County Nature Center.

Alan
 
Alan,

I'm guessing you have the design load in the hull for the stability plots...Did you locate the CG of the loads (paddlers) 10 or so inches above the intended seat height?
If that's already in your calculations, looks like you're all set. Stays stable until you dunk the gunnel under!! What could be better?
As far as the seat cleats, I tested some sample cleats, it took over 300 lb load to fail the cabosil thickened joint..that would equate to a 1,200 lb paddler!!

A few years ago, I donated one of my builds to an outdoor forum. They raffled it off and some lucky soul got a beautiful boat for $10, while I got a much needed tax deduction... a win, win, win situation.

And as mem says, you should do this for a living!
 
Yes, it was at design weight, 420 lbs. I'm using 12" as the COG for all my designs to keep it consistent so there can be some direct comparisons made. I believe the actual COG gravity of a paddler is higher, like you said, but I'm unsure exactly where it should be when you take into account the weight of the hull and gear, which could be heavy or light and placed high or low. Not to mention whether the dog is standing up or sitting down. ;)

So 12" seemed like a nice number to use. The only use of the charts is for comparing one of my hulls to another since none of the builders share these things and even if they did comparisons would be difficult since everyone would use a different COG. So that's why I'm keeping the number consistent no matter the hull type. It will at least mean something to me when I'm working on a design, once I've got a few built for a frame of reference anyway.

As for doing it for a living that sounds fun but I'm not going to get ahead of myself. I've got a lot of learning to do and next winter will be the deciding factor. I'll have a few hulls under my belt by then and I'll see how they performed in real paddling conditions. I'll also have a better idea of how much time it will take per build and material costs. But most importantly next winter I'll know if I'm sick and tired of building boats or still enthused.

Played around some more with the design last night and added some more arch to the hull hoping to add some strength but keep the stability from dropping too much. Wouldn't you know the stability actually went up a little at all angles of heel? Seems I remember reading Jon Winters say that hull shape didn't have the effects on stability that most people assume. It will be interesting to read his writings again now that I've got a little experience playing around. I suspect I'll learn a lot more this time through.

Alan
 
Have you considered coming over from the dark side and not using staples for this build? Considering it will be donated as a fund raising prize for the local Nature Centre, you might consider the overall finish of the boat to appeal to more people, thus selling more tickets. Don't rush the build, make it beautiful and enjoy the process, especially since you won't be paddling it yourself. Create the first Des Moines as perfect as possible.
 
Inside my head is a constant battle between aesthetics and utilitarianism. Not just with canoes but with everything I do. I lean heavily towards the utilitarian side but appreciate aesthetics as well. But in all honesty staple holes are a long ways down the list, they just don't bother me at all and as a matter of fact I kind of like the pattern they make and being able to see where each form was and the shape it created.

I fix cars for a living, or at least I did before I graduated to the office a couple years ago. GM seems to have a thing with hiding interior fasteners. They're better now but in the 90's pulling a door panel on a GM was a pain in the butt. Lots of screws and they were all hidden behind little covers, plates, and lights, many of which liked to break upon removal when they were 10+ years old. Then one day in rolls a nice looking Mercedes sports car. And wouldn't you know it, every screw on that door panel was right there in plain site, and there were plenty of them. They made no attempt to hide them. Instead they found a way to make them aesthetically pleasing on their own and it looked great. Functional is beautiful too.

Besides, with all those filled holes it looks more like a vintage cedar strip. I mean, if it was good enough for Peterborough..... ;)

Alan
 
I'm with you on that one Alan. If I built staple-less, I would never finish a canoe. If you went staple-less, it might take you more than two weeks to finish a canoe!;)
 
Strongback is spruced up and forms are mounted. Strips cut as well. Just need to cut the bead and cove and we're ready to go!

I realized when taking the pictures I haven't taped my forms yet. I'll have to remember to do that before I start stripping.

When I built my last two solos I had to measure the forms after cutting them out because they looked too small. This time I had to double check measurements because they looked too big! I'm not used to seeing a tandem on the strongback.


20141207_001 by Alan Gage, on Flickr


20141207_002 by Alan Gage, on Flickr


20141207_003 by Alan Gage, on Flickr

Alan
 
Alan,maybe you covered this on other builds, but where do you find clear cedar in Iowa? I'm near the Cedar Rapids area and it's starting to seem like clear cedar is a fairy tail. If you ask for it around here people look at you like your'e stupid or something.
 
Any chance you can show a closeup of your fence system for the band saw? Been wanting to try that for a number of years, but never seem to get a stable platform.
 
Alan,maybe you covered this on other builds, but where do you find clear cedar in Iowa? I'm near the Cedar Rapids area and it's starting to seem like clear cedar is a fairy tail. If you ask for it around here people look at you like your'e stupid or something.

I've never had much of a problem. On my first build I bought precut strips from NW Canoe in St. Paul. Next time I just ordered it from our local lumberyard. I believe they got it from an outfit in Sioux Falls. That was really nice stuff and 18+' long. But pricey at over $7/board foot. It came planed down to 11/16" which made for very narrow strips (5/8") after the bead and cove were cut. It was actually pretty nice for following the tight curve of the bilge.

I also have an account with a lumber wholesaler in Sioux Falls so this fall I bought about 120 board feet from them in 12' lengths. It's D grade, which in hardwood speak isn't as bad as it initially sounds. Mostly clear with a couple pin knots allowed per board, sometimes no knots. This is 7/8" thick stock with one side left rough so I plane it down to 3/4". It was a little over $3/board foot but the quality is noticeably less than the expensive 18' pieces I'd ordered in locally. But it works.

This last batch was actually a bit of an ordeal as they don't keep it on hand in Sioux Falls so had to get it from their mother warehouse in Minneapolis. First they quoted me the wrong price and sent me knotty cedar. Second time they got it right. I think next time I order I'll have my cabinet maker friend in Minneapolis see what his suppliers up there can do. I'll also check into the price of 8/4 rough sawn stock.

I've tried finding good prices on cabinet quality lumber before and never found anyplace to buy it without a wholesale account. So it's probably either go that route or find a yard that can order it in and pay the markup.

Alan
 
Any chance you can show a closeup of your fence system for the band saw? Been wanting to try that for a number of years, but never seem to get a stable platform.

Ok, here ya go. These are the disassembly pictures in reverse, which makes them the same as the assembly pictures except that they're already dirty. I don't know if this is the ideal setup or not, it's only the second time I've done it. Seems to work though.

Clamp 2x6 to bottom of table to provide a support for outfeed table. Shim appropriately with whatever is laying around:


20141208_005 by Alan Gage, on Flickr

Outfeed table set in place (there's a 2x4 screwed lengthwise to the bottom of the 1/4 sheet stock to stiffen it):


20141208_004 by Alan Gage, on Flickr

Scrap piece of hardwood for the fence. Clamped at one end and at the other screwed through the outfeed and shims into the 2x6 to hold everything in place:


20141208_003 by Alan Gage, on Flickr

A couple strips of 1/8" cedar underneath the fence keep it raised up a little so saw dust doesn't build up in that corner:


20141208_002 by Alan Gage, on Flickr


20141208_001 by Alan Gage, on Flickr

And that's it. Worked pretty well. I just use a scrap block of wood in my left hand to keep the board against the fence. Better results this time than the first. More consistent thickness though there were still a few strips that had to be thrown away or have the narrow parts cut out. The first few feet seems to be the most difficult to keep straight. It's easy to let the tail of the board drift to your right (as you're facing the saw), which lets it pivot on the front corner of the fence and pull away from the blade. I'm used to putting pressure on the board just ahead of the blade to keep it tight against the fence with a table saw but it seems to work better to keep that pressure behind the blade, close to the back of the fence, until the board is about half way through. Then start bringing pressure back to the blade.

I wonder if a shorter fence would help? Either that or a much longer one.

Measuring the strips with a caliper shows 1/64" as the maximum variation between strips and along the length. Most of them are half that deviation or better. A few were much worse and will not be used. I still think the table saw was more consistent but also more waste.

Alan
 
Got the bead and cove cut tonight. Gives you a good couple hours of mindless work to think about whatever comes into your head. Mostly what I thought about was why didn't I rip more strips as I mentally added up how many I had and how many I would need and how I'd need to setup the bandsaw and router table all over again for a short run. But hope springs eternal. I had these same thoughts on my last two boats too but I had enough both times. On one I had a single full strip left over and on the other I didn't have a piece longer than 3' when I got done. Guess I'll find out soon enough. :)

Alan
 
Thank you for detailing your bandsaw setup.

Are the bead and cove cut on a router table with similar infeed and outfeed extensions?
 
Thank you for detailing your bandsaw setup.

Are the bead and cove cut on a router table with similar infeed and outfeed extensions?

This was from my last build. I modified it a little bit this time but basically still the same.


20141107_004 by Alan Gage, on Flickr

That same piece of 1/4" sheet stock used as the bandsaw outfeed it used here too except I clamp a couple boards to each edge to give it support and also to create a little tray. So once a strip goes through the router table I can just leave it laying in the tray until I have 15-20 built up, then take them all out at once. Much faster than setting aside the strips one at a time after each is run through the router.

The infeed for the router table is nothing more than a sawhorse just to support the back end of the strip. It's not level with the table and after a few feet the strip falls off of it but it doesn't matter since they're so light weight and flexible. Could probably get by without anything on the infeed side of the router table, just let it droop and drag on the floor. With the bandsaw I had to rig up something taller to hold the board up on the infeed side. It supports it closer to the saw so that when the board slides off the support it's pretty well balanced and doesn't try to drop.

Alan
 
Gotta love those Erwin clamps. I see you have plenty of them. When I get all clampified I'm usually one short.

Clamps are a good Christmas gift for that hard to buy for person on your list. I'm thinking about getting my wife some. I have just the place for her to store them.
 
Last edited:
Back
Top