• Happy National Garlic Day! 🧄🚫🧛🏼‍♂️

Solo Daytripper SOF build

Joined
Mar 21, 2015
Messages
441
Reaction score
21
Location
SW Wisconsin/Driftless
I'd been wanting to build my latest hull idea, but was not willing to commit to the time (& cash expense!) of another stripper at this time. Happened to meet Nick Schade at Canoecopia, and took some interest in his current project, a skin-on-frame kayak kit.

I took some inspiration from there, some from other SOF builds around the internet, and decided that I could probably do a fairly quick-and-dirty build for around $120 cash outlay. (I salvaged/scrounged material from some of the family stockpile, so duplicating this build will be somewhat more expensive.)

Note: this build will not be as pretty, nor as light as it could be. I decided to compromise on both a bit for a more expedient build, so that I can test out the hull shape. I'll explain where I could have been fancier when I reach those points.
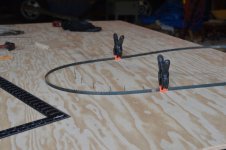
DSC_0461.JPGDSC_0510.JPG

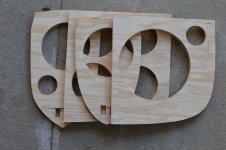
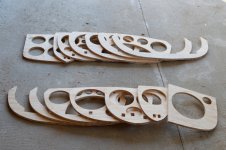
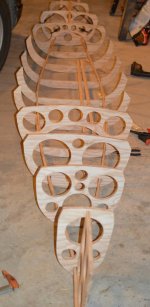
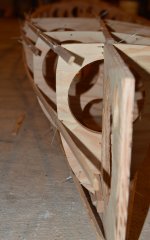
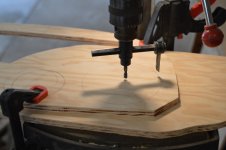
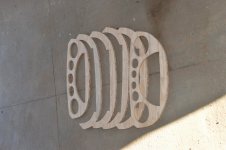
Starts off looking fairly conventional, but whats up with the hole cutter?
DSC_0511.JPGDSC_0512.JPGDSC_0513.JPG

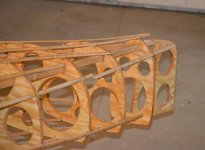
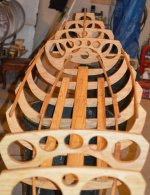
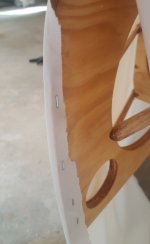
This is the bit that I picked up from Nick's kit project. Unlike most Skin On Frame, these are not a temporary form. Instead, they are a permanent part of the canoe. These stations are made of a Fir ply, with a semi-marine adhesive. (real marine ply would have been custom order and expensive. This is just a test build) You might also notice that only a few are open at the top. I decided to build this particular boat partially-decked. Total weight for the stations, after cutting out the bulk: 12.5 pounds.

This is the first point where I could have saved weight, and added elegance: Most Skin boats use forms, and then have light, steam-bent, or bent-lamination, ribs. I certainly could have done this, but that would take much more time. (perhaps the next one, if I decide I like the overall technique)
 
I'll be watching too...
I have mused about a SOF build for years, maybe a carbon fiber over foam set of frames with heat shrink Dacron skin. I kind of want to build another guideboat, for solo use on bigger water. But still something I could easily carry for a few miles.
 
I will be watching with interest as well. This part is intriguing.

You might also notice that only a few are open at the top. I decided to build this particular boat partially-decked. Total weight for the stations, after cutting out the bulk: 12.5 pounds.

That style partially decked boat is very appealing to me, especially for ease of gear storage and entry/egress.
 
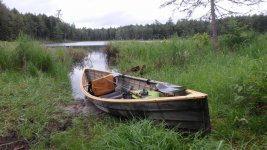
SOF Canoe, similar to a geodesic aeriolite. 12 1/2' and 13lbs. Actually about 14 1/2 with seat backrest painter ready to paddle. Heat shrink dacron epoxy finish with carbon dust in it, thought it might be able to slip over rocks logs etc. Seems to work ok, did put a hole in it once going over a beaver dam, stick went right through. But, the puncture closed up somewhat and actually only leaked very slowly.
 

Attachments

  • photo9758.jpg
    photo9758.jpg
    362.8 KB · Views: 1
Sorry for leaving everyone hanging on this. This turned into one of the more frustrating builds that I have undertaken, especially since I was expecting it to be quick! Never underestimate the power of a long commute to the shop!

For any future readers, Connecticut Yankee 's version is the "Right" way to do this, if you want the lightest, strongest, prettiest SOF you can build.

Now that I've test-paddled the thing, I'm going to try to give you a quick overview of the build process.

Jim Dodd : No Strongback! this was entirely self-framed. (Though, I did regret not having a better way to keep the frames spaced during initial setup) See the next couple of pics for reference:

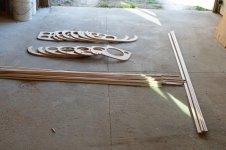
First: Here is all of the lumber, rough cut. figure 25# at this point, including the frames.

canoeparts.jPG

CanoeBackbone.JPG

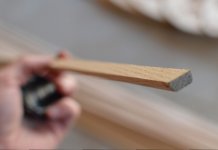
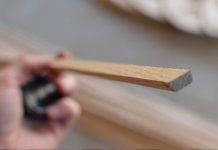
These stringers are 5/8 X 1 1/4", and make up the primary backbone of the boat. When I first started handling them, they felt like wet noodles.

The bulk of the lumber in the first pic was this stuff: 1/4 X 5/8 oak, with two round-over corners. Neither these nor the main stringers were long enough to do the canoe end to end, (Salvaged from what was on hand, remember?) so I had to do some creative overlapping.

ThinsStringers.JPGStringerZipJoint.JPG

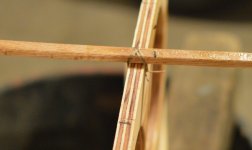
The zip-ties are temporary, Basically holding each piece in place while I figured the spacing and drilled a lacing hole for the next one.
 

Attachments

  • ThinsStringers.JPG
    ThinsStringers.JPG
    57.6 KB · Views: 0
Last edited:
Oh, as a heads-up to Mike McCrea : there is very little access to the below-decks zone on this build. Basically 12 inches to the next frame, which has a hole pattern that precludes sticking anything too far in, unless you want extracting to be an exercise in contortion. I'm thinking that these kind of frames would be bad for that anyway, even If one went with a wider, single opening in the center of each frame. See what I ended up doing for a floor.
 
It turns out that I took some truly horrible pictures during this build. The best views of how it all comes together are the below:

first one is during the initial fit, done with zip-ties:
CanoeMostlyStringered.JPGMostlyStringered-Sinew-oops.JPG

The second, shown after a coat of varnish & (mostly) permanently attached, also shows one of the major 'Oops' moments. I've not tracked back whether the problem with the bottom of the frame was in the copying of the numbers, or the actual lofting. I just pulled the stringers back, and brought the frame down to fair with the rest of the rocker.

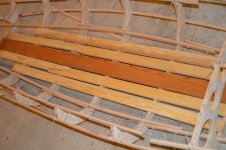
The frames and stringers do not provide a good place to sit, so before taking apart the zip ties, I built some floor boards:
CanoeFloorUnfinished.JPG

These are white pine, also off the salvage pile. In this case, This is at least their second, (perhaps third?) salvage: My dad originally acquired that pine over 25 years ago from the scrap pile at his job. It had some very early signs of having been slightly decayed in the log, known as "Bluestain." Not enough to affect the structural integrity, but the company didn't like its look for their purposes. Mom thought that it made awesome cabinets, as well as trim and paneling. Some of that paneling was re-purposed as trim for a more recent project. I pulled these from the scraps from that trim job. (I did sand and re-finish before final assembly)

Next: A really cool material that I discovered!
 
Cool build!

I am interested to hear what it weighs in at.
Will you be using Dacron for the skin?
 
After test fitting, I cut all of the zip ties, and finished the parts. The frames and stringers got 1 coat of Helmsman. (Low exposure, low abrasion surface. I would not recommend as a general practice, but this is a prototype)

I hate the feel of varnished wood on the skin, and find it slippery underfoot when even a bit wet. Therefore, the floorboards got two applications of Boiled Linseed Oil.

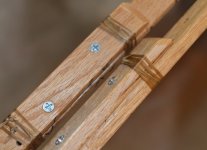
So, how to permanently attach all of the parts? I was pointed at a material called "Artificial Sinew." It ls a long-strand, waxed, un-spun polyester fiber. It does not stretch. The variant that I got is flat, 1/8" wide by about 1/64" thick. 70# test per strand. It handles a lot like oversized dental floss: SinewTie.JPG

Of course, there are some limits to how tightly I could tie it. The two backbone pieces needed to be spliced, and the sinew was not doing the job. I reinforced with some wood screws:

SpliceStringers.JPG

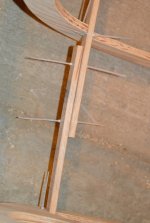
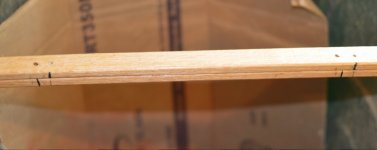
Speaking of the backbones: Here is where a better alignment jig would have been handy. Apparently, I got many of the frames just a bit off of square, so the lace holes in the backbones did not line up. I re-drilled many of the holes to match left and right:

StringerRedrill.JPG

Here are some of the heavier parts coming together: Still missing part of the floorboards, but you see the gunwale edge. (somewhat of a pain point when car-topping) The blocky bits between the middle frames and the backbones are for shimming. When I laid out the frame notches, I was trying to provide the greatest possible open space between backbones. I set a minimum frame dimension, and stuck with that. When assembling the pieces, it became clear that this did not result in a fair enough curve for the backbone as viewed from above. While they were startlingly flexible, they were not that flexible. Could have been prevented by better planning.

PartialAssembly.JPG

Next: fabric and finish.
 
When Researching for this build, I saw that some used fairly light cloth, and were able to heat-shrink it into place. I wanted something a little tougher for the skin, as I am always rubbing along logs, sand, and Turtles.

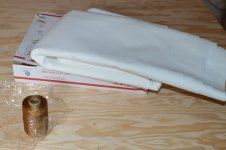
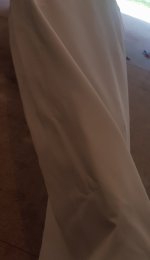
I got some 6 oz Dacron (The sailcloth weave) off of ebay, came to about $7 a yard for 60" wide. This is cool stuff: I'm totally going to buy more, perhaps in a slightly lighter weight, for custom-made tarps/rainflys/etc. Water tends to bead up even on the untreated cloth, and any seams would benefit from Mike McCrea's DIY Seam sealer.

DacronSheet.JPG

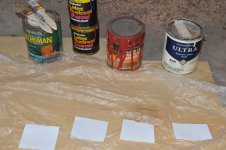
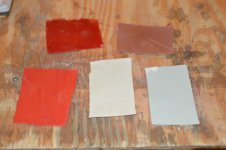
What to coat it with? I did some tests:

TestPaints.JPGTestResults.JPG

After letting them dry, I found that the Helmsman adhered best, and would have made a good undercoat. The next was the Pittsburgh house paint! I did also spray some standard red oxide metal primer, and that was the easiest to rub off of all, weirdly enough! Simple choice. A gallon of custom-mixed color was less than 15 dollars.
 
alsg Yes, it would have been an option. I didn't want to leave them go for the time it would have taken to cure, so I would have used screws anyway. ("Quick" prototype build was the thought!) I also wanted them to be easier to take apart if necessary.
 
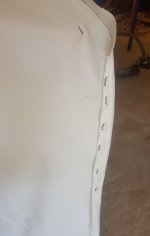
Interesting thing about this Dacron stuff: it has no stretch. None. Zero. Won't even flex on the bias. Wrap it around a complex, 3d curve, and You'll need to have some edges somewhere. (This is the sailcloth version. The lighter, heat shrinkable stuff may behave differently.) My hull shape has a fair bit of rocker, So I had to make a choice: I could stretch it flat along the chine/knuckle line, and fold in four darts, one on each side, front and back. Much like the soft fold shown here:

softlateraldart.jpg

The other option that I saw, and that I eventually went with, was to lay the fabric flat along the bottom, and then put in some vertical-ish darts in the sides. Each would have some challenges, and I'm not sure that I picked the best.

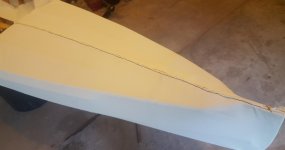
Anywho, started by trimming, stretching, and stapling the ends:

StemUnderlayer.jpgStemOverlayer.jpg

Then, a little trimming, and my first stitching, for the deck coverage:
RearDeck.jpg

I had a bit of a time figuring out how I wanted to stitch this. The artificial sinew can be split down to narrower strands, but I was having a hard time getting a needle through, while still pulling a usefully thick strand of thread - the needle would go through, but the thread would jam in the extremely tight weave. (If I were to make tarps, etc. out of the stuff, I'd use a machine and sythetic thread.)
What I settled on was a sewing awl. it has a sturdy, tri-face point, with an eye near the front. One pushes it through, and then captures the loop with another strand on the back side. It's better for fairly coarse stuff, like pragmatic leatherwork. The awl itself is thick enough that I used the sinew material at full thickness, making approximately 7/8" stitches. Overall, I thought the decks turned out neatly.

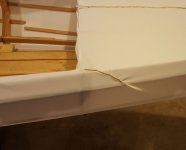
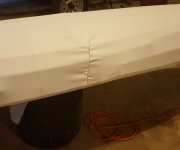
Not so much on the darts:

CornerDart.jpgSideDart.jpg

The corner dart is not bad, but that one down the side is a bit of a franken-dart. Not sure if the lateral darts would have turned out better.

Because of the coarseness of my stitching, I did not trust a seam to be sealable. I did not cut these darts at all. The fabric is simply folded in place, and stitched down. There are some pierce-holes from the awl, but they are minimal.
 
Sorry for the delay - Here's the finish-up for this build:

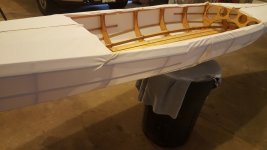
Overall last pic before paint:
20180819_145925.jpg

Yeah, That side got a bit wrinkled as well. No dart though.

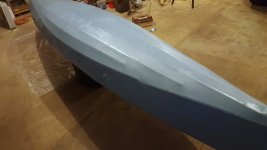
Painting was nothing special, just brushed on. I prefer a 2" brush because it leaves me in greater control, while still covering fairly rapidly.
20180819_174443.jpg

I seriously overestimated how much paint I needed. I purchased a gallon can, and two coats ended up being less than a quart. S'okay, I like the color. In the end, I found that the paint does need some time to fully harden. It's not nearly as tough when it's less than a week old.

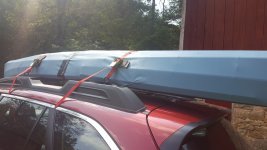
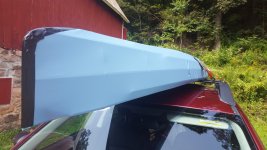
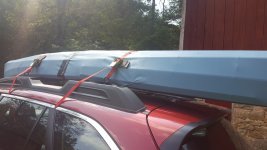
Total weight ended up in the 30# range, perhaps a little less. Very easy to get on top of the vehicle. It nests neatly inside of my tandem, like a Matryoshka doll. I believe that I will be able to cartop both of them at the same time that way.
20180825_150040.jpg20180825_150015.jpg

Yes, it flexes a bit under the straps. I decided that I wanted to reinforce the seams and the dart just a little, to prevent water infiltration. That is Gorilla Tape. Not the best idea, I was to find out.

DSC_0600.JPG

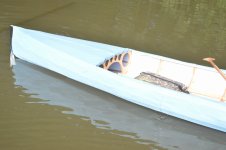
Here she floats. Sorry about the over-exposure. I had been using the manual settings on my camera the night before, and forgot that I had not reset it to auto-mode. I found out during my first test paddle that there are some things that not even Gorilla Tape will stick to! (The strip over the dart had to be removed in mid paddle, as it had partly peeled itself, and was acting as a sea anchor)

The needle holes for the dart do seep just a bit, about 2 cups on an hour and a half paddle. That should get better with another coat of paint or two, and allowing the paint to cure before stressing it.
 

Attachments

  • 20180825_150040.jpg
    20180825_150040.jpg
    348.8 KB · Views: 0
Overall, This was in interesting experience. I don't think that I will build another hull using this method.

How does she handle? Bit of both, here are the lists:

PRO:

- Came in just about the right size - long enough to have good glide, but she can get her nose back in some tight quarters.
- Easy load/unload is great, though the fact that the 50# tandem is awkward for me to load does concern me on other fronts! (I'm still a young guy!)
- Seems to track fairly well, but responds to light paddle pressure for turns.

CON:

- The need to have floorboards keeps my weight higher than I intended. She's easy to balance when seated or kneeling, but transitioning requires a delicate touch, and standing is an automatic no-go.
- Construction method prevented me from adding a footbrace where I wanted it. The bulkhead is just a little too far forward.
- The floorboard arrangement is not comfortable for me to kneel on. I like to lock my legs wide, against the sides, and that takes me off the floorboards.
- (more a design/planning issue) I may have noted up-thread that, when creating the plans, I had intended to come back, and bring the knuckle down further, and bring the gunwale in. This would provide better paddle access and an anchor point when kneeling. If I had remembered to do that, I would consider using a double paddle with this boat on occasion.

I'm sure that she will continue to see use as my local solo grab-and-go boat. I may build a Strip or composite boat to a similar hull shape in the future, though.
 
Back
Top