• Happy National Bean Counter Day! 🫘🔢🧮

PC Y-Stern

Joined
Jan 31, 2013
Messages
2,340
Reaction score
185
Location
Warren, Manitoba
Politically correct it ain't, some truly odd work on this boat for sure.

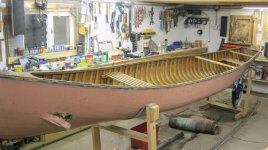
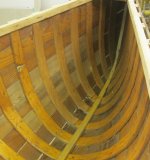
This is the second of the two canoes we picked up in Southern Ontario in September. This is a one off, home built Y-stern that was used primarily for moose hunting in the Algonquin area in the 60's, 70's and 80's. It was remarkably well taken care of, there is no rib tip rot at all, even the thin cant ribs are good. Hull has no rot either and it was well built, the main planking is all one piece full length. We believe it is white cedar ribs with red cedar planks. The materials could have been purchased from Peterborough or CCC as they were at the end of their lives at that point in history, the ribs being tapered suggest that also.

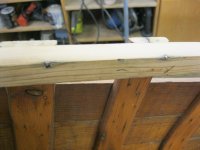
It was a tad difficult to get apart, the keel screws were a mix of steel and s/s, all the gunwale screws were s/s so we have those for re-use. It may have been the original canvas and it appears it never had filler on it, they just painted the canvas.

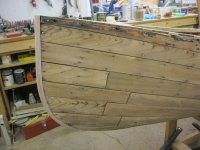
The bow stem band had some brass screws and a half dozen copper rivets through the stem and peened over on the band, that is ala Morris. We figured out why soon enough as it has had the Jim Dodd treatment to a degree. Although it has a nice solid ash stem, the builders overlapped the planking like Jim would do stemless. It will take us a bit to remedy that since there is about an inch airspace between the point of the planking and the stem, which is why the stem band was put on in such an odd way.

Another anomaly is that they filled all the gaps with what looks like PolyFilla or Plaster. At least it comes out easier than resin. Still, it has to add weight especially when the boat is wet, which is was under the canvas/keel. It has dried out and gotten quite a bit lighter. Mem could just wrap it in glass after we fix it and it might be lighter than filled canvas.

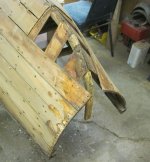
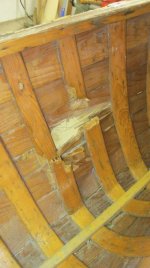
Other than the obvious hole in the boat, there may be another 3-5 ribs to fix and some poor workmanship to clean up, but otherwise it should go fairly smoothly. It will require fairing considering the 5/16" thick planking did not conform well to the ribs at the bilge so there are edges that will need to be smoothed out. Getting the tacks out is near impossible since they are copper and the heads just fold up, so there won't be any replacing tacks happening this time.
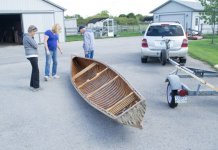
Click image for larger versionName:	Road Trip .0021.jpgViews:	1Size:	78.7 KBID:	74403
Click image for larger version  Name:	Minor damage_zpsuofxlt3g.jpg Views:	2 Size:	146.1 KB ID:	74405
 
Last edited:
You interested? If so, we could finish the hull how you want, like no varnish or whatever. Could be just what you are after, although you have that sport boat to build this Winter. I'll see what the wife thinks, ha ha, it is hers after all.
 
This boat has rocker too, maybe 1 1/2 to 2" each end. We are thinking it was built off a Pete mould. They made one called the Trout, 16x36x14 deep, canvas prospector square stern according to the Dragonfly site.

Christy will be in touch by e-mail. Maybe you will only want the big hole fixed, ha ha. .
 
You know, this could have been much easier had you been interested when we had the boat at your place in September.
 
Christy was thinking we should bring this boat for the Cruise on the Kap, then you might want it more, ha ha.

PC Y-stern 2_zpstsbd5qfy.jpg
 
Last edited:
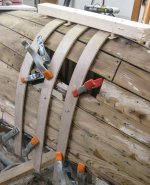
So like, last night I was looking at the ribs and going, ummm, this may not work, I mean, if it were the middle of the boat the rib can go in either way, but... here it has an angle and since they are for the other side... so I looked and thunk about it... looked some more then swore a bit, then moved them to the other side for the night while still wet...

In the morning I fired up the kettle and doused each with boiling water and got them adjusted for the correct side, getting the twist just right... live and learn.

correct side_zpsnapd3a2z.jpg

In for a penny, in for a pound.

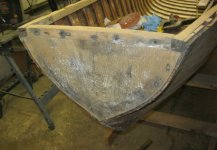
With needing to wait a few days for the ribs to set up, I moved to the stern... I had seen a gap between the planking and rear stem where it contacts the transom, so, I removed partial planking to get access so I can add a filler piece, and, well, then I noticed the planking is pulling away from the transom on both sides, near the stem a full half inch... so, out comes the transom. They used only copper tacks to attach it, and figuring that some yocal down the road might try to throw a 9.9 on this, the transom needs to not fall off. So I pulled it out, am caressing some of the issues with some epoxy and peanut butter and will put it back in with silicon bronze ring nails tomorrow.

ugh_zpsx7pcvdt7.jpg
 
Last edited:
Ok, so, not as easy as originally thought, and not the end of January although it is moving along, it is just that... fix one thing, find another problem, repeat...

transom_zpsdldrt8zc.jpg


transom 2_zpsuj9iwweg.jpg

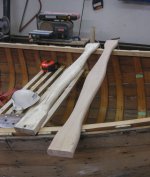
This boat originally came with a yoke, which Christy chose to discard since neither of us would be able to pick it up alone. So, she tasked me with creating a new thwart like the originals. I have not done this before, having to copy an original thwart. It did come out alright though. Old look like Ash, new is Birch. Inwales are Douglas Fir.

new thwart_zpsfph4qbhq.jpg
 
Last edited:
I'm guessing the transom was solid wood, not plywood.
And how far forward did the transom brace run?
Maybe a pic ? :eek:

Interesting thread ! Thanks !

Jim
 
Thanks Robin, it involved the band saw, belt sander, thickness planer, router and RO Sander. Close inspection it won't pass but will do for this boat. The original thwarts were only rounded on the top so I ran those through the router as well to round off the bottom edges.

Jim.

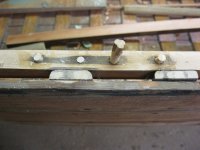
The transom is a full 1" thick solid maple or birch. Still in very good shape, no rot to speak of. There would be steel L brackets in the inside corners that connect the transom to the inwales, they will go back on after varnish. Still need to fix a bit of rot on one inwale where it was screwed into the transom side, not a biggie, maybe this weekend.

The transom brace as you call it is actually the rear stem, which is likely ash and about 3 feet long before it curves up and connects to the transom with screws. Due to how they bent the ribs at the stem locations it created a fair gap between the stem and planking. After I smoothed out the ribs where they connect I significantly decreased the gap and the planking fit the transom very well. All fastened with silicon bronze ring nails, then I fill the little gaps on the inside with thickened epoxy. Not likely to get it off again but it isn't going to fall off either. Much better than it was before I removed it.

The canvas will wrap around the back of the transom then the plywood plate is screwed over that to help seal it all up. I may go with a hard wood instead but the sacrificial plywood is alright as well.
 
Last edited:
Looking Good !
Thanks for the pics ! They help shed some light !

Jim
 
Looks very nice! Still waiting for my plans to be printed, but I looked on the canoe bookcase that I have (the back half of a square stern) and it has those metal braces too. Think I will be taking them off and using them in my build.
 
I like that the steel brackets are hidden. And that transom looks solid. A serious boat for work (and play).
 
Brad, the brackets are not hidden, they just aren't on the boat at the moment, but they do tuck into the corners nicely.

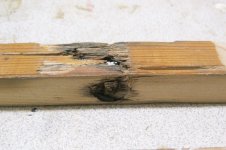
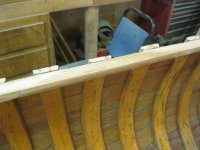
Christy had an unfortunate incident last week which required a necessary evil repair. Whilst drilling out a frozen thwart bolt, the bit slipped and ran through the inwale and split it nicely in two places. I deemed it unfit if just dowelling it and epoxy, it would be a weak spot, so I had to cut it out and replace the piece, which is yet another thing I had not done before, a double scarf.

We used D Fir again, although this piece is much darker than the original, but being glued in with epoxy it will likely be much stronger. I also filled the old holes a midships as Christy wants the thwarts spaced differently to allow a larger middle space for gear. Don't need the old ones and they were different sizes as well, so I used the drill and a rasp to bring the 3/8's dowel I had down to size to fit.

fugly_zpsygqbtk0c.jpg

scarfeh diem_zpsvcz3lp3p.jpg

scarfed joint_zpsdnbwlgno.jpg
dowels anyone_zpshm4zq5oa.jpg
 
Last edited:
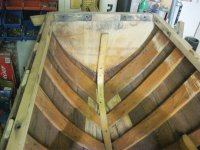
Onwards. Illnesses have kept us away from the project for most weekend days but finally making some progress again. Having re-clinched the majority of the original tacks, I sanded the entire hull today with 40 grit on the RO to knock down the plank edges. Due to it being planked with 5/16" thickness, over time the boards cupped due to saturation and the original builder did not get the planks to conform to the ribs on the turn of the bilge, so we just tried to knock the edges down to lessen it showing through the canvas.

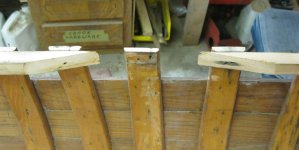
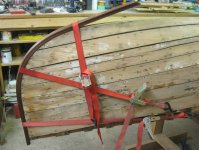
Also finished shaping the outer stem. The need for this is due to the fact when the boat was built, for some odd reason they tapered the stem to a point and overlapped the planking, about the same as what Jim or Alan would do with a stripper. This explains why they had such difficulty attaching the stem band and literally missing the stem in a number of places. The new outer stem is birch and caps the ends of the planks after they were cut and sanded down and also will provide enough "meat" to affix the canvas and the stem band.

bending_zpsqfpbzdo3.jpg


bent_zpsoyvydf7n.jpg


I stained the 3 new ribs with Ipswich Pine and it is a pretty close match to the sun faded white cedar adjacent to it. They will likely darken over time but it is less obtrusive this way.
stained_zpsvaodd1rc.jpg


We did figure out why they put the second rib nails through the planking instead of both through the ribs which would be normal. The nails they used were too long and every single one they put in pierced the inwale making it so they had to cut them off and file them down. So they put the second one through the planking to avoid that, rather than getting shorter nails and cutting them shorter before driving them in in the first place.

rib nails_zpsroygnut2.jpg


Christine also had pulled the seats out, taken them apart, sanded the individual pieces, varnished and put them all back together so they are ready to go back in once we get the varnishing done. Although running late on this one as well, I can see having it back outside on the horses at the end of next weekend and on to the next project which will have massive amounts of rib work to be done.

Karin
 
Last edited:
Reclinched a bunch more tacks tonight...I had driven them in with a punch to be able to plane the outside of the hull, and they stuck through a bit far. All good now.
I also thinned out some Helmsman varnish and soaked down the hull exterior with it. Second coat tomorrow and then we will be on to the interior. Helmsman for the first two coats inside and them Epifanes for final coat.

Install the thwarts and seats. Then back outside she goes.
 
I'm enjoying your practical repairs to this boat. I think it'll be better than when it was new. What are you using to thin out the Helmsman?

Mark
 
Back
Top