• Happy National Garlic Day! 🧄🚫🧛🏼‍♂️

10 Day Voyage With a Fiberglass Canoe...1994 MR Sunrunner

Joined
Sep 5, 2018
Messages
181
Reaction score
86
Location
MN
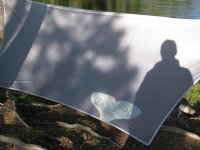
100 Miles & 37 Portages

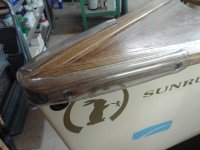
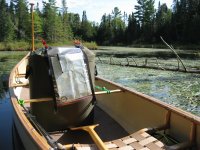
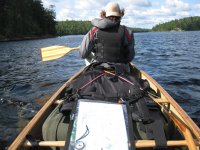
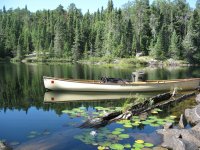
I'll soon add more detail to this post for those that have graciously expressed interest in this old oddball (1994 MR Sunrunner). In short, the secret(s) to the success of this trip was a strong, 6'-5" farm boy and me being one heck of a camp cook to keep him/us fueled & spirits high. Also my Machiavellian way of shrugging off getting us lost on Nym and heading us into a moose swamp on portage #2 where my bowman promptly tore his new pants from ankle to crotch...And later using the same mind-tactic as I guided us into the entirely wrong lake being distracted by the quintessential canoe-tripping conversation...aliens...

More Later On...
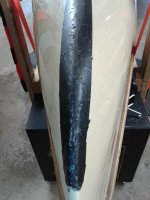
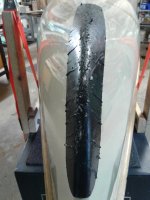
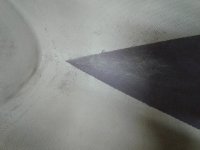
  • Gorilla Tape skid plates
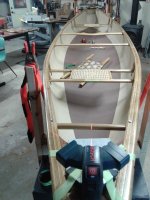
  • Ed's Canoe contoured seats
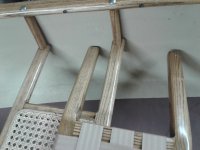
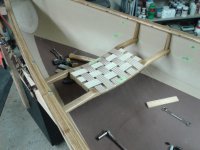
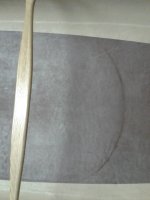
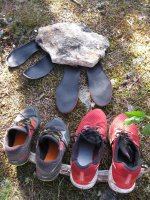
  • Chosen Valley portage pads
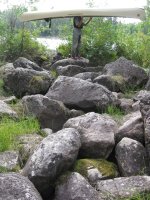
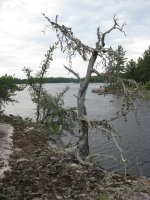
  • Handling in big water as well as twisty backwater
  • Paddling efficiency vs portaging inefficiency
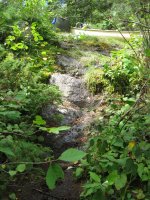
  • Portaging 60' up (& down) 45 deg. slopes
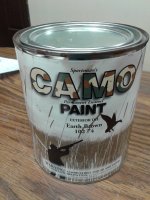
  • Duck boat paint from Menards
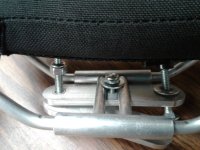
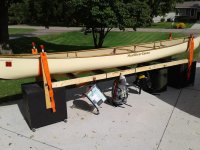
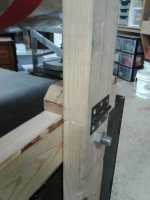
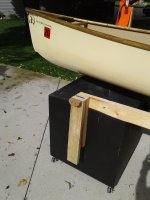
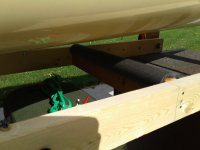
  • Further developments of the "Canoe Rack Sling Thing"
  • How the DIY roof rack performed on the Astro Van (754 miles)
  • What a slug looks like having been mistakenly rolled up in a wet tent
Almost forgot.......Q: Would I take it into the woods again??? heck YEAH!
 

Attachments

  • photo12346.jpg
    photo12346.jpg
    420.9 KB · Views: 2
  • photo12347.jpg
    photo12347.jpg
    637.7 KB · Views: 2
  • photo12348.jpg
    photo12348.jpg
    604 KB · Views: 2
Awesome......I haven't went over 5 hours yet. (really new here)
I did find the Gorilla Tape skid plate trick already. It works. :)
 
Great, looking forward to the trip report, seems like there might be some humor and fun times. Thanks
 
Gorilla Tape Skid Plates: Photos showing both installation and following 100 mile trip of rocks, creeks, 8 beaver dams, & portages. Granted we wet-foot every landing and pay close attention however I am still amazed at how well it performed and stuck firm with the bow strip just barely beginning to "peel" back at the top. Only one layer of tape applied the stearn and 2 layers on the bow. I cut slits in the tape to help it round the contours making certain the folds layer/fold in the direction as to not go against grain/travel. Does not appear I have any damage to the gel coat. If any, it will be very minimal.

Ed's Canoe Contoured Seats: Did not want to replace the original seats (being I caned them this past winter) however on a couple test-paddles noticed them flexing with my 195lb bowman. The peg hangers rocked a bit too. I am soooooo glad to have spent the $ to get these seats as I have never been so comfortable in a canoe. Absolutely zero butt-fatigue which is a first for me. As far as installation goes...it was not easy. For whatever reason, the seat hanger spacing on this canoe varied for each seat side. Since I did not want to drill additional holes in the gunwales (so I can quickly swap seats) I asked Ed's not to drill the profiled hangers, which I ordered as well; thinking I could drill them out myself with varying hole centers. Screwed up the first attempt so I put the original peg hangers back and mounted seats to them. Some pegs sit a bit cock-eyed due to the original build (varying hole distances) but they performed rock-solid.

Nose Cone: In an earlier post I was deliberating on how to protect the nose as often times I rest it on the ground/rocks when shouldering the boat.With this boat being heavy, this method of shouldering was used often. Clear, vinyl tubing being the answer for me as the existing gunwale fasteners/screws were used so no additional holes/modifications were needed.

As time allows I'll finish up with the bullet points in the initial post.
 

Attachments

  • photo12350.jpg
    photo12350.jpg
    309 KB · Views: 1
  • photo12351.jpg
    photo12351.jpg
    306 KB · Views: 1
  • photo12353.jpg
    photo12353.jpg
    294.2 KB · Views: 1
  • photo12352.jpg
    photo12352.jpg
    303.2 KB · Views: 1
  • photo12354.jpg
    photo12354.jpg
    358.9 KB · Views: 1
  • photo12355.jpg
    photo12355.jpg
    327.3 KB · Views: 1
  • photo12356.jpg
    photo12356.jpg
    316.9 KB · Views: 1
I recently repaired a kevlar OT Canadienne. While I was patching and grinding, I added a 2 inch and then a 3 inch roll of epoxy saturated s glass on the stems. Then I painted the old gelcoat. The canoe looks pretty new for being built in 1989. The vulnerable fore and aft stems are protected and the tape is barely
noticeable.

Always a good a idea to carry some duct tape. Gorilla tape is a good update and better material for being in the water. We have paddled some pretty smashed up fiberglass canoes 40 miles to get home with a roll of duct tape and some bailing.
 
Last edited:
Gorilla Tape Skid Plates: Granted we wet-foot every landing and pay close attention however I am still amazed at how well it performed and stuck firm with the bow strip just barely beginning to "peel" back at the top. Only one layer of tape applied the stearn and 2 layers on the bow. I cut slits in the tape to help it round the contours making certain the folds layer/fold in the direction as to not go against grain/travel. Does not appear I have any damage to the gel coat. If any, it will be very minimal.

Well, they served their sacrificial purpose, and the slit application job was neatly done. I’m not sure about replacing them or adding more Gorilla tape every couple hundred miles. All of our canoes have fabric and epoxy skid plates, and even the never-again kevlar felt fuglies have lasted for years and many miles

Getting all the tape residue off to install a fabric and epoxy skid plate would not be fun, but would be once and done worth it. Dynel fabric, over bias cut fiberglass if you want to go all in, covered and compressed with peel ply. Add some graphite powder if you like the black.

Ed's Canoe Contoured Seats. I am soooooo glad to have spent the $ to get these seats as I have never been so comfortable in a canoe. Absolutely zero butt-fatigue which is a first for me.

As far as installation goes...it was not easy. For whatever reason, the seat hanger spacing on this canoe varied for each seat side. Since I did not want to drill additional holes in the gunwales (so I can quickly swap seats) I asked Ed's not to drill the profiled hangers, which I ordered as well; thinking I could drill them out myself with varying hole centers. Screwed up the first attempt so I put the original peg hangers back and mounted seats to them. Some pegs sit a bit cock-eyed due to the original build (varying hole distances) but they performed rock-solid.

I am also a huge fan of Ed’s Contour seats, especially the wide contour seat for my fat arse, enough to have replaced perfectly sound flat bench seats in some canoes.

Even with a drill press, vice and exact locations/spacing marked on the drops through the inwale holes, getting seat drops drilled is tricky, especially truss drops.

If you decide to replace the old OEM pegs with something simple, but much sturdier and easy to DIY, just take a piece of dimensional lumber, ripped to the desired drop depth, and cut out some wedges \_/. Wide part seats under the inwale, narrow seat-frame-sized end at the bottom.

Cut four simple wedges, the last angle cut starts the next. Maybe cut 5 or 6 wedges while you are at it to have some oops misdrilled spares. Mark the hole locations through the inwales and drill. I drill 1/32 larger than the hardware, so I can swab varnish inside the holes, and have a little slop to accommodate oddly angled hardware.

Test fit them, take them back out and lay on a couple coats of spar urethane. Done, much sturdier than peg drops, especially at that length, and not unattractive.

Nose Cone: In an earlier post I was deliberating on how to protect the nose as often times I rest it on the ground/rocks when shouldering the boat.With this boat being heavy, this method of shouldering was used often. Clear, vinyl tubing being the answer for me as the existing gunwale fasteners/screws were used so no additional holes/modifications were needed.

Those are some really attractive and well fitted outwales at the stem; I’d hate to grind them up against the ground in that style shouldering. I do that type lift with our vinyl decked canoes, and the deck plate tips show the scars.

I used a piece of clear Tygon tubing as painter loop grab handles on one canoe. With a spray cover installed and the stem carry thwart inaccessible I needed something more hand kindly than just a rope loop to grab.

Worked great as a comfy hand hold, except it grew fugly with mold and bacteria inside the tubing. The transparency of the tubing may have added to the microbial growth; I now use opaque tubing; at least I don’t want to vomit when I see the mold spores.

38957820915_785564df90_c.jpg
P1220469 by Mike McCrea, on Flickr

That kind of bacterial growth would not be good for wood. Not sure how much different a metal deck cap would be, although I believe copper and brass both have antimicrobial properties.

EDIT: dang, I re-read this and didn’t mean to sound critical, just offer some thoughts and ideas. I really want to hear about big water/twisty water, the Astro van racks and slugs rolled up in wet tents.
 
Last edited:
Thanks all for the interest, comments and suggestions thus far. I will share more this weekend. Also should comment on my new CCS food pack. It is so freag'n comfortable I'm trying to talk my wife into selling our refrigerator. Maybe then we can get two...more...possibly one in orange...
 
Handling

Ive read about how the MR shallow V hulls are (supposedly) slightly twitchy with marginal primary stability. I'm no pro but I say...baaaaaah. I took out a very tall first-timer for a couple test floats (with gear and without) and we rocked it as far as seemed reasonable and neither of us had any sense of alarm. Trimming it out was necessary as he/Matthew/bowman is pushing 30 lbs heaver than I meaning gear pack in front, food pack at my feet and fishing gear etc. pack in the stern behind me.

NOTE: I should've swapped the gear and food packs earlier in the trip but didn't think of it till day 8 as obviously the food pack had lightened considerably. I finally did notice we were ploughing a bit.

We paddled a number of big lakes...Kahshahpiwi, Agnes, Kawnipi, Batchewung, Nym. Definite wind...Definite whitecaps...Definite rollers at times.

Here is the cool thing...On one of the lakes (Sturgeon perhaps) the rear quartering wind was so strong that I could not keep us on target to skirt whichever side of the island I was aiming for so instead of turning us broadside into the rollers to correct we were pushed into the windiest part of the lake. Precisely what I was wanting to avoid...The cool part being the boat was so responsive that when I saw over my shoulder concerningly big rollers closing in on us I could immidiately rudder us this way or that with little effort. I've been turned broadside by gusts in big water before in other boats. This hull has about 1" less freeboard as others I've paddled and imagine this has quite a bit to do with it as well being less surface area for the wind to catch.

I'll add a couple more thoughts on handling later when my wife brings the computer back as it has taken me 2 hours to tap, tap, tap, this out on my stupid pad...

PEACE
 
[No message]
 

Attachments

  • photo12394.jpg
    photo12394.jpg
    716.5 KB · Views: 0
Thanks for sharing Micah. It's fun to see your creative use of the clear tubing. I use black electrical tape as a little edge protection on my carbon fiber paddles and might try upgrading to gorilla tape....do you think that tape is tougher than electrical tape or is it just stickier?
 
Thanks Gumpus. Gorilla tape is the "heartiest" & thickest, stickiest tape I have come across. I began using it a couple years ago at my job where I had taped down the edges of a number of carpet runners in a school. Two years of foot traffic along with all the dirt and grime that goes with it and it still looks fresh. No edges pealing up thus far. Tape for a skid plate is definitely a Red-Green fix (for those of you that have seen that program) however I ran out of time with all the other mods that were done this summer. Maybe this winter will tackle real ones.

As for the nose cone, Mike's point is taken on it contributing to rot as some sand and soil are currently trapped inside. Therefore it will be removed when not in "tripping" mode.

Mike: Thanks for the suggestions on seat drops. I will look into that as well as one other possibility which is aluminum shaped into a channel. Have seen this some place before but can't remember on which boats.

WINDY CONDITION HANDLING CONTINUED...
To close out my thoughts on this boat in windy conditions, I should mention that we were stuck for 1.5 days at the end of our trip being the winds were just too strong for me to feel comfortable. I don't have my map and trip notes in front of me but believe we were hunkered down at Little Batch or Batch Bay on a small point. With binoculars I could see very nasty swells blasting across the larger part of the lake so just sat tight. During that time we saw 2 groups go through but I can only imagine they "needed" to be out as permits were expiring or could not find open sites elsewhere being we were getting near the entry point. We watched with concern as both groups zig-zagged to the nearest island and lord only knows what happened after they rounded the corner. After going on by us, one group (3 guys) immediately got hung up on a rock and the other (appeared novice) stopped for about an hour at the island either trying to carve out a site or washing out their filled shorts. When we got to the ranger station we learned one soloist was 2 days lost, and at the local cafe happened across a couple we came across earlier in the woods that needed to share their site the night prior to a group that lost 2 canoes in the storm. Yikes...

Lunch break is over...got to run...Will continue with twisty-water handling soon.

Thanks All
 
TWISTY WATER HANDLING:
We paddled a number of small creeks however no rivers and for the most part no rapids as we are not much into that sort of thing. Definitely not set up for it and Quetico doesn't offer much. I was quite conscious of how the Sunrunner performed compared to prior voyages in other boats and would have to say it did much better. These are quite twisty, shallow waters (photo shows a bit of an indication) often with beaver dams so lots of switchbacks to navigate through the reeds. I don't remember but once needing to back out of a clump of bog or swamp grass which generally is the case in not being able to make a sharp corner.

CHOSEN VALLEY PORTAGE PADS:
As with the Ed's Canoe seats, these were a must-have. In preparing for this trip I portaged this thing around the yard a number of times and knew right away the stock yoke was not feasible. Tried making a couple different pads and even outfitted my life jacket with pads however when one considers a 6-portage day with a couple of them in the 600-800 meter range I was finding it just too uncomfortable. They come in both clamp-on and bolt-on and I chose the bolt-on which was inadvertently smart as they needed to be removed to fit atop my vehicle. These things work fantastic as I gave them the first test with the first portage being 830m connecting Nym to Batchewaung. I was physically fresh at the time and was able to make the entire portage without stopping. Definitely wanted to get the boat off my back 300M out from the end however! In doing a bit of research, the most important thing I've learned is to make certain the pads are positioned on the bony, flat parts of your shoulders and off your neck/trap muscles to avoid headaches. No doubt this topic has been discussed in prior posts so nothing new. Just new to me as I am most used to the Spring Creek yoke where it is not as much of an issue.

2 modifications are needed however. One being I plan to install a spacer to raise them up about 3/4" as sometimes my head would bonk the floor of the hull. This being a relatively shallow boat. The other being a design modification as the central fastener/bolt that connects the clamp to the yoke frame comes loose so the pad/frame then slides back-&-forth. Hard to explain without a photo but my camera is not synching with my computer as of the moment...will send photo tomorrow. My belief is the washer is just too thin (cheap, junk hardware these days) so it deforms and fails to hold tension. And...if the bolt were affixed/welded to the clamp then a wing nut could be used on top so 2+ inches of side-to-side travel (about 1" per pad) could be achieved in the field without any tools. This could accommodate different size porteurs. Tomorrow's photo should make more sense.

OTHER PORTAGE NOTES:
As mentioned in the original post, it was certainly nice to have a younger, stronger, taller, paddling partner as we had a number of portages that were the steepest I've traversed. In looking at my trip notes the 290m into Keats and the 730m into Baird were extremely steep. The photo does not do them justice but I know if I were to have gotten 1/2 way up or down these slopes to encounter a 2' or more step, not so certain what I would've done as dismounting the boat on a steep, rocky, slope with little energy left would've been sketchy. No way I could've made the step myself with 70lbs of canoe up top. Knee would've exploded...

More later...Good night for now...
 

Attachments

  • photo12429.jpg
    photo12429.jpg
    435.5 KB · Views: 2
  • photo12431.jpg
    photo12431.jpg
    766.7 KB · Views: 2
Thanks for that very interesting trip report and boat review.

we had a number of portages that were the steepest I've traversed. . . . The photo does not do them justice but I know if I were to have gotten 1/2 way up or down these slopes to encounter a 2' or more step, not so certain what I would've done as dismounting the boat on a steep, rocky, slope with little energy left would've been sketchy. No way I could've made the step myself with 70lbs of canoe up top. Knee would've exploded...

Your description and picture reminded my of the many take-out and other "portages" up cliff-like faces when I was a whitewater boater in the days of yore. That was the benefit of Royalex -- you would just drag the hulls right up and over the rocks with ropes. If I were solo tripping today, and Hafþór Júlíus Björnsson wasn't around to help, I'd do the same drag with my composite tripping boat. Better to scratch up the old tub than break my old back.
 
Awesome......I haven't went over 5 hours yet. (really new here)
I did find the Gorilla Tape skid plate trick already. It works. :)

Welcome to the site Oldtyme! Loads of info and experienced folk willing to help.:)
 
Photo attached of my own personal, German Hafþór...

PORTAGE PADS CONT..
See photo in that central bolt (actually countersink, philips cap screw) loosened up so tubular pad framework shifted. Picture the top, nylock nut being a wing nut.
 

Attachments

  • photo12447.jpg
    photo12447.jpg
    722.1 KB · Views: 3
  • photo12448.jpg
    photo12448.jpg
    288.6 KB · Views: 3
Last edited:
PADDLING EFFICIENCY vs PORTAGING INEFFICIENCY...(the question at the heart of this trip):
Q:
Should I keep traveling with a fiberglass boat (~70 lbs) or get something Kevlar. The big question in my head..."With the boat being heavy (anticipated slower portaging) can we make up that lost time in the water with this stiff, sleek, hull design."
A: I don't have any idea as there are simply too many variables. Definitely nothing scientific about a canoe trip.

Gut feelings...
  • I do believe we made up time in the water as we logged both a 28km day and a 29.5km day which was a good bit longer than prior trip daily bests keeping in mind we do not consciously race across the landscape. We got on the water each (dry) morning at 9:00 and were generally at camp around 5:30. This leaves room for morning tea and evening hot meals.
  • It does seem to me we crossed some bigger waters in short order as we often found ourselves saying..."That went quick"
  • I'm not so certain we spent any additional time portaging. Just additional energy. I timed a couple longer portages and they seemed to fall right in step with previous trips. There is the possibility we were forced along faster through the longer portages in an effort to get the heavy sucker off our backs.
  • Without my own personal Hafþór along ;), some steep portages may be impossible without dragging as Glenn shared. This needs to be taken into consideration when planning trips as my son has plans to trade his dad off for a friend on his next voyage. :(:(:(
I've no doubt over-analyzed this point but if anyone has further insight, please share. As mentioned in the first post, the plan is to keep voyaging with this fiberglass roadster.
 

Attachments

  • photo12457.jpg
    photo12457.jpg
    502.7 KB · Views: 2
  • photo12458.jpg
    photo12458.jpg
    304 KB · Views: 2
I think a faster boat can help make up time for slower portages. That being said, when I was in good shape my strategy was the heavier or more uncomfortable the load the faster I went. Make time on the downhills and conserve energy on the uphills.
 
HULL FLOOR PAINT REVIEW:
Mistakenly mentioned earlier this paint was purchased at Menards but instead it came from Mills Fleet Farm. Made by Van Sickle Paint Mfg. Co. In my opinion it held up superb which I did not expect. Nice matte finish to reduce glare, goes on easy, cheap etc. etc. The only sign of wear (minor) is at the bow where the paddler's size 16 red Nike's shuffled around for ~100 miles. Color options are limited and a tad weird for "CAMO" colors but...oh well...

CANOE RACK SLING THING (Rev ?):
This was referred to in earlier post (which I don't know how to reference/link). Ultimately I needed to move on to Rev B, or C, or D with this concept as the initial contraption was both difficult to roll around the shop floor/garage/driveway and it was super-difficult to load/unload the boat from.

RECENT MODS...
  1. Installed 2x4 framework to link the fore cart to the aft cart as it proved impossible to push/pull the boat around without.
  2. Added all sorts of hangers/hooks to the new framework so all tripping gear could be rolled out of the shop and into the driveway for loading.
  3. Installed hinges on the 2x4 hanger uprights for two reasons...One being is I was having much trouble lifting the boat up and over these uprights. The other being there was often an interference issue (hull getting pinched between) when rolling the boat over (upright-to-upside down & vice versa). Now the uprights simply hinge out of the way.
  4. Drilled additional holes in 2x4 framework so I can quickly adjust the distance between the 2 carts for a potential different-sized canoe.
  5. Added pads (3/4" water line insulation) to the 2x4 frame cross-members. Done simply as a precaution when loading as to prevent hull damage when loading.
Definitely no brilliance here, just "farmer engineering" on the cheap.
 

Attachments

  • photo12459.jpg
    photo12459.jpg
    291.2 KB · Views: 2
  • photo12460.jpg
    photo12460.jpg
    264.2 KB · Views: 2
  • photo12461.jpg
    photo12461.jpg
    387.9 KB · Views: 2
  • photo12462.jpg
    photo12462.jpg
    765.4 KB · Views: 2
  • photo12463.jpg
    photo12463.jpg
    431.4 KB · Views: 2
  • photo12464.jpg
    photo12464.jpg
    396 KB · Views: 2
  • photo12465.jpg
    photo12465.jpg
    256.1 KB · Views: 2
  • photo12466.jpg
    photo12466.jpg
    308.8 KB · Views: 2
  • photo12467.jpg
    photo12467.jpg
    354.3 KB · Views: 2
  • photo12468.jpg
    photo12468.jpg
    301.7 KB · Views: 2
Back
Top