• Happy "Killer Rabbit" Attacks President Carter in His Paddle Boat (1979)! 🚣🏼‍♂️🐇

NorthWind blowing in Fl...

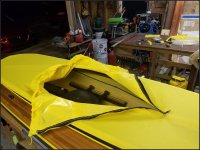
Mark … I also built the woodstrip JEM North Wind plans, actually built two of them. I recommend you do your canoe weight calculations before committing to a layup. I built 2 because the first version came in over 70 lbs. The deck does add weight. First one was 1/4" cedar strips hull and deck, 6oz fiberglass inside and out hull and deck, a football of 6oz S-glass on hull bottom, plus S-glass skids, No fill coat on inside. Cockpit coaming 7/16" douglas fir with ash splints for the rim. Gun rack style seat bracket with Ed's extreme duty web seat. At my age it was a struggle to lift the boat after a paddle. So I use stern wheels to cart it up the boat launch.

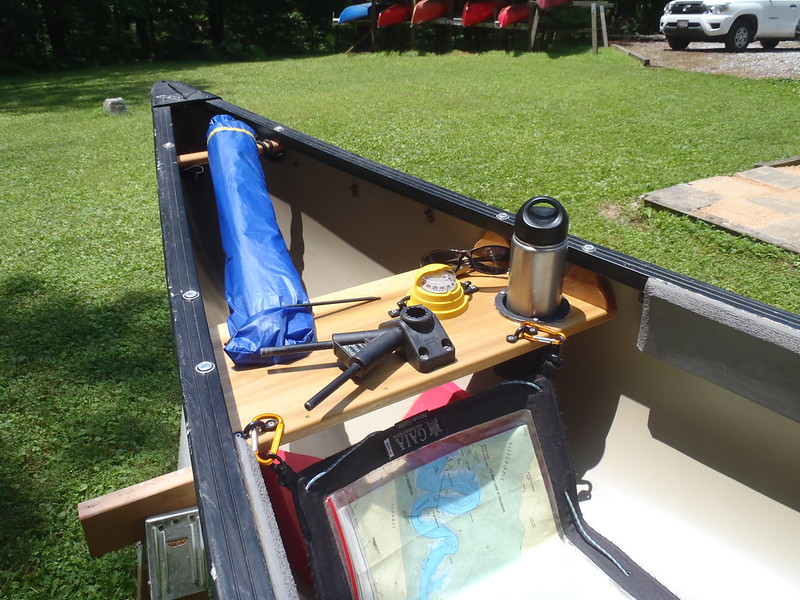
I sold the first one and immediately started 2nd version which came in at 61 lbs including rudder. Much better! I used variable thickness of cedar woodstrips, 1/4" below waterline, graduating to 3/16" on the deck, mostly from strips leftover from previous builds. Deck layup is 4oz fiberglass inside and out. The hull is still 1/4" cedar with 6oz E-glass plus football on outside, S-glass only for skids, and inner hull is 6oz E-glass in center and 4oz on ends starting about the end of cockpit. No inner fill coat. Cockpit coaming 3/8" mahogany with a carbon rim (which I molded from the 1st build). Same seat design as the 1st version. My rudder gudgeon is the one from Duckworks for pointed sterns which I had to bend the top piece to get the angle right, it is nice and solid. I added TruCourse rudder and foot controls which is good enough. The rudder, gudgeon and cables add 3 pounds but is worth it.

The canoe handles very fine and is plenty stable. It is an excellent design. But for my recent BWCAW solo trip I left this boat at home and instead took my Kevlar solo canoe which is 20 pounds lighter.

Larry
 
Hi Larry, thanks for your thoughts on materials and methods. Im interested in knowing more about how you did the coaming and seat on your boats. I'll probably do the seat hanger like a Kruger sea wind. I am building mine a bit heavy, similar to Deerflys in terms of layup, but without the carbon. I have other lightweight boats for different types of trips, so weight will follow in priority to strength and function for this build.

Mark
 
its been a while, but back to tinkering with a few things I never closed off on.

First is the spray skirt, after much angst and a lot more procrastination I decided to just evolve my rain cover, which is discussed earlier in the build. I'll make another rain cover out of a lighter fabric like 70D, maybe in another year or two...

It was hard to do but once I started there was no turning back. Once the tube was done and I tested getting in and out a few times it was pretty obvious I didn't need the zippers to get out, I needed them more to get in. So instead of two zippers like I planned initially, I decided one down the center was enough and it is.
20180429_162537-1280-1024.jpg20200216_120605-1280-1024.jpg20200216_190038-1280-1024.jpg20200217_194704-1280-1024.jpg20200217_195319-1280-1024.jpg

The next thing is a removable thwart/gadget bar thingy, also contemplated earlier in the build, but finally started a pine prototype. There's several ideas going on here. Obvious use is to mount a compass and GPS within easy sight and reach and also go-pro type camera and mounts. I can also add a number of eyelets to leash my map bag, paddle or anything I might need relatively quick access to and not lose underway.

20200226_200629-1280-1024.jpg20200226_200604-1280-1024.jpg20200226_200655-1280-1024.jpg20200226_200616-1280-1024.jpg20200226_200023-1280-1024.jpg20200226_200145-1280-1024.jpg20200226_200721-1280-1024.jpg

Another use was to secure my kayak paddle with float bags as a stabilizer for sleeping/resting en route or to aide in self recovery in sloppy conditions. Since I planned and still do, to do the EC being able to sleep almost anywhere along the way simplifies things, esp getting through the Everglades segment without having to plan all out all the camping arrangements with the park service. I can cat nap my way through, stop at a ground site or chickee long enough to stretch etc and keep going. This is also important to me closer to home on the Big Bend paddling trail along the gulf on Mexico where I may need to make an unplanned break to protected water or hostile shoreline and stay there until conditions improve. Having the mini aka/ama thing going on will make it a little easier to relax in otherwise crapty circumstances.

After some water time I'll know exactly where I want it and will install threaded inserts into the combing, which will eliminate the external clamps and any variability in alignment etc. Then I'll fabricate a more aesthetic looking contraption to go along with existing scheme and bling and put all the junk back on it.

Also working on epoxying some eyelets on the inside for lashing gear. Came up with a novel idea to make the eyelets. I didn't photograph the process from start to finish, but if you look at the pictures I do have you can see what I did more or less. I started by putting mold release wax on a glass panel. Laid a couple layers of 6" carbon tape bout 10-12" long. I then laid a 5/16 ID carbon tube longways down the center. Then mixed up some chopped carbon and cabosil putty to fair the sides. Laid several more layers of 6" carbon tape over the top and one 4oz S glass to sand and fair a little without getting into the carbon fiber. Once the piece cured I squared up the edges on my table saw then chopped to width on my miter saw. Should be plenty of glue surface for each piece.

20180530_230357-1280-1024.jpg20180531_065159-1280-1024.jpg
 

Attachments

  • 20200217_194734-1280-1024.jpg
    20200217_194734-1280-1024.jpg
    278.6 KB · Views: 6
Nice work on the spray skirt Deerfly. Are you going to add any snaps? The cockpit is big enough that I think my spray skirt will implode with a decent sized wave. Those tie down ends look great. Mine are much less elegant, just a loop of webbing epoxied and glassed to the hull.

Mark
 
Trying to avoid snaps if I can help it, but they may be unavoidable. Still experimenting, which was part of the impetus for the gadget bar, which will clamp the front half down pretty tight. If I make a slightly smaller bar for behind the seat (would be outfitted with post to accept 360 degree light for night travel or stopped/anchored in open water) that would add substantial friction in two of the most vulnerable places.

The skirt currently has 1/4" bungee under near maximum tension (just about enough stretch to get cover over the combing lip) along with 2.2mm dyneema that I cross, pull tight as I can and clam cleat at the back for addition tension.
20200302_122350-1280-1024.jpg

I also coated the inside lip area of the skirt that comes in contact with the combing with seam sealer to make the fabric less slippery, which actually helped quite a bit, so much so that I'm going to re-coat and expand the area a little more.

I was out pig hunting this weekend and haven't been working on it, but will do some more testing this week or next weekend and update the thread.
 
still tinkering around with the gadget bar, spray skirt and internal gear tie down points etc.

Here's a few pic's of where I epoxied those eyelet thingy's I made above to the inside of the hull. Lots of glue surface on each, I think it will take a hammer and chisel to knock them off. I thought about laying some 1" glass tape over the feet, but I don't think I'll need to. I then ran 1/4" bungee through them along each side and then weaved 32mm stainless steel snap/rings in each one. So I can attach bungee cords or tie paracord anywhere along the side or directly ring to ring either zig zaged or straight across. I also attached a little bungee trapeze to the rings with the mini carabiners to see how that might work. Its hard to see but the NRS float bag at each end of the canoe are secured to the farthest SS rings with a mini caribiner on each side of the hull too.

20200311_224202-1280-1024.jpg20200311_224211-1280-1024.jpg20200311_224709-1280-1024.jpg20200311_225800-1280-1024.jpg20200311_225635-1280-1024.jpg20200311_225454-1280-1024.jpg

The gadget bar, albeit a bit crowded as I experiment with it, works really well at making the spray skirt nearly impossible to knock off the combing at the nose section. The distance I have it clamped in is just about right to see and reach things too. I could see doing a trip where the weather might be iffy enough to have the skirt clamped in at the front and just tucked up under the bow to save a few minutes for a full deployment. I can deploy it from within the cockpit while on the ground and might be able to do it while floating as well. Will have to try it on the next trip.

20200314_185458-1280-1024.jpg

Lastly I managed to get out for a timed 5 mile paddle late Sunday afternoon on the Withlacoochee River. I had a fly rod with me, but wasn't really out there to fish, was mostly stretching the muscles and trying to figure out how far out of shape I am and also testing the gadget bar mounted go-pro knock off camera. Ended up running over all sort of bass near the mouth of the little airboat trail I came out on. Paddled mostly non stop, not hard but steady. My moving average was 2.7mph and peak was 4.4mph. Felt good to get out there.

20200315_172120-1280-1024.jpg

 
still tinkering around with the gadget bar, spray skirt and internal gear tie down points etc.


The gadget bar, albeit a bit crowded as I experiment with it, works really well at making the spray skirt nearly impossible to knock off the combing at the nose section. The distance I have it clamped in is just about right to see and reach things too. I could see doing a trip where the weather might be iffy enough to have the skirt clamped in at the front and just tucked up under the bow to save a few minutes for a full deployment. I can deploy it from within the cockpit while on the ground and might be able to do it while floating as well. Will have to try it on the next trip.

Deerfly, I like those DIY eyelets, very clever.

We have gadget bars (I call them utility thwarts) on every decked canoe and every open tripping canoe. Some of the slender or thwart-ish shaped ones became overcrowded.

P2160528 by Mike McCrea, on Flickr

Even without electronics I wanted a wider utility thwart, and settled on 5 ½” wide as being spacious enough in our solo boats.

P2240011 by Mike McCrea, on Flickr

A bit wider still in the bow of a tandem, not a lot of thwart length up there.

P7140005 by Mike McCrea, on Flickr

I have a couple of those Scotty paddle clips and didn’t much like them for paddle keepers, they seemed kinda harsh on the shaft. Never thought about using two of them across the utility thwart for a paddle float reentry or outriggers.

I am liking all the outfitting touches on your Northwind, those little bits combine for a lot of safety and comfort.
 
good feedback as usual Mike, thx.

Utility thwart is more noble and purposeful sounding than gadget bar, I'll have to remember that. :)

I have also figured 5"-5.5" to be about the right width too. The test piece is 4" and its not quite enough, but I like what it does for sure and being able to quickly remove it is nice too.
 
Utility thwart is more noble and purposeful sounding than gadget bar, I'll have to remember that. :)

I have also figured 5"-5.5" to be about the right width too. The test piece is 4" and its not quite enough, but I like what it does for sure and being able to quickly remove it is nice too.

One of the guys working atop the jetboat for a shuttle up the Colorado called down to his helper, requesting that my Penobscot be passed up next “Ok, gimme the Inspector Gadget Canoe”. heck, he’d never even seen it fully dressed with spray covers, sail and back band, much less with fully festooned utility thwart.

P2160527 by Mike McCrea, on Flickr

His helper knew exactly which canoe he meant and I wore it like a badge of honor.

The utility thwarts came about for me because I needed a wider thwart, within lean-forward reach, to attach the sail’s base mount. Once I started sailing I realized that I needed an easy to read deck compass; I have a bad habit of slowly, incrementally veering off my chosen point of sail, dazedly unnoticed until the sail begins luffing.

In open boats with partial spray covers there isn’t a lot of exposed gunwale to grab when exiting the boat at an awkwardly steep or wave swept landing, so I wanted an open cleat on that thwart to affix the bow painter for instant hand grab, before I even step out of the boat. (In the decked canoes I have an open painter line cleat on the on my left side, and a closed cleat for the rudder line on my dominate right).

Pad eyes and deck hooks don’t take up much thwart space, and come in handy for various things.

With all that available on the utility thwart the thing I use the most frequently is the bungee cord. Hat on, hat off and stuffed under the cord. Gloves off, stuffed under the cord. Sunglasses, pipe and tobacco, map or notepad, etc. The little ball on the cord makes it easier to lift the bungee with gloves or cold fingers. The utility thwart evolution has continued, a short piece of drilled dowel does a better job of holding down flat things, especially one with a flattened side.

P3200673 by Mike McCrea, on Flickr

I use a single run of bungee, over/under/over the thwart, stopper knots tied off below at each end. The underneath bungee is handy for things I want kept out of the drizzle or sun. Using a single length of bungee also makes it easier to re-knot/re-tighten one end when the bungee eventually stretches out.

I really like your over-the-cover utility thwart clamp design, and will no doubt be equally handy without the spray cover in place. And probably used every time. Purposeful they are; I feel kinda lost when I get in a boat without a utility thwart.

We have a couple of clamp-ons, just in case. Those never even evolved to see compass, cleat or etc; I only used partial spray covers, so almost every hull has a utility thwart permanently installed.

PC071385 by Mike McCrea, on Flickr

Love me a utility thwart; if the Northwind’s continues to evolve further please post photos; I’m always looking for ideas.
 
Back
Top