• Happy Midnight Ride of Paul Revere (1775)! ⛪🕯️🕛🏇🏼

Freedom Solo 16'

Joined
Jul 18, 2016
Messages
989
Reaction score
575
Location
Bowmanville, Ontario
My first canoe was a Freedom Solo and I really love this boat for tripping. I toyed with the idea of selecting a different solo for this build, in the end the decision was to build a modified version and incorporate some of the "stuff" I have learned since that build.

So I am officially building now ... the first step was too tackle a few items before I get the strongback positioned and aligned (my shop is small, once this is setup, not a lot of working space left).

Items to complete before I get to stripping
- accent strip
- gunnel prep
- strip inspection
- strip book matching

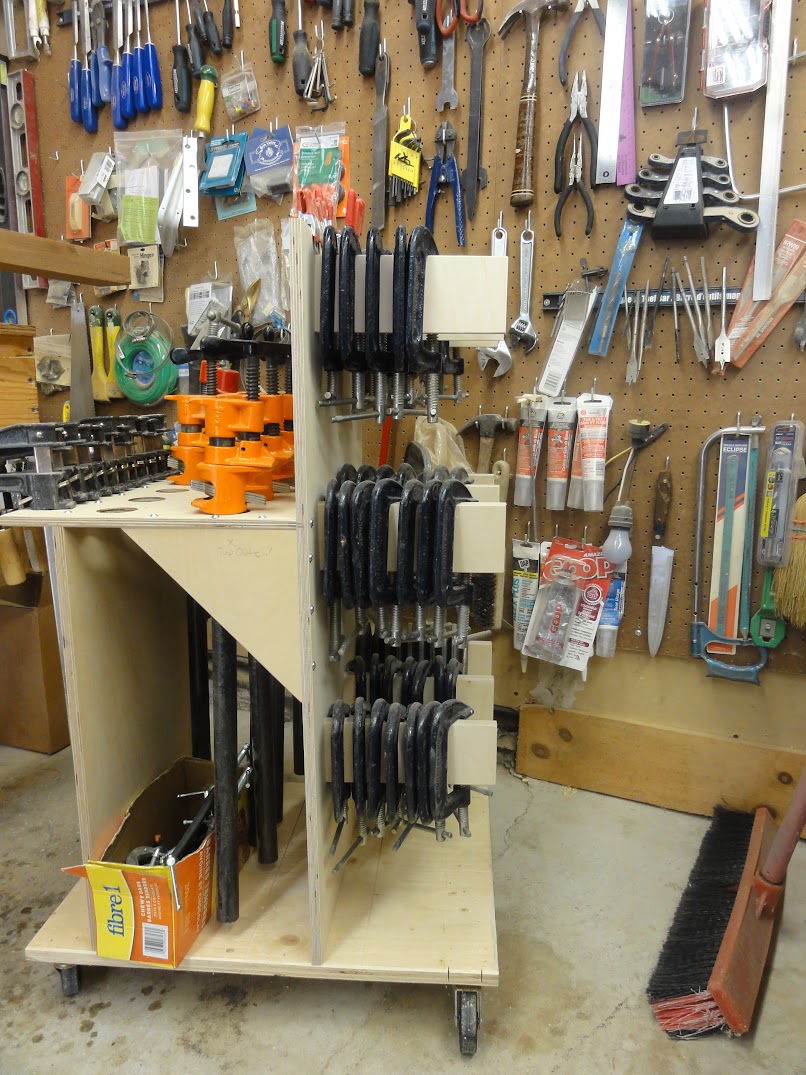
First up ... organize all the darn clamps that seem to always be a mess and in the way ...

Clamp Caddy V1:

Xyklymc5Xsf3r-mKvwF9B_ZCADM3HSYjYfjhu0md51iuWGsgA4hUw3RJa-LEE8Ad7b9Ik4ut-563s-16v71FMCycZkqEuk5T58gGufm9PPnpToPm_MDTJ7pjkfnMVX9HOFgvJ8YkCGC08vVtOamn91D_Syudhp1Er4ROM06i00KunUA94lJmJRhY5XFAljOGSkmE-UrzuY2qpZrCJUBUpI914fQatBjcdr5yfkUoJteOXLng67RDpEWJqg7gmQ8gurNIZauU_QgxphshLMGPiS8BeCa8lVB0xnLzLCNAGt0scNHNpkSSuOxImAoDgFcL860uZIakDJCdeReiLd26peID60GDUZ-Aq58TpH4Y0ZH99sxLhGO11KbkRvVAwmGO4N_ToQndxTBP3CUhMooL-y9X0z8L1AGmHKZrGprZQ0OycPhjFiXhNd49KpgiD8NLcu5gQ7LZN_98WQ7MppiTu9x1NtoS2pGJoxYfQ_NalQDLr3n7M2BP-xIGHQZDLxoWrW-PwiVTCxXVuJHogQMXXdQDoyKy81V8UEfXwaTEV0uNT6YqVKnDFrDDO7a-_YKFHmep_Is8FvisV0SGqY8Bk388Bdl5ogo2wIJ8IE5Tlg=w807-h1075-no


Accent Strip
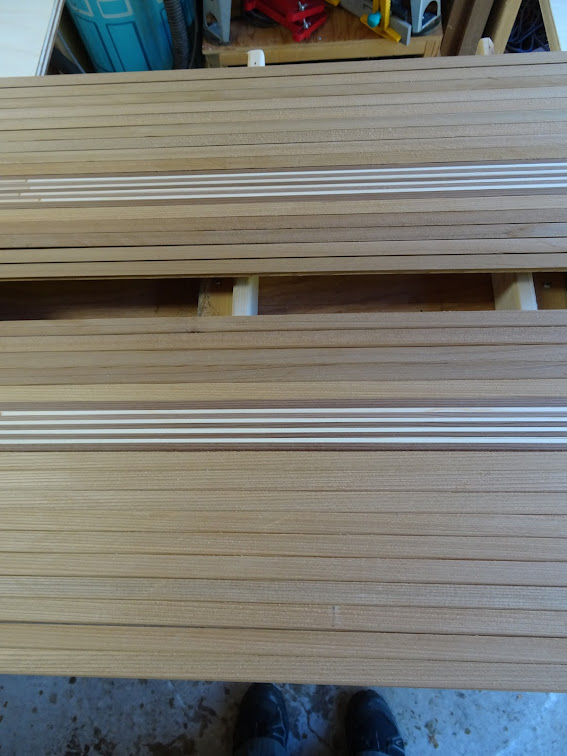
I like pin stripes as accents, not sure if this is for looks or that they can be a challenge to pull off. Anyway, that curving tumblehome section just screamed for a pin stripe section to highlight the area. Now a secondary reason is that having built this boat before, I also know that full size strips are a challenge in this area, the accent will be made up of 3/8" strips to ease the stripping.

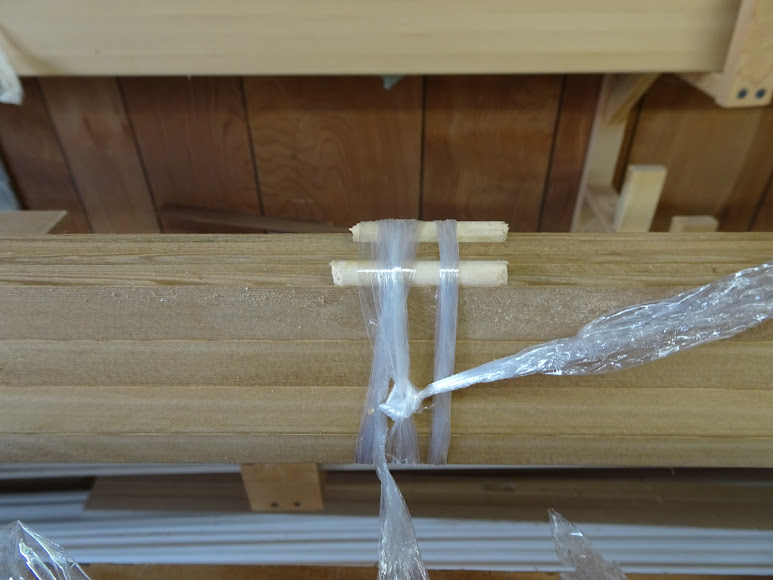
I had a photo hiccup and don't have many pics of this, the initial glue up is white cedar and a piece of dark red cedar to yield 18' lengths of 2" thick material.

QLfxcVC958ZffCNsZKSbs73loDn9uTBl8g6kouxIYaEs4qOuBpDz2Kze-dLZd1PiMoO7Sjg1KaWSU2ATP5Jma0B21FDxXfQHdtZBOdNHiAKfImQwpxjx8OuBCSQpEHgxNU-gicpgmu-qp2Wk_g5GveslFk2hm44V4bfAHdiFqLjP98ThOXOYy0UQww_egTtACcaewUsF_wByMQ_0j3xT3-BRr3TujdnspY9jqS2fAT393eIZMH3-ArcXqNVINo47Kbo5b03_lHtlw3YUizKKFF6NE8OJ7gcLsKksrf4a5Ab2VG15fZV4GzjfVaqf1AglSouT9jJ8NYSaVWYkErMJ4ZcIPQ3KVNLeAn_p-SZzGuTrXUIHbUKaNnBDj-goY1G7KRKjR2gb_gIRStPOnLp0hJnur0M_FXuhABf0zg7s9chAsQ0qOTnHEstF7_w-JtGd9FHzXnV2hlKnXf4jUogbJZGO4mfmiVV1tkCjc8wjpy2b5urMBYWZVM3CUTbPRwG8g3Hk7OQnb0ZkTXVnsMgvpYRwn49gx2pLzjU4IWwk23hbYSDtYL7TJ0aDsANQm607wM58DhSDyTxDEdz9ODPjPceYld5Fh0oDdIymMYcx3g=w807-h1075-no


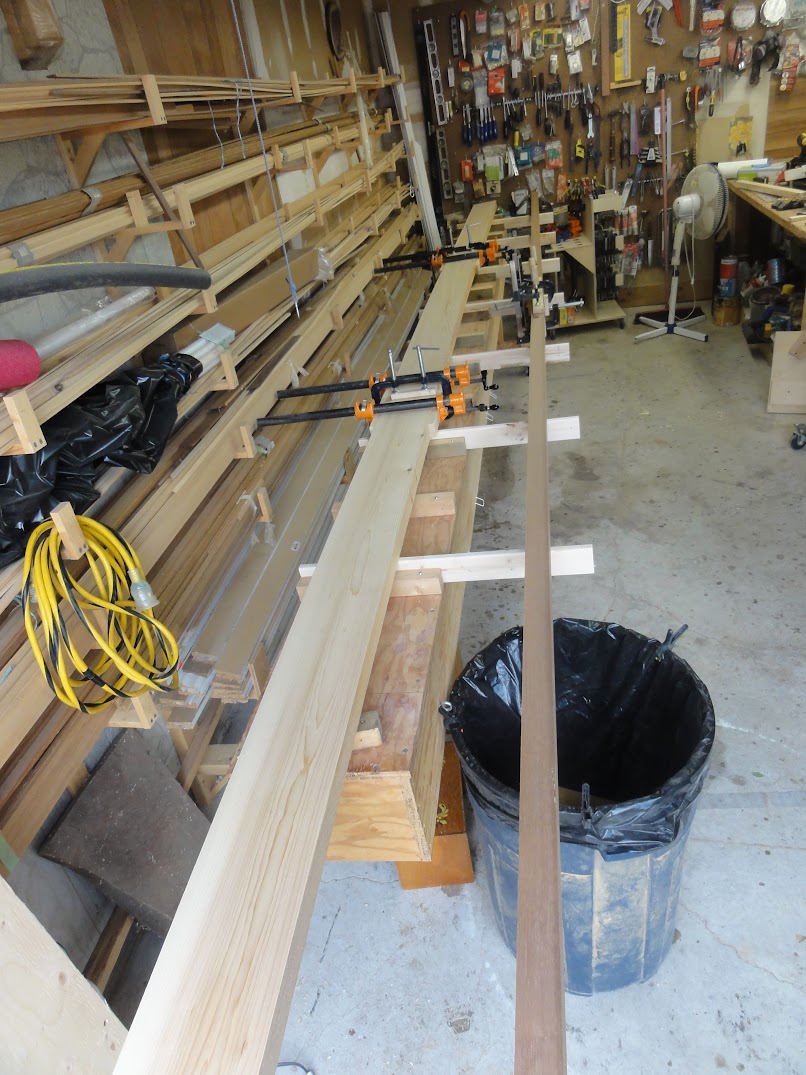
These were sawn and planed to 1/8" and 1/4" pieces (that is 1/8" x 2" x 18' and 1/4" x 2" x 18'), from these I glued up 2 types of strip blanks 1) 1/4" WRC + 1/8" NWC and 2) 1/8" NWC (top & bottom) with a WRC in the middle.

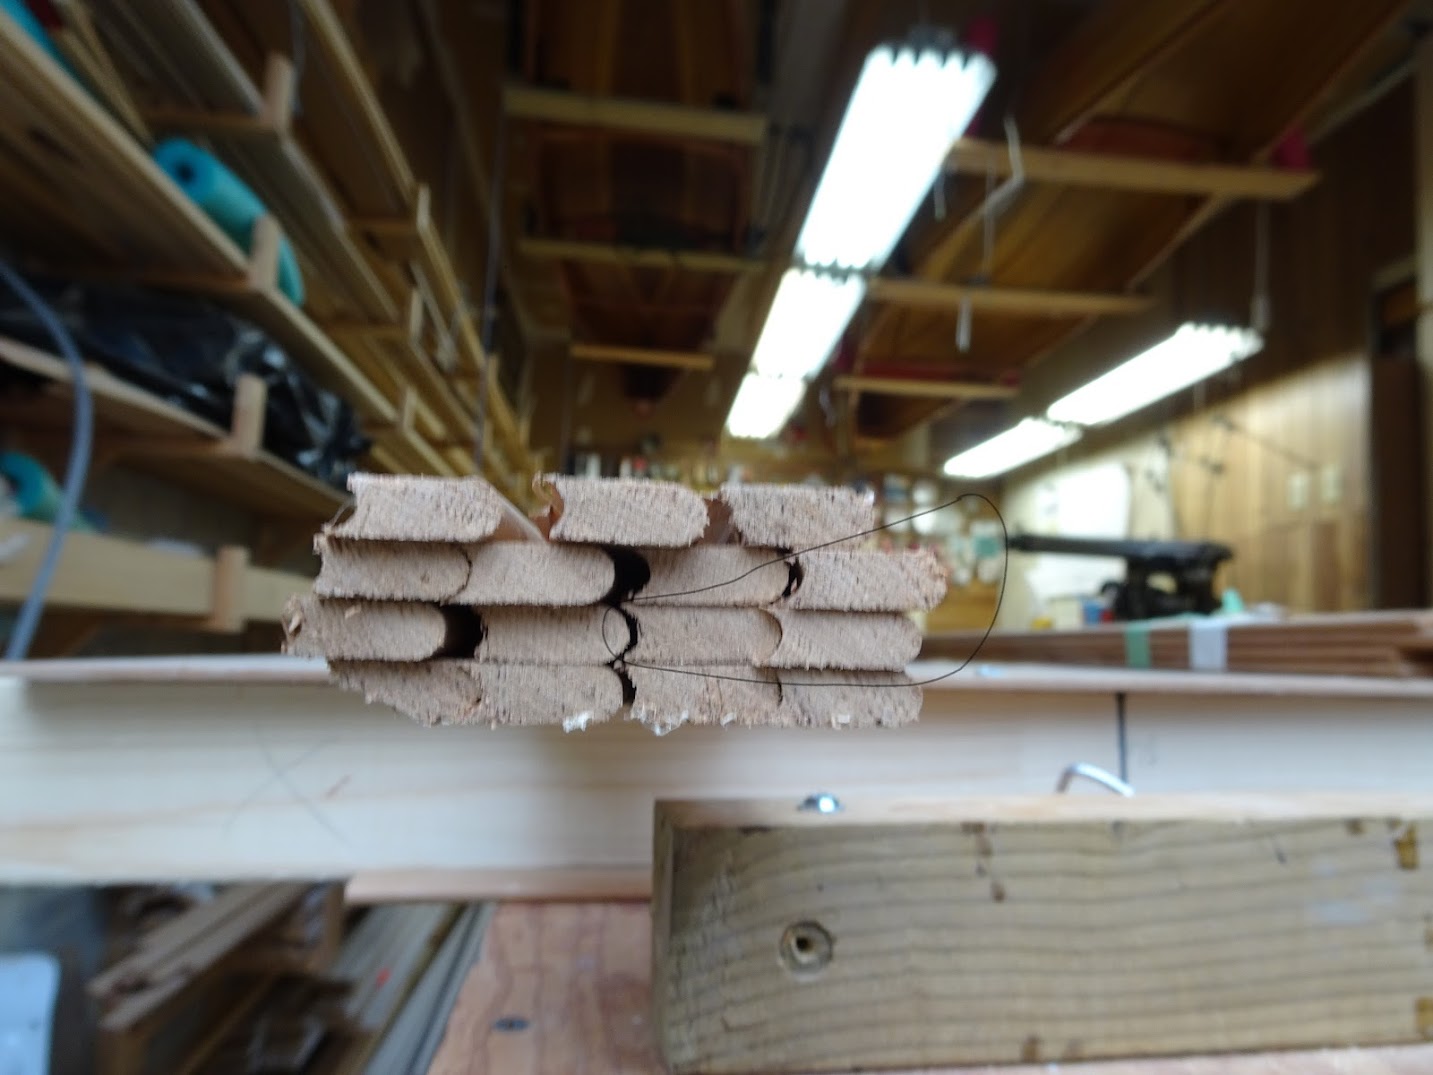
I cut/planed/coved/beaded 1/4" strips from the blanks, they go together as shown (these are just demo end cuts):

fa1it_XKKa3EPYvzjxUjm9N3i4KxrLZohvWZrr60UZme8z1ijr1owNEbQxkRGAxz-i7mZSLR7CqLjrAk8vYLJB1y7TJOBcu7Vfkq-1Mfk_n3qmebXfGORhj2g909lRkVmBuRBEjRJx8_tVrsM8dEQANGUil6MZ-JEOFol_8ZAPTlhre10hX8Y_iMPQZoexyiiuWTYznloJn0pIPulXaJne7WoqdtN5iScDwQQxqEy7yHHf3WFc5oW4pImKX1kR3K5z9p9BzbKBeGCgM8Ub2iiFIjKQftnTFygqo4dGHpI-99RL0OepjtBMh_sB2xwWYFU4QVzgzxBZhyc23oJdSL38Ezl9rLvSHDwvd_DQI5yEj6L_Za1aOzPZ6ux1RHrJa24saRgq2lQdCUcPGUHPTkXoHJchq6JGqbYmYD8yfV_zdOM8yiHMdihTQvyTwGmIUj8ff0lV3gjwTgUJ6SJYfNznckcmm1QAUpDx50jJhZGpLSMlu0xaLKRMJtNSbqxgvaucjZiBT3YSJqSThDi-wN0KCke4qM9oCLTQiOSHs_pGB9NfzFFG9_KvmNFpkRu9UFnfwXp524Ymo4VMijlR2Uc9lkg4t2O2GgxWi4jkkGOQ=w1434-h1075-no


mGvwbfmpy9Fg3Y0nnUDMVWkU08U5Ll-2WCkr3jt2Ckg3mhwlexzwY9XWoxV0RHLEstsvvrqPZun8qks36P0VmsdWupU5BATB_I5e8IsxfSmLIOEZi1nNimkS4Ga6E5IJfjiwBkGZCGRqduyihVmPJeT1_hD8lNsNylObuoH-M7IJtx9L-EI2OVrb97mtdQG-Tj0snb75gJJ-Qr_zsSpidVTDiG-O-vLBd9NYBbtlstYjZfA9oCcXlemYMFJ5FvZT6pSc6jVPngXoTiNtXwOfNrf5q4VaZc_mEQJ0pZ29px3KnWMd1Kfzs634BMXRU_j9yDj59gqrWFAXxSriudsA0UIH2pTVhHYAH6_lt0YlL8ECHmd-FBWNUzfkW3wEEkRX0AWS1gim1NbLin1qpUlUpRJ1tKrnMPG60k6TZhC7a8XN747Y3557F69omkZCSWPD4zB_5jQIRFqx7HLP0KdG7J3LzggA8PezPzGu2oWJGy_t17pKzyvp-s-I0gmES8yKoSqwIQABOSS0S7yFe0JqdD1OvvdbNbFYHnsJ8hbK1LqqSgBYa6bF3FHbNyKW-PYfytQHMFKY7KA2otWJ3NEMnu13OkJaZ6pZmC63S3kGCQ=w1434-h1075-no


ZBXaAldwinKw1Pub4TUtDnljLUm4QJcFD-m3YD15tas_M7a_Q9SkZVBsar8zUD9uo42G2SQ6ytYLyR3Kx9-U7_1cK1RXKztz8KvuSNLGqMnQO-h0QgUR0rX4CWtwjcDNzLYwwfu3G9qofzopbkekNAkbbXeTr05m_hGqTTl1kJoA4D8OROcz6Di2fXeNSMLkI4k2n3JEuPfAtuRl_CY69q9dG8yetaivON7dxZMfuTwflR35yntn06xmo4mgk7y8--lS7e0Jk5Hb6CwXKXNj2fFbFGenyrHR8FnEf3jh7AaQK-0c7zr3X3HBIEJs7ZN5oEN9GAS6bTIQ3KeoGyVPpU_Gk8-Anfakhpf54fKxsO3LbfauivnngGeKSuVxqLYvaIQE0F6wG1UObPnlo-VdfByhrSMgyycmEa74oE62JL8LAXRp_rSaYqjQ1LYcJDDjVCuJpOj87dv0P1ebEz7i9F-0y-d4YCV5bFxHeZBsVwVr_pqQg1vUbci-4NhYDMCAaTHOP60LuwqFJ-lvG8u3PgT7egcvzXcDiSH9m9zxL_zQ01HedTHZvE1lA9xuVaUR0k46OAfjHvfTLZfH7u_1ERLLQJTrb4yARegJCqectg=w1434-h1075-no


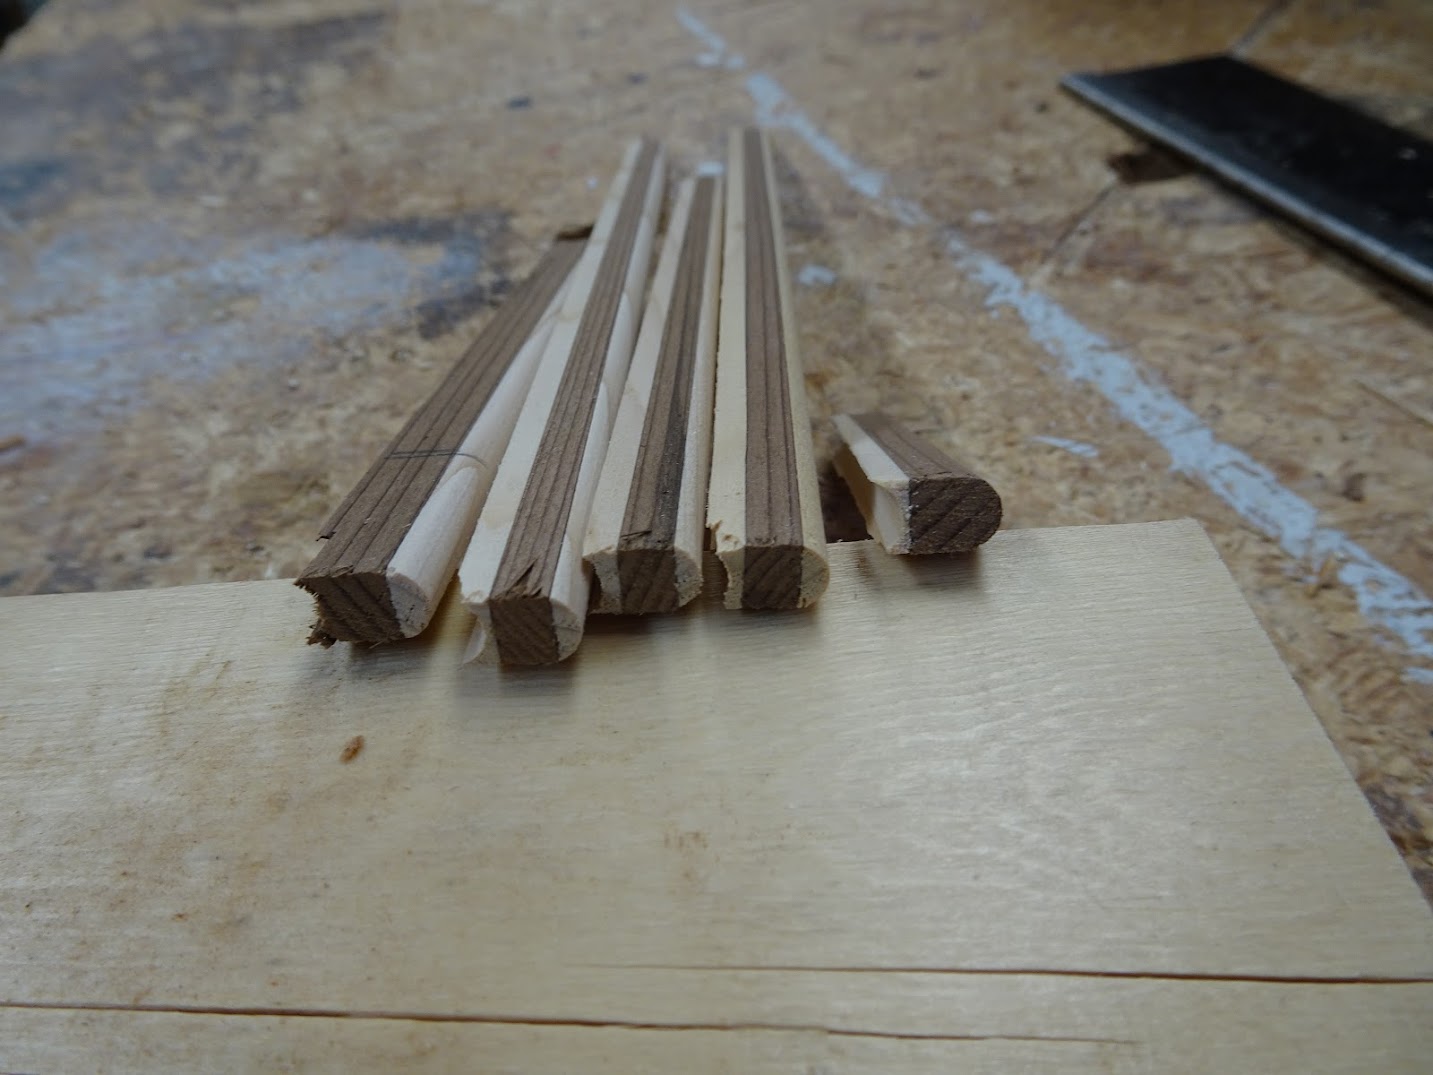
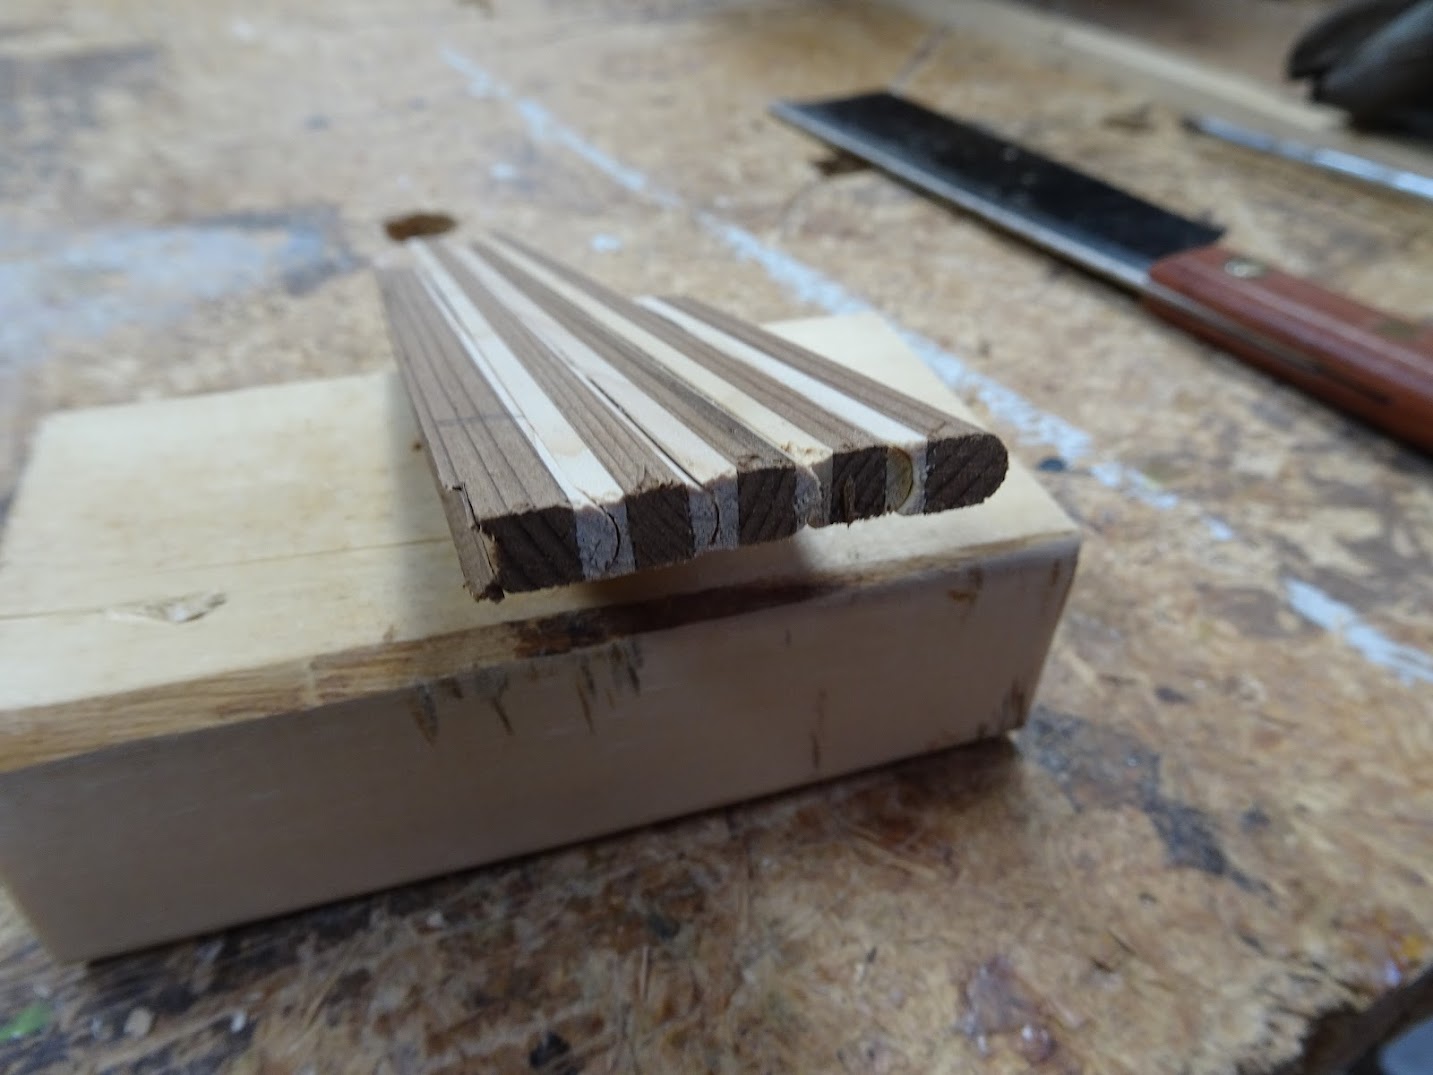
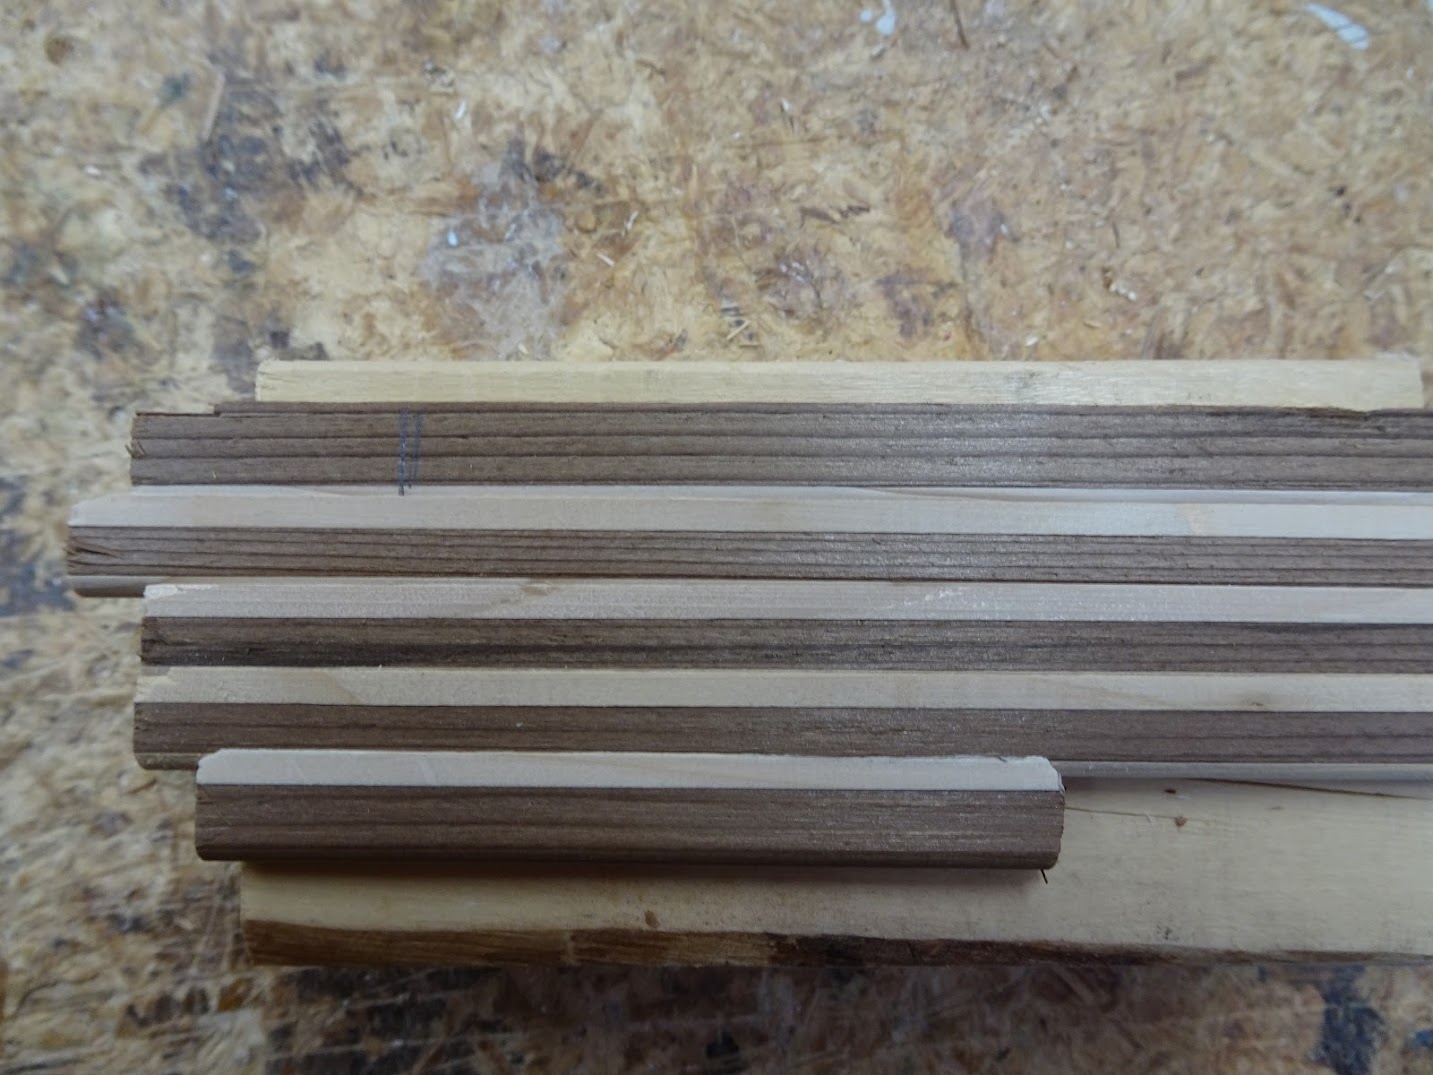
Accent strip complete ...check

On to the next task


Brian
 
Last edited:
Good, a build thread. I was running out of stuff to look at on the internet. What modifications are you planning to make?

Mark
 
Hi Mark,

I saw a Kootenay style boat ... it looked pretty cool and I thought "I can do that", so the stern and bow will be redesigned to allow that style. I will post the process I followed.

Brian
 
Glad you are building another canoe ! Looking forward to your posts Brian !
That's a lot of work for an accent strip ! I'm sure it will look great !
A 2" width strip, will be hard to bend, so location will be important. Guessing just below the knuckle joint of the tumblehome.

Aren't Strongbacks handy ? I see you are clamping up planks for strips.

I have the plans for the Freedom Solo. I TOO am interested in your modifications !

Oh ! By the way ! Your shop looks neat ! Wish I could keep mine that well organized !

Jim
 
Last edited:
Another build thread! looks like christmas came early this year. I love reading these builds and looking at the pictures that go along with them.

That accent strip should look really cool.

Thanks for sharing!
 
Hi Jim,

If something is going to live in my shop, I have to be able to make use of it, the strong back is really handy, I use it all the time, sometimes even for canoe building (lol).

The accent strip is applied as individual strips on the boat, the small size makes that knuckle more navigable.

Brian

Looking forward to seeing it ! Surprise us !
 
Hi Mark,

I saw a Kootenay style boat ... it looked pretty cool and I thought "I can do that", so the stern and bow will be redesigned to allow that style. I will post the process I followed.

Brian

So, Kootenay style like the long nose canoes? wow!
 
Next on the task list are the gunnel blanks.

I picked up a 10' length of 4/4 x 8" rough cherry at my local lumber yard. A quick plane to smooth the sides a bit, followed by marking and cutting it length wise to give me 2 pieces of ~ 3.5" x 7/8" x 10'.

I need about 17' 6" for the boat, this includes some allowance, 17' would likely work, but when it comes to stuff like this I am not big on "likely". The 2 pieces will be skarfed together, using the 30" (20'-17'6") allowance, yielding a final length if 17' 6" and a skarf ratio of just under 9:1.

This pic is the pieces ready to be epoxied together, they have been aligned and marked (you can see the pencil marks if you look carefully). When I do this kind of joint I like to use outside stringers and alignment blocks to keep it all straight.

Me8PfZ8jx4QKpuqF76Zs3GJM7gHOSP7A_ErRkHzMKHunCLDcWveAduXSHOJlckJDWfvoIx_lbS_-BkfpYYC5owkLQ5yQFzgW59FfD-XfK7bUgBChPZ0aP00vWQE_pn6yL20o33k6RZ72GpMq9AxuQNL2LckAUpS8Or6uWCfzjUJ2rRpGcN5eVgHwtRTgsUgx1N_gd7IcuJTDHfo9kzB8Y7aNr6FIbWfUbcC0WT63jj__OW9RRLxeyqR1VJj6DDdbfsbsghKkow8UrOyxqmC_TJspsfMeOJPGTL3SaKmo1t7gQbgmED-rTggykcdJZOVE7rBPO28U8i215d5Rur5VQW3gRhBMWwHjHfWwqTx-rKIQqs1VYwbULPBv7IVf_gvVXjeP7yd735jd4v8_H7P0e-e460M-eEx7XBH9F91bGyFhgldU2NcTzJCKUkfaJV_7CK5ylKKnaFi0NbdM06MvlTBJ3hVWpN9bPPEAIvzua-GztULJZyabxMbKTweinxz-vvPeAm4rRfoudQbXG2Ty_-vJAK6iS2Q7CBAk28n-kHkNhPbzOPcjagoJM4oDP9X_QAqqneXwS7RnziC2_qoen4dH_wDuXSO9kyMCLROcbA=w807-h1075-no


The cut is saturated with epoxy and then I lightly butter with thickened ... in this case, it is thickened with cabosil and cherry wood dust. The clamping order is:

- the left bar clamp to lock the left piece to the stringers
- align the pencil marks
- right bar clamp to lock the right piece ... this effectively locks the piece horizontally, it can't slide left or right
- place the cut blocks and lightly C clamp them to align vertically
- center bar clamp, then left and right to close joint

iJy62d2tmAa6IhVaRLcbCtqsKGDxdhoR34PHfS0LzGjQJ8ERCTp0nix2DqOBdBKwC-6vLM9gWnWQqRSRDQJRD5oiLHD2M7IpyLFIgLdTZFUDayt0WuN5leWZchKxNsO0bzwcLWS6wFRoh9Ihd1IHO9u0LhR5YnMpV08eiBQamW6UZYXMWslfnhb3Bg883vZtOQCMMrB20cADtYWj6utmnfetDWY3M7jYWZeFA4zZzMEi05vllNIHq1OcIB02xGPPNk-HukUcQaCVPQoKQTssk6tK52w2HJIFc_gZXaa9T7XnEjMtMtSsqWwRiT1D7dK5lPqsNA6VEQX_VUROUqS4PAUAbBX-N4AA8BwE6Ce7UP48e02GxaEcLxof9KsY0pI11arR5Qks6QE93Nsm00vBeLBsH-kQXkTYBq_TYTTdSPiSxvcf9GjG_Qor-77_Zra2EdMsDNWVecQiEkctsylhCRL-Wm5r-bR_rT9jwvDtUhJLQgCl_H1vNyHbAmBesuJwVJAcxbD2RrJNp7g-jGwcAhV8rYTs8QqZpb3u4x0xx-a66hX-r8RNbgrDilUIe7tgg6BT_K6G-ynb-G20TNylFtH_WkTFJ9vYnL4RxiRFVQ=w773-h580-no


Close up of alignment marks, notice how the epoxy line shows up, that is the colouring I added and should be almost gone when a finish is applied.

Finished joint, just a little light scraping is enough for now.

Mm9FIjLXA1kPivbAMFf13vfmoRIZRTmz5ODB25RnJs4PTbfiNyB-z4cD9XpLA8PzmLzDmSoPUxf2Bk2f9d13T40Z64uLzGoTV-JW23P3vge3LGn8SpUWm8j2JgMwcjSdN--8yKKYQ8Wz2KT8Dw3zwiXQ2hOdoqVa3m-AT9loFq_SqGC98aJJtHRV-Z0YwAOx4C0nLW3o8wh_qb3-qGsFEyCIDATtB7uVlUu5Gl2ttRs0roHRTaJ84GwHq8BMu67uJFSDKUX071jEEiboTPpH4PDVnyj8703kkd3CAmjh8wnnnv5pH_71sXLvA23PxYSMyUohzQifYuC2QeR6QUVoDlUw0WichV09_RhzfzWJmPamjNDxmZD-ikVjDBnem_Dh1t34SgQSKlN2l2XRPh-slwo7vQWYD9bWCVFk1QXLypkdkRZ-LGdGWVpHhj7T4ZzjTEtR19SBBEnT5cL7oQRiJbECqlHKtbI_orJUuYZFx9R70jzsTyrhcUw7rpGQVdEbbvcNEhSa0HCBgnFl6iuBKxh6B0Lq8Lj3t20xbhjcLPxB9ExBQyvtOgRJ8N-2hI74iLimiXJudUNAqrQqR0WpGMZr-GIPEmnfvVP6MiOmSw=w1434-h1075-no


The new long length is very straight and ready to become gunnels

MAy5QZsSIgYGgMV0evywOzgnapOsTi3ONygPlEvknBGMflWZNO-zcmQwoZFaKN4MutQqTseJ_de-4opsZCwRiov4wkdF3oOo63eGXNNd-vGQzczdX5uA7lTpoizn8fFetDnvDVNLEsv3jz6aBuhRdEt6J4Mobwp_K78KL5oTT6I0h_sxUJiq_IyiEDxWe1iri4XOuF38liivbzWJI9SAU8cBH-yhL38KwecTWeMiZFpSvI7Rj_xHBi-AN5Qa5GeAb8QfcOUZj_fTOEmM2HUv9GVD1gD2-ZDC1-TBFHuyJulqreldDftF6ibI3-VkBYLHaRLZY5nStNBomvl_X9KgOmaIz189mdcTUktPEYuy6ggjFrjDCjalW5IO7B9HGGleN151s4uguKHfPg2rNGoOiEGItubp_XyR8BTsCJV6v2Bhi_3NBAZSj6RWSHmE_vG3wTtllHnlzv6qbRr1ZI8QURJ1UJ2sFqpAd7X7nRMbEl75InQISz4ZOCjN3xKDPnWZ59Wb5FMYgyYBalVEEnoI4zq9tfq0k0TVLuU0XaSb9odb7YvydeDRGBb0OzVQn7ISOkys151akNlFx_ajnEJoVt-5tWgyi6I4UUp5-MdanQ=w807-h1075-no


Using the Skillsaw method for cutting strips, it is adjusted to ~3/8" ... gunnels are born, they get a quick plane down to 11/32" and are complete awaiting installation later on.

h3a_tUlV9oXZljcXuLgvww01d2jmfe3soTH86G0qJ9jCHNGJRG1_ZNS7T7wQcwdFDs4PlTmcy7y8zqd7xqsUpDLmW8onGuN-cDnm1kFnbGej6czjrhH6NFhiHPspWPMVdSj6dKNQNUSVo4FzfY8N6oOPCORxxfVmVI3dWgpUVSE91K-qCBrY5PZh2b-S0643oBA-BqKvXEJIa9jafqPVWIeAbuCPdVuu_5qeYlNDAnbmaIjg1R2DmCy83uuNdDQwayGwlj0yWyZPSrjRMWiGFv-3We1q-2fBjtAl-MFdLSM5odYvASZ0kzYoTfFv2K571eVjlINJ-C98pMW9thL1k7Px8aZQdcM-GCiQyG23uqxdZL5cDGOn-ek3Lg9pG6NDYEczRL-0lnNDCxrIkOqra3FavDA4kbd2CcW8LceBJNXe0Ji3Pbv2-p54jPDrMski1i7Dge-HAYrjFYedePcplbEq6xjLADo3OjkTFgSybVF4LJetnr4iqLrqR4JAQ6Tof30_gK6d3z8NV2kfmkmXxJILQuStNRPyH8MgsaKgNCbpYnsBtOHy9UQpZmbVT01YkoUCNDfKord7ctqoJdNCbCA0OhptaeseRwchaOpgLg=w1434-h1075-no


Brian
 
A Kootenay style, will require form revision. Changing the stems alone, won't be enough, without making it look strange. Interested !

Jim
 
Last edited:
Mark,
It won't be anything like what a regular search shows, with the long prow. If I can find the link to the pic I am using, I will post it.

Brian
 
Jim,

We actually discussed this over on the Bear Mountain site when I first started thinking about doing this ... and yes I am prepared to change what needs to be changed.

Brian
 
Over on the Bear Mountain site, some time ago, a local builder had gone through getting the wood and making strips, but never got further. He wanted to sell off the strips, so I picked them up at a good price.

I knew transport had damaged some strips and that when I decided to use them, they would require sorting and maybe some rework. At the time I simply got them stored in my racks for the future.

Well the future is here and it's time for those strips to be used (first build I haven't made the strips).

Here I have got them out for inspection (both floor and strong back):

aUC06bLNdjJBfHjHtE4dmkFJYzyZ4KtwVAgPED2PkjTkvA8vSrwAczkuHe1lb_ZSM3t0EPRf7_luOs9Zg8rM1BRCxIBSvRtVFnMW2cq0Z2_XgxEnD6O7Bg6KdmtYu-fa0hsWY2o2tMUHI1fkWK1A3mUSNRkTKMDE1RL9p1wrUqnZSbCeMNHrU6aAGXTOUivUupbQrm5fxuKtFGav8TtmZipJAn1VcAAXmp2sUkDDH3a2EWgILyWxYaiHeZ9HMptbj1NI7MrFhFNCZBjZMeu2ekpikRgj2oXy1uTo_rCLsxac7xrMRuZ0YqqbaW3zefIt6cVyHREma8rd5uswPThNu3YkSa8zvpcz7CVlZiCaUA4jAcUhYRCQ03visdPadi5ind6fWF6MP0gpEAMjOQKg74Rx_y7gg2ASel56alEFpILfXhGfs2LrWIeXYpTafo3oXXNlQUAmo01L76R5iMTusAdtCK3C3U3jNB_HioNm_4r1uwn9VDT2qwUX-UNCH3OXuprYD4O1W6L-okXshzIyQcqJp8P03MyZVXyrB7Y0zt-_zO9-pxNGTpQvoXm97D_C7Dqk8MxRov7veAIaQWB6gfUG_JgxzdCYRigqyVpctA=w1434-h1075-no


Since I didn't make these, a careful inspection was done. There is a lot of edge damage to the coves and they seem overly thin. Careful inspection yielded something I didn't expect .. not sure if it shows up clearly in this end pic (look at the outlined area), but the cove looks to be off center slightly, plus when fitted, it looks too deep.

eW5Uu1oWEwWOmZy21aI1Ss8IBQrWcwNlfYILlMo8xMn0LdZTnlukEtK84aMwsTj9D8buq1wjHbxKyef_0enydjM9y98UsSF3dR2rGTpXkIdcXTmtkAkfEqzHSCKc6MTG6VXkYBhVntSrefrdwB1xUhs2OURETYk3wWW4bG4WspdS9KI5LIFfmK67HN5ilH77RFUwDPslW3mgwhi_szXEyK-Lz9orMT01X8ORoJcf8OygFyU9nXviFhBb4xProKCNjkqVliKi2pMSfHhX-ZLcYBeznF50DuDh9O8b6aOFTePmp9TN2PIAa1a1GbTB7gcKxHxlO_GeoUp-JoNL0JHq3W6kv7YtWML0gM8UCmob5axGkwxD94vuw6W3xAXlmEAxiGzLQfWExeGrnTpdy-vB_TM1R3oTTjGP-lhFMl1xzv3hP0eszg4XAlry7h95OkxhpP9GklAVS6zo9Jbk4aaSQVoVVePxI6JJWu_V9Y3y8rQMFh4ah4YYF-xqA5i2G1iMTFxoxKxZXKtnjUiu_aSV8RCBeVvUOSjuQ2rg9LAjGImobATnCY_THczRtiFXb5KWauCAV5e2IGhWym-l8rSfB33CKqFGAZZH1U7DKVcKww=w1434-h1075-no


The plan is to take off about 1/16" from the cove side of the strips and then re establish the cove. this will clean up the edge damage and re center the strips ... that is the plan anyway. I made up a jig for the router to do this .. I think these 3 pics should describe the process pretty well.

Underside

sgoXwUPei81nepVT9KFizz-rJFnaNrYTXw1K0312PNhakkT7NehMpUqp4IQU5jJAj3x_WkpEaRoBU_TWTTdo5CCDa3w_cUaCnNJRCyILHnmDoDwVzqN97pq-SRygWuEqaYwiBiGmWEE7DO0bGDJWTWHULkacQYg5OzsUldNGXTn2rBCW3YBIG-xNgPDarczqrR6huedx-gM_iBmWTcIK1KlWxygLp2j5NTp1VzePbGKFijKDnyB-0qQxRUWaYIVj59JZ9TMMjYZ0GQYs2r-XJJfCVyM9Gnazjqwv5-L8xnReFI1GcgazGnACTykZGmt2gvePR5wcZDLpnSd3cO8SqTq1supFtpPCmToLUmdNQrvVuDkZVlWMvEVUZuyzLZFuakJOZ7x6R5ZLJf6NoIJ4iLRGdZznlXqD1GOyWt4sHMy9b5DrIIsa_cqQT4u_US15T-BZF5WVbCUAygz-wANgJD_65sTFQ6Uc1FKyIBybosrgIrO0jBnz7_e7WS3GrqfuqjvYq5nEhRnpr--ibaOTP2A_AguUFYRqABN7-FONfOptIqPcfo2TlgbY-n8mt1I9oV1wpjP27THZNE-460UVE8t5P2aMnD9VeDesoKf14Q=w773-h580-no


Top

Nr6GOr49zQkwcH-1WdbJaYo7bAzlaUMDFMlLZ_cShHOq5-tgcnjkCiANcUx32I36kaY7OT4NIZemaWqVH4NpcWlZ_KCC6GgTmnmpv-_y-d44st-aNder2VmvnW6jqLCEVGZH4MqskJ09ZSC_wJc7owx2VZP_3Cr_VHjo2gS3Nh9iKzLyKhAM_e1QUU-SYsZJ_Oluv7SF-b_BuU4QouYyK34D2Yn6fDU3jRXcJtU1-VVyIj8rEDdPEMT68Q-eSB8ABnc0q12z06akkIiSfRmteXzJseFlQLuX1dC2L2IIyCZ7PwC5JQMzF9MW_ljCA02mtVHac97Lzz4EmDrQRzlbq1tCG_G5RXEDuRMZSf8yxShrzUmhKbG8MvOHFc8XTfLDEjzS4uAWd_SohWdmKpnIilHUoUcddzGA4SHf_fUXu4zi4pJ3yOJRS_WfBaKhimBGPqKj_TQkIehkC5pqpitsSemt5jMdA7eInGudnzMSZIgUhJtxNzslFIVatZaC6HU7fFXcoPi3dhXS-AdHXfO0_oHrXBKoFS6UPEbuXYnF34gVClsk4c6hQyQ7mayWxWGUrGT-r1lwoATwozukAxr7by5MNhqzFiNEvEtbQqDrQQ=w773-h580-no


Installed (top view)

CGyKSiJrwzT3Vodta2Q2pBSXxUKk95Vu10-c_YPktK-wbYIYRTqgISe6tuBErP0Ne0oD0lo5GmFdFQpmfbo6qPHe42Sar1Bkr-YINxgXu2HW7Q3-BaOsbDmS4JeMKOim1DNI5WKxaMkRMyCanw1-6fHN8YNXz438MAwVIschZLEiU3CfBW8SksL9oD1CrGiYlSI1BD70etpSPa89RBeQLN8HjYIzTW5Y11qCSZwYc_p9cB7Fzf8l6RuWIuoLNGssQoyLNpz1K4INEvY1EM7olhFmn4UjXXbPS5HNlTNpQOhHUDuRTV3qproH2_2JAau1Xw1IgYTOHy5eGhA_bTvbOvdlmGByyAhfKWHL9YY3kgO1jwlrDLYDEiv-ePddzAm3xq69KdoaXVZLh_SBzopvsqzYkivIq7j0jUnADGDsJpo53zC-S_Sez19ehKH-fVyOU62kfYdncru_rGpmnAbtswqWBR2L2zvBoFpjHC19Laqjo5V3l4oDz-TPhYS9yQVmPUO71VdwDFawEm-RfQiuGAR1pq-kKaZ8XC_uYT_ExWOifcUtl0JbiexUv2BFbeq0jauQ8rKI-UhlStWRuqiR6RuonngdCsp3RPQLizr0Sg=w773-h580-no


I guess it wasn't my imagination that the strips were off center, this is a pic of the "shaved" strips ... pretty clear that cove isn't in the middle.

ELZY6KYhTtz9iM9cp1x6xaqT9n7UHP0eou30NQiU0DceCGuvdOlvPc2Br5T5OtqdZhTGk7Xx9Dyh1HS6vQiCU0J3BvGIWsCg1qiDobIPOEoEiBR9sx48Kz9ui3K_3OoZJgzvLGlMNycLe09xv2fs8aSmelDYdF3XyFpN9s48_6eqszk8t49-HRHsCy3OKCOJ787swykwZKvvzlOSngc-uvOxv2O7xdt_KGhmq_fyc0X3s1PrD4FdAvsllb5aJUS9HLDOwl_uwMKOOir5TXthDPibMTAZZR51sqowxe6BlR84bYxRHHtbigcZCLxeBLpwm-Mo2JttFyapaRpdhPudQzYJpfeJgsydHMnt8Q5bFBCCSuRSUkV-q6Lik0gjoEXbpkmRU1D_vZ4aX1Q-pyuad_-XNCPdIg3qH2RMTzscDHed2-xHZk0hF2A2uoXdRSbA5E4GDK3sxyr43fdcIUtoZfdXSArp88kmONiboY__Kjnb0CZjZio5BRuQO5wg-VkYCKDt_K5gep2Yth7zR6P6sUAuWxqWcGf9rV7Z58woaBpfS19kViPGANFW40X9B-bjpPT0IFie26eiY4xh1tYwogQgynLMo5yL94gyT5Dwlg=w773-h580-no


Once all the strips were trimmed down, I setup the router to do the coving. Nothing remarkable here, so there won't be a lot of detail ... although one of my go to tips for setting up the router (found on the Guilemot site). Take a waste piece of strip, blacken it with marker ... then do your setup cuts, it really helps define the edges, here you can see the adjustment progression.

FqbGB0DQvH5KD-cqsDTRzt96PXvq15Zy18OP9uMI9aNtrqcg_fHnEgwNsSjqU9K6_WsB7ZxHQtBPncdk-WOuyUAKqz77W15HzhgCtiSMQuYGm5if9ouMdarLnqTMrCZcsQNDxBVClyCPd-gkVQr8j-bEdGOgv0nC6W99LS4qTIr05v374PD-rzhkfVUUjkoSONPZVnX57UP2pH2pcf4tfi-nS-v-o0aNdDJgd8FJfBbOryrNoQIaQq7b3yBByW2IchdZZUeWkcLkgku_1zMAUIn1Sy-Tsfj-iI4un8xihYDPLPxXZNCiJRF1bo4SBLnXT4RnlpIS7f7Bdaj2whLWnoTFwtX059mdq1wZMLWnSkEFn4gyOeq2_7SuNx1A-T0N_hxaWQ6R6aYJ2yxsJgd2wRUGzy4hg4Uk8wFl25wT7NlSh0POYEt_H_j5xmzNMk1-Chd8UAwejD4sC0BEXxlGl3xXRtztTJnstKv338LrFz2VrO-KDQGEkixCFb-_E8whSy06in-UsAkU7p6_xrluymunJdjj57j3hnPwpLYio9rvEjgohWpCToAh_3M0ySX7c5huE4fz4iZ36mm6vR7kjkTydjjfQvrdFWbIvv0Y-A=w773-h580-no


Nothing left to do but bundle and put the reprocessed strips back in the racks. They get bundled using 1/4" dowel keepers and 4" palletizing tape to keep them tightly bound, avoiding handling damage.

dDbH1bWba8QOHItTm5KtM2yYVKs-3yIlQAkwaKUlRUGqW2oblf3KbgWS5tR5EhLIwp8BfU-9P1iBgnIrte0JDuhgCMfM_rnJEvgcg2RQeM-fMkk5B12MVdVoNBvuF4-agxQnOYxtKFznfGYlTTHe0cETck-rh29f9k2zR4jueyaijvIWEcQiNoYnQf_68oGo-xPjn_c7GnuSah9lOIiX2q20J7PPHK3OKAaOoEoI4k3QIp5sW-vU_ZnYbJC4TUnxyOO_ZVSh6E9cAd7FAKGAYtHp_HOZOHs7OiG6a7suWhyE5JOqg3OUGzTfQVeJ3N7p6EiV1SnAkqkaTaWQZBnZFN6sNQv2Gy9QSMGNtpkKU787kfUACt3-8LxLR4YbOcYHALVYJZYJwjehZigGBBZwx9A2L976KcQxyz0TVYqVp3RMTC5zNb5ETJkJwjyqVnZbMKlw2ryceeoRIVIw1l2ikAzIfwr5fDCffcH5_qppKnHOpaZo1X7FSKv26A9iWBySSQ8NQl3tuqs1QiGDkfKCTUftzWEM4aiaGJpKRIME1vmL91tjRVuZjeCWQ5bPv96mGuA4XeWH4PWY5s78y_sG1dGQAUUYSacFAsqECTZUQQ=w773-h580-no


Brian
 
One of the last steps before actually starting the real challenge of building the boat .. is book matching the strips, while not strictly necessary, I like to take this step.

I picked up a sheet of 3/4" ply (just had the store cut it in half) to cut new stations, plus some 1/2" baltic birch.

Before I use the ply for its intended purpose, i spread it out on the strongback to make a large sorting table. Out come the reprocessed strips and the accent strips.

CXIfMUnnraDhN1W-wTpx1ufJCNctJUroDoilLw9jWswz1wGCQWh-fGv6oguskzRHAKI3F-iadElU3-B_IztJrRnX8PTmM47dyT-VmPoA-AYh4Lt05tLebL-yqEp_hfwTtuCPooTmZKA2uN38PU6GYvy3I-KcSmFYUQnsa9L9sIYMO5Vkqo2jt6diBKDjGP5_sxL4OpCZpV8Kj8P3roltM3yZ-HD4rJfaN7FPOr6Rvqv0XHrEN5dtsqczFMrXVCX6mCTbDE_bIpnMIxmHCRM9FpaqGb2eU0I0UhK04Ejo1mxnLmfC-y0jXgLYVJZWRvgzR4D0Dhh1OBcP7HqAtxc2-nbpmFJ9JKlPbNtKPscdaFbRtcbR7jmxBn3kg7jFmqJ_Sr-GWnjVzuMSiSiRM7nciZ2ly9H-93DF0v7zpkWXqqG2XdkyU0Ftn_W3Ond_D6ZJMg2eYiM360Somv1vTLNEyNNWw5C4Z3L0VhMR0prJrvskzcLBYoqWP0dHnxvD7V1m_xnCnuEpedfQb6APCImgSuSbJf1BSPX6sDh3piAHxhSBVsLCIgLQtFHbzweCu3XDXrNV1EZ9qudgykGrhMymza9ur43LEzeN6tUlckIpJg=w568-h756-no


Once arranged, they get numbered and marked left and right ... a side shot to gives a better idea of the strips and accent

0u2ygp_4noffr-COZNW8xRS9bvMd_eYFeXZrG38POFw6Tj0c2CIl6P14hULvDPyNabmTiEHI-QBLsWCyfqDjU0wIL83SHkBrytLkn9qzuEUiW1bN3_Fm8aO9M2Ds-Fnmxh4rVwmZJ8x3h0v8Rn1ol0DB2B4DVdQYfJWlz8i7DUWW3uCkw9htIu5HwqpJmdnlQSzW2V4gxf6UYjgLOmML0ZQG2V7QxAzXGhpxNwoTaZXfkEnKphjW9ShsDJ1EUaDPL3mL4NIxO4TXoMbQwCbZKDAs2LoMDiOASys9vtgpDvQIs6PIUhjOzuSg92N6s_KB6uUBI_UWyC3kw8t42KrMccbeQP5I2NL0R11DmgFghZyngrMHLbfN59H3QUY_sXxp-p7DBTnAAp0MDZerbgadZIl4o3h1BpTCMURiVyCOw7FdJkhpXJwPBw1s5kjjIW7-yWNtgH5t4DqXrnrI6OWXBZZqlPRmOzh70tMHR3LaC2QI_eBtYKQzVJ5VK2PdwiRYGpVWp-TG2LCfDr0yQ0m-hvcreQSsvlPKrqyOcXPLr5Ol1TZLKpyDknSVUza8LUQH8PrTz5QrYIWoXIB-hOnXjfN5jFtwIVJbOLMUqg1W2g=w568-h756-no


Rebundled as left and right ... ready to go back to the racks ( a lot of twoing and froing)

aTpVp2EM6EYWlKi_Kn2Fj7VsBvMTn3UpkpPxK8yih6lK_Ba9xowxyggI9NsjAm4aje_wMCvR4zHf6mtrL8VSUojTSqL7eaNhak_44Ss9tfCQzjGBjX7Xo0QDzLuT9eXkfHKO0wPnD9kHfPmzMUG-OA_GUYr7d4uNi8f98-MX4NFTjIUEwepZ9p_ABU7Pkhbma0K92_AVwe2-tgTHEcvjZ-PRQqWXBlN4s2sKY0lSL4t9c5kuwlOqjOz5pVgpVD32wQOiXOhplnLBH-BgbFtvWyyPKp7_9rLp2W8DGE-ue9mJrqNyzxtmscu1Zmcno6nrsDpHN8rAYbL7Rzv53lQVs71UXAB05gZTaW_TqRicjsKD1o-_B_zAhEuBKzs0P0Xl5sm1Jik8YQTiNr-a5qU9SpRJQHphRZeFex4__39SU1kicCw15nBcqc6D33CLwHLkfkadR_kd9OSLyXlQP62J-xERzZNZbjy251fLtNOfYn_64LvFXI0domZyYPNBA7KjKBXYoZEAbM50-nLYJAdKFWDTWCQaNPVM4NPh2CSTARwscu3dUSJgmiVS6fp1GRFY2JnOc9HZtlCeRmE4GTzzvwZlZycbo8tYiS1QwI71LQ=w568-h756-no


Most of the prep work is now done, getting closer to the fun part.

Brian
 
Nice job of sorting ! So the accent strip will start, 6 strips down from the shear ?
You are making my pile of strips look bad ! That's OK ! They will find their place.

Jim
 
Hi Jim,
I figured 5, the last one that looks like #6 is the starter strip for the accent strip. Just hope it lines up the way I expect on the tumble home knuckle.

Brian
 
Looking like a well organized build. Everyone seems to like something different for the accent strips. Are you intending to run them parallel to the shear or parallel to the waterline?
 
I plan on running parallel to the water line "sorta" ... I follow CanoeCraft and follow the sheer for about half the forms in the middle and let the first strip find it's own fair to the bow and stern. Letting the strips go fair seems to result in a visually pleasing line.

The plan is to run the accent along the knuckle portion of the tumble home ... since it is made up of 3/8" strips it will be easier to turn that sharp edge, additionally it should accentuate and make the knuckle more of a feature.

Brian
 
Last edited:
Back
Top