• Happy National Garlic Day! 🧄🚫🧛🏼‍♂️

Royalex Repair

Joined
Jun 7, 2015
Messages
36
Reaction score
20
Location
Wisconsin
Several years ago when I was outfitting my WW solo canoe (Mad River Outrage X), I made the mistake of using too much adhesive and/or not letting it dry sufficiently before placing the pedestal, knee pads, d-rings, etc. Things were fine for a few years, but over time the outer vinyl layer started to bubble and delaminate from the inner layers.

For the large area under the pedestal, I cut out the delaminated vinyl layer and replaced it with fiberglass cloth (e-glass), epoxy resin, and graphite powder. This looks like heck, but it has worked reasonably well and has lasted for several years.

Now it's time to fix the much smaller delaminated areas under the knee pads and d-rings. The vinyl is still in reasonable shape, it's just bubbled away from the inner layers. One recommendation I heard was to drill a small hole in each bubble and inject epoxy resin with a syringe. I'm wondering if G-Flex may work better than regular System Three or West System Resin as I've heard it's more flexible. I've never worked with G-Flex before. Is G-Flex thin enough to inject with a syringe?

Any other suggestions for how to repair these bubbles in the vinyl layer of Royalex? It doesn't have to be pretty as I'm not concerned with the aesthetics of a 15+ year old Royalex boat.
 
G-flex comes in two type, regular and thickened, I've mostly used the thickened which might not flow that well in a syringe (it has a consistency similar to toothpaste or maybe shampoo). The regular type probably would flow ok. I used the thickened along with s-glass to repair interior cracks that showed up when I pulled off a large doggie pad that had been applied with contact cement.

Seems to me this issue of damage to the inner layer of Royalex under any attachments like pedestals, knee pads and d-rings is a lot more common that people realize since it is hidden until these things are removed.
 
I have never been satisfied with any repair I have ever done on Royalex, especially delamination, but your plan is interesting. I would love to hear how it turns out if that is how you proceed (I am wondering how it would cure). As far as G-Flex, I use it for almost everything. The usual viscosity is such that you can inject it with a syringe; I have used ones that my dentist gave me to flush out a tooth extraction.
 
Injecting or forcing some G/flex under the delaminating vinyl skin seems like a good plan, provided more radical surgery isn’t needed. A small slit in the vinyl, wide enough to get a popsicle stick in/underneath and smear the G/flex around, may be more efficient than drilling a small hole.

Once you have the G/flex injected I’d cover the area with a piece of wax paper and lay a sandbag weight atop. I keep a supply of wax paper and gallon Zip-locks full of sand in the shop for similar purposes. Take the sandbag off every half hour or so, inspect the area and push down any still lifted or raised areas with your fingers and lay the sandbags back in place. As the G/flex begins to set up the lifted areas will adhere when you push them back down.

The larger concern is the condition of the foam core. With something like Vynabond or Mondobond (or even contact cement) laid on too thick/too wet the trapped solvents can eat through the vinyl and get into the foam core. That is really bad news; once into the foam core the trapped solvents can continue to spread, softening a wider area of the foam core than just the circle under the D-ring pad.

How does the rigidity of the RX feel around the delaminated areas compared to unaffected parts of the hull?
 
One important caution if you feel the need to remove any old adhesive residue from d-rings or etc. With the vinyl delaminated I would not get any solvent anywhere near those areas. If a solvent like acetone gets into the foam core things will go from bad to much worse.

Years back, on another board, I had a “debate” with someone about the solvents in Vynabond melting vinyl RX skin if misapplied. I said I had seen the aftermath a few times and heard about it often. RX canoe manufacturers are rife with such customer tales.

He was well versed in canoe repairs and outfitting and opined that he had never seen it, and doubted it happened very often. A year or so later he was installing vinyl pad D-rings in a new RX hull and used acetone to wipe down inside the hull. No problem with sound vinyl, acetone flashes off in a split second. He applied the Vynabond correctly, allowing time for the solvents to dissipate until just barely tacky.

D-rings properly installed he walked away for the night. He left the can of acetone inside the hull. He didn’t quite manage to get the cap fully seated.

Somehow the acetone can tipped over in the middle of the night. The acetone puddle melted a large area on his canoe.

My understanding is that the solvents in Vynabond essentially “melt” a bit of the vinyl surfaces for a tenacious bond.

With Vynabond no longer available, perhaps for health and safety reasons, I have less faith in the more generic “vinyl adhesives” and just use G/flex to install vinyl pad D-rings. So far so good; no solvents, no failures, nothing pulling up, lifting or delaminating.
 
How does the rigidity of the RX feel around the delaminated areas compared to unaffected parts of the hull?

There was some softness under the pedestal (i.e. where I used vynabond). I repaired that area years ago with fiberglass because I wanted to add rigidity. That repair seems to be holding up fairly well.

The other bubbled areas are smaller and the foam core is still rigid. The bubbles are on the outside of the hull and tend to correspond with where I used contact cement to mount d-rings. I like your idea of cutting a small slit in the vinyl and using a popsicle stick to smear the g-flex around. I think I'll give that a shot.
 
With Vynabond no longer available, perhaps for health and safety reasons, I have less faith in the more generic “vinyl adhesives” and just use G/flex to install vinyl pad D-rings. So far so good; no solvents, no failures, nothing pulling up, lifting or delaminating.

Interesting! I will be installing some d-rings, knee pads and a few other things into my new (to me) Mohawk this Spring, I've done a little of this in the past and always used contact cement. Although it's worked ok I've never been too sure how secure the bond has been. G-flex on the other hand I've used quite a bit and am very comfortable using it. You comment seems to indicate that G-flex would be just as good for this type of work.

That doggie pad I removed and found a ton of "spider" cracks underneath was installed (but someone else) with contact cement, do you think I would be better off using G-flex?
 
Interesting! I will be installing some d-rings, knee pads and a few other things into my new (to me) Mohawk this Spring, I've done a little of this in the past and always used contact cement. Although it's worked ok I've never been too sure how secure the bond has been. G-flex on the other hand I've used quite a bit and am very comfortable using it. You comment seems to indicate that G-flex would be just as good for this type of work.

TLDR– I would not use contact cement. Maybe one of the (now pricey) specialty Vinyl adhesives on RX. G/flex (unthickened) has worked well, and I always have some in the shop.

I never trusted contact cement for vinyl pad D-rings, and certainly not for something like thigh straps. Contact cement on minicel is fine, in fact near perfect, with three timed coats and heat gun reactivation, but I recollect it being un-recommended for D-rings.

I know what contact cement residue looks like, and how to remove it, and have worked on some canoes that had vinyl pad D-rings installed with contact cement. The edges of the pads were often lifted and many of them were - let’s just see – sure enough, just popped right off with a hard tug.

I have not tried the more recent stuff like Vinyl-tech 2000. I expect it works, but $40 for 100ml of something I rarely use is kinda pricey, and I have no idea how well opened cans store over time. Vynabond did not store well.

https://northwater.com/products/vinyl-tec-2000-adhesive

I have G/flex in the shop, have faith in it, and just trace out the pad circle on the hull location, wipe down the circle with acetone and then realize I should have used a pencil instead of a now indistinctly smeared Sharpie outline. I clean the back of the vinyl pad as well, just in case it picked up any contaminates along the way or in shop storage.

Paint a coat of G/flex inside the (pencil marked you dummy) circle, and a wee bit outside the edges in case my aim is off or things slide around a little, lay the pad in place, cover it with wax paper and pile a sandbag or two atop the wax paper to help press it down.

The Zip-lock sand bags conform to hull curves nicely. I sometimes put my drill press vice or coffee can of bolts atop the Zip-lock sandbags for extra weight.

After 30 minutes take the sandbags/weights off. With the pad exposed press down any lifted or bubbled areas with my fingers (or use the blessed hard roller), put the wax paper and weights back on. And repeat, and repeat until everything is stuck flush and fair. Leave the wax paper and weights in place and walk away ‘til tomorrow.

I am convinced that the most beneficial installation step is to paint a little bead of G/flex (or E-6000 adhesive sealant) around the perimeter of the pad, after it has been adhered in place. No wax paper, no sandbag weights, just a perimeter bead to soften the abrupt hull-to-pad transition and help prevent any water/sand/dirt/grit infiltration at the edges.

I have not had a G/flexed & perimeter beaded vinyl D-ring pad even start to lift an edge in an RX hull, and do the same perimeter bead on composite boats. I never thought that “Vinyl adhesives” were appropriate for D-ring pads on composite hulls, and I use the same G/flex and perimeter bead there, with similarly satisfactory results.
 
Last edited:
I have repaired and outfitted quite a few Royalex canoes over the years. Any adhesives that contain methylethylketone or acetone, if not allowed to degas sufficiently before being applied to the hull can cause severe damage to the underlying Royalex as the adhesive degasses into and through the hull. This includes not only vinyl adhesives but many contact cements such as DAP Weldwood. If you are unsure what the adhesive you are using contains, find the MSDS for the product on-line.

The damage that I have seen is usually not limited to delamination of the inner or outer vinyl layers of the Royalex. There are usually also a multitude of fine cracks in the ABS solid strata and the ABS material is rendered more brittle and less pliable than undamaged ABS. In the case of the boat described by the OP I would be inclined to go ahead and remove the delaminating vinyl to allow through inspection of the ABS itself. If any cracks are present, I would gutter them out by beveling the edges and fill them with thickened G Flex, then cover the denuded ABS with an appropriate fabric such as S fiberglass bonded with unthickened G Flex epoxy.

G Flex does work quite well for bonding outfitting to Royalex or composite hulls. I know a number of whitewater boaters who have gone to using it for outfitting canoes. Vinyl adhesives tend to work well for a number of years, but typically will gradually lose bond strength and eventually let go, usually at a time when it is least desirable. The only problem with using G Flex is the lack of an immediate tack bond which requires that the outfitting be immobilized until the epoxy has cured sufficiently to prevent movement, runs, or sags, and the relatively permanent nature of the bond. If you ever need to move or replace an item bonded to a Royalex boat with G Flex, it will mean removing the inner vinyl layer.

I would not use contact adhesives for any outfitting subjected to distracting forces. It works well enough to bond pedestals or knee pads in place. As for vinyl-tec 2000 usage on composite canoes, a few years ago I bought a composite Clipper whitewater canoe and I asked Marlin Bayes what adhesive he used for outfitting his whitewater boats. His answer was vinyl-tec 2000. I bought a can and used it to install the knee and thigh straps and D rings in my canoe and it has held up fine. Keep in mind that when you install outfitting in a composite boat, unless you first sand down to fibers you are really bonding to the vinylester resin that was used to construct the boat, not the structural fabric.

As for injecting G Flex epoxy with a dental syringe, I have also done that many times. If the G Flex is unthickened it will work. The viscosity of mixed G Flex depends on ambient temperature. If it is too viscous, viscosity can be reduced by warming it gently but this will also diminish pot life.
 
The other bubbled areas are smaller and the foam core is still rigid. The bubbles are on the outside of the hull and tend to correspond with where I used contact cement to mount d-rings.

If I am reading that correctly the bubbled/delaminating vinyl is on the outside, under where the contact cement was applied. So the solvent softening went through the ABS layers all the way to the outer vinyl layer?

Yikes.

I will (hopefully) bow to Pblanc’s knowledge in such a case. I’ve never dealt with solvents going all the way through the ABS layers.
 
OK, using G-flex for d-rings is the way I'll go.

Now how about the knee pads or other small bits of minicell? Any reasons NOT to use G-flex?
 
Now how about the knee pads or other small bits of minicell? Any reasons NOT to use G-flex?

Skip the G/flex on minicel, use contact cement. DAP Weldwood (red can, not green, and you don’t need the gel version).

I have tried other adhesives for minicel twice. A 2 foot x 2 foot slab of minicel, carved to conform to the hull used as a base for a bucket seat in a decked canoe conversion and installed with G/flex. It took a fair amount of G/flex to coat that slab and the entire seat popped out with an inadvertent tug less than a year later. Shoulda used contact cement.

A massive 6 foot long piece of minicel, also carved to fit, replicating the original foam “seats” in the Sockeye before I soloized it. Regrettably installed using an entire caulk tube construction adhesive. The giant minicel “seat” blew out of the boat on the roof racks shortly afterwards. Shoulda used contact cement, and the construction adhesive left razor sharp stalagmites in the hull.

I expect I have installed 100 minicel knee pads, heel pads, knee bumpers and etc using contact cement and haven’t lost one yet. Haven’t even had one start to come loose.

FWIW: Three timed coats of contact cement on the minicel, two coats on the hull:

Clean the area on the hull and outline the minicel location.

If it is in an awkward to reach location, like directly below a thwart or yoke, do a dry test fit first to make sure you know how you are going to hold the minicel and put it in place. Contact cemented minicel sticks instantly, and you only get one shot at putting it down correctly aligned.

Paint a coat of contact cement on the minicel. Paint a coat of contact cement inside the trace on the hull, making sure to go all the way to the edges of the trace.

Oh look, the contact cement on the minicel has already disappeared into the foam. Paint a second coat on just the minicel. Walk away for a few minutes. If I will need to reuse the brush in a few hours or the next day I wrap it in a piece of wax paper.

When the second coat on the minicel has dried to the vanishing point paint another coat inside the boat. That second coat on the hull’s impermeable surface is probably unnecessary, I just do it to make sure I didn’t miss any of the area. Paint a 3[SUP]rd[/SUP] coat on the minicel.

Wait until both minicel and hull coats look dry-to-just-barely-tacky and hit both surfaces with a heat gun (a hair drier will do). I set the minicel upside down in the hull adjacent to the trace and heat gun both surfaces at the same time. With a heat gun the contact cement on the minicel will blush sort of milky white, and it doesn’t take long to reactivate and blush white. You don’t want anything still contact cement wet, just barely tacky/almost dry.

Aim and press and hope like heck you got the alignment right. Don’t bother trying to pull the minicel back off if you didn’t, pieces of foam will just tear off the bottom.

I do the usual wax paper cover with sandbag weights on top, for at least several hours if not overnight, with a bit of and bag removal and pressing down by hand just to be sure.

Some places, like minicel knee bumpers below the inwales can be clamped in place.

PC180138 by Mike McCrea, on Flickr

As with D-ring vinyl pads I am convinced that a perimeter bead of sealant helps protect against water/sand/dirt/grit infiltrating under the edges of the minicel. I use one of the GOOP adhesive sealant products, Plumber’s Goop, or E-6000. E-6000 is just as effective and less expensive.

https://www.walmart.com/ip/E6000-Industrial-Adhesive-3-Fl-Oz/44148643

Note with E-6000 – It does not come with a screw on applicator nozzle, I’ve saved (and cleaned) the ones from past Goop products, and clean them out each time I am done for future re-use.

Have fun. BTW, minicel cuts like butter with a band saw, and leave a clean smooth minicel surface for gluing.
 
More Blather

About the two coats on hull, three coats on minicel, you could probably get away with one and two, especially with a single timed-to-tacky coat on the boat. At least two on the minicel and, eh, what’s one more. Three thin, sucked in and timed to dry coats on the minicel, heat gun activated seconds before installation, works very well and stays stuck.

The only time I have encountered difficulties with multiple contact cement coats on minicel was some miscommunication when working with a friend in the shop. We ended up with (at least) four coats on the minicel and three on the boat. Even with sufficient dry time between coats and blushed with a heat gun the stick & stuck proved more failure prone than usual practice.

I know you can put too few coats of contact cement on the minicel, the first coat vanishes so far and fast into the foam it is largely ineffective, but I guess too many coats can also be an issue.

Vynabond or etc solvent-containing adhesives on an RX hull always scared me, and I waited so long for Vynabond to outgas on one pad that it wouldn’t stick at all. It wasn’t even a Post-it Note. I am pleased to have gone over to using G/flex and waiting days or a week for it to fully cure for many reasons, including storage life, cost and always-in-the-shop availability.

The only time I have encountered difficulties with G/flex and vinyl D-ring pads was less a shop miscommunication than a friend’s brain fart. Accustomed to minicel contact cement work he liberally smeared both inside the hull trace and the back of the pad* with G/flex, instead of just painting a layer inside the trace. Lotta wasted G/flex squeezing out the edges to clean up.

Not as much wasted G/flex there as he left smeared on the shop door handles and trash can lids when he forgot to take his gloves off. Yes, minutes later I went out the doors and picked up trash can lids. Without gloves on. Got me on both hands.

*More blather. It is easier for me to paint G/flex inside the trace on the hull, on a nice firm immovable surface, than to paint G/flex the underside of a floppy vinyl pad and figure how the heck I’m gonna pick that slippery sucker up and lay it in place. Arrrgghhhh, badbadwords, dropped it on the dusty shop floor.

Further explanatory blather. Recped, you may already know contact cement minicel procedure and have your preferred practices down pat. I don’t know folk’s outfitting experience, and don’t know who all might be looking at a thread for advice or ideas. Contact cement, done right on minicel, can be a very secure and lasting solution. Done poorly it can peel off, or eat your boat.
 
Recped, you may already know contact cement minicel procedure and have your preferred practices down pat.

I can talk like I know what I'm doing and that I have lots of experience but the truth is my experience is limited and my knowledge can be suspect especially in the areas of repairs and outfitting (never mind paddling technique). About the only thing I'm really good at is logistics, supplies (gear/food etc) and navigation (on the water only).

Another issue is that I have little to no tools and equipment, in this thread you mentioned two things (belt sander / band saw) if which I have neither, pretty much the only power tools I currently own are a cordless drill and a heat gun. With one exception all my boats have been bought used and came with some form of outfitting so I lack much experience with anything other than skid plates and exterior hull repair patches.

==========================================================================

Apologies to the OP for hijacking this thread!
 
You don't need power tools to cut or shape minicell foam. Something like a long, sharp fillet knife, a bread knife, or an inexpensive coping saw will work well. For cutting thin layers of minicell something like an X-acto knife works well. Minicell is easily shaped using surform tools or sandpaper. A small hand roller is handy for rolling over vinyl D ring patches when bonding them in with vinyl adhesive to make sure you are not leaving any air voids beneath the patch.

My procedure for gluing in foam with contact cement is very much like Mike's. I use DAP Weldwood (flammable variety in the red and black can), not the gel type. As the can gets used up, some of the solvent evaporates and the consistency of the adhesive naturally thickens. When fresh and thin, I apply three coats to the foam and two to the hull. As it thickens up I might reduce that to two coats on the foam and one on the hull. When gluing in something like a rectangular kneeling pad, I find it very helpful to make indexing marks at the corners that extend onto the hull, in addition to tracing the outline. This makes it easier to properly align the foam as you lay it down. Foam pads can usually be temporarily bent into a curved form which can make it easier to align the pad at one edge, then progressively roll it onto the hull avoiding air pockets between the foam and the hull.

I use a heat gun when bonding in outfitting with either contact cement or vinyl adhesive. With contact cement, I warm both the foam and the hull just before approximating the two. With either vinyl adhesive or contact cement, as you waft a heat gun over the surface you will see little bubbles form in the adhesive, especially with the vinyl adhesives. With a modicum of experience it is pretty easy to tell when the adhesive has sufficiently degassed to allow the outfitting to be applied without risk of damaging the hull. Be careful not to get a vinyl patch too hot. They retain heat pretty well and if a really hot patch is applied to the hull it can heat it to the point of damaging the foam core of a Royalex hull. Right after installing outfitting it is best not to invert the boat for a while. That way if the adhesive has not degassed sufficiently it will be more likely to do so through or into the patch or the foam rather than into the hull itself.
 
Pete, I with you most of the way on minicel and contact cement technique.

You don't need power tools to cut or shape minicell foam. Something like a long, sharp fillet knife, a bread knife, or an inexpensive coping saw will work well. For cutting thin layers of minicell something like an X-acto knife works well. Minicell is easily shaped using surform tools or sandpaper. A small hand roller is handy for rolling over vinyl D ring patches when bonding them in with vinyl adhesive to make sure you are not leaving any air voids beneath the patch.

Yeah, minicel can be cut with anything from a fillet knife to a serrated bread knife to a coping saw. Probably including whacking it with a Katana. For clean conforming cuts, and especially with curved surfaces, nothing has worked as well as a band saw, even using a winky benchtop model.

I have had little success using a Sur-form, and even gently used Dragon skin leaves a ragged surface, which may not matter in contact cement adhesion. That rough surface might even present some mechanical advantage. I dunno know, a clean smooth surface has always worked well for me with contact cement.

I agree wholeheartedly about the shop benefits of a small hand roller, even a $3 Home Depot wallpaper roller; the outfitter’s press down/roll out friend on many applications.

But I don’t want to lose sight of duNord’s specific, peculiar situation.

There was some softness under the pedestal (i.e. where I used vynabond). I repaired that area years ago with fiberglass because I wanted to add rigidity. That repair seems to be holding up fairly well.

The other bubbled areas are smaller and the foam core is still rigid. The bubbles are on the outside of the hull and tend to correspond with where I used contact cement to mount d-rings. I like your idea of cutting a small slit in the vinyl and using a popsicle stick to smear the g-flex around. I think I'll give that a shot.

If I am reading that correctly the bubbled/delaminating vinyl is on the outside, under where the contact cement was applied. So the solvent softening went through the ABS layers all the way to the outer vinyl layer?

Yikes.


I have little idea what to suggest with seemingly through-to-the-other-side solvent issues. I’d probably easy-out shade tree outfitter opt to force some G/flex forced under the bubbles, maybe on both sides, weight the “repairs” down, and reinstalling D-rings vinyl pads further away from the damage.
 
If I owned a band saw I would use it to cut minicell, but I never have owned one. Yet I have built at least a dozen minicell pedestals, and modified dozens more, cut out scores of kneeling pads, etc, and gotten by pretty well. The rough surface left on minicell by surform tools can easily be dealt with by finish sanding the surface with sandpaper if you want it smoother. When bonding minicell with a smooth surface, I have always first roughed it up with sandpaper of approximately 100 grit to improve the adhesion and also rough up the hull surface a bit.

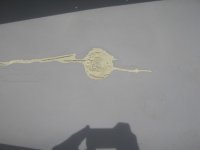
The photo below shows the type of damage I have seen resulting in improper installation of a vinyl D ring patch with a vinyl adhesive. This Royalex canoe had been pinned and had a number of longitudinal cracks on the hull bottom. I have exposed some of these at the point this photo was taken by removing the overlying interior vinyl layer and have guttered out the cracks in preparation for filling them with thickened G Flex epoxy. Others, the location of which are given away by the rather unimpressive splits in the gray vinyl layer, have yet to be repaired. But the circular area that has had the vinyl removed was directly under an old vinyl D ring patch. That patch came off relatively easily and the underlying vinyl was actually intact although discolored and delaminated from the underlying ABS in a few spots. All of the little cracks in the solid ABS stratum only became apparent after removal of the gray vinyl layer. These were not the result of the hull deformation from a pin but due to solvent degassing into the hull showing that the damage to the ABS structural layers resulting from this type of mis-installation is often worse than what would be suggested by the appearance of the vinyl layer itself.
 

Attachments

  • photo14516.jpg
    photo14516.jpg
    39 KB · Views: 2
Last edited:
Another issue is that I have little to no tools and equipment, in this thread you mentioned two things (belt sander / band saw) if which I have neither, pretty much the only power tools I currently own are a cordless drill and a heat gun. With one exception all my boats have been bought used and came with some form of outfitting so I lack much experience with anything other than skid plates and exterior hull repair patches.

Pete is correct, you don’t need a band saw to cut minicel. I still use a coping saw for complex curves on smaller minicel pieces, a utility razor will slice up to inch thick slabs and coarse sandpaper will further shape or smooth.

One thing I believe helps with minicel pads if to bevel (chamfer?) the top edges, so they are a bit rounded or angled and not an abrupt L transition you are more likely to peel up with inadvertent heel pressure.

P2160525 by Mike McCrea, on Flickr

I have had little success using a Surform and much prefer using (discontinued of course) Dragonskin, a product made for shaping minicel. If you want to carve minicel dimples for knee cups or etc a belt sander (and caution) works, but there is some similar-to-Dragonskin cheese grater like hardware store product used with sheetrock. Or just have at it with some 80 grit and elbow grease.

In some ways Dragonskin or coarse sandpaper is better; it is easy to oopsie take off too much with a belt sander or band saw, and kinda hard to put minicel back once it is dust or slivers.

Recped, my shop tools would embarrass a real craftsman. The shop band saw is a cheap benchtop Ryobi with miniscule 3 ½” clearance; I doubt it would cut a popsicle stick, but it flies through minicel and leaves a perfect smooth cut.

Agree with Pete about a little hand roller for vinyl pad D-rings, or compressing selvage edge tape (or Dynel) under peel ply. I used a small piece of drilled dowel with a 20 penny nail at first, but a plastic wallpaper roller from the hardware store is only $3.

While I am spending your money on minor boatworking hand tools, a decent pop rivet gun is like $20. I couldn’t do some boat outfitting without one.

https://www.homedepot.com/p/Arrow-Heavy-Duty-Rivet-Tool-RH200S/100097261

Agree as well about the criticality of aiming the minicel. If you are installing a piece of contact cemented minicel in place along the chine curves some dry test-fit practice is well worth the time so you remember how you did it. You get one shot.

With contact cement on minicel, or G/flex on vinyl pads, I don’t touch the canoe overnight, and don’t use it for a week.

Back to the OP’s question, I am still a little “Yikes” about vinyl delamination that progressed through all of the ABS layers to the outer skin.

Half-assing things the way I often do I’d still probably cut a narrow slice in the vinyl, inject some G/flex with a syringe, smear it around with a popsicle stick, cover it with wax paper and weight it down with sandbags. And hope for the best, while suspecting that the ABS layers underneath may be cracked, cratered and brittle from seeping solvent.

The alternative radical surgery, removing the vinyl for inspection, guttering out any suspect layers, filling with thickened G/flex and covering the wound with a glass patch and peel ply is probably a better fix, especially for a whitewater canoe.
 
Upon closer inspection, the bubbles on the outside vinyl layer aren't necessarily opposite d-rings or knee pads on the inside (in fact, some are quite far away). This combined with the fact that the hull is rigid underneath the vinyl bubbles is leading me to believe that the delamination may not be due to improper application of vynabond/contact cement after all (the exception is underneath the pedestal which I repaired with fiberglass long ago). In any event, I don't think further radical surgery is warranted at this point, so I'm going to go with injecting g/flex.
 
The outer vinyl layer of Royalex is there to give the hull a nice color and to protect the underlying ABS from ultraviolet light degradation. It provides a modicum of abrasion protection to the underlying ABS structural layers, but does not really contribute anything to strength so it is, in a sense, expendable.

If bonding it back down does not work, I would probably just remove the loose vinyl and paint the ABS beneath it with any variety of paint that offers an approximate color match to protect it from UV.
 
Back
Top