• Happy Scream Day! 😱

Freeze-dried Meal Coozie

G

Guest

Guest
I can’t imagine choking down another tepid but not yet thoroughly rehydrated freeze dried Mountain House meal on an off-season trip. Their beef stew is my least favorite to rehydrate, or eat when lukewarm, with the beef chunks still jerky-like and the potato bits crunchy. “Let stand 8 – 9 minutes” my arse; without a coozie it will be cold by then, and still somewhat chewy.

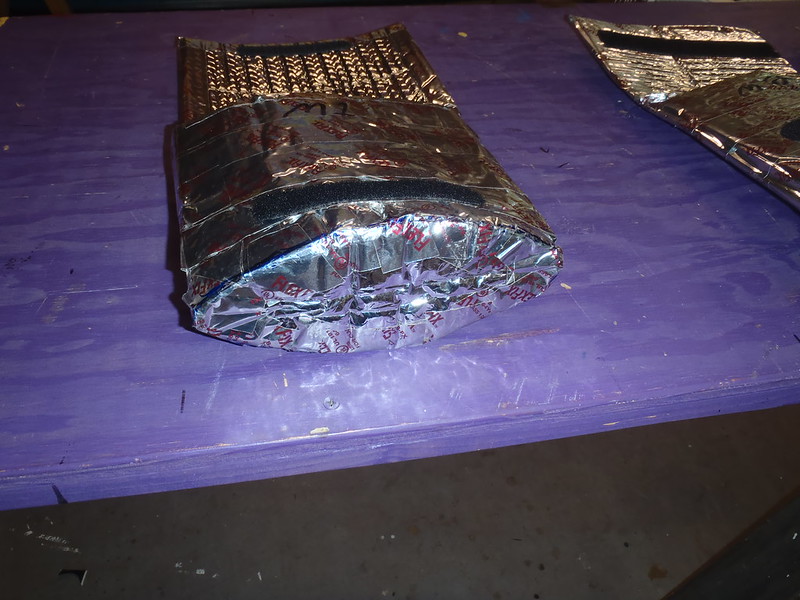
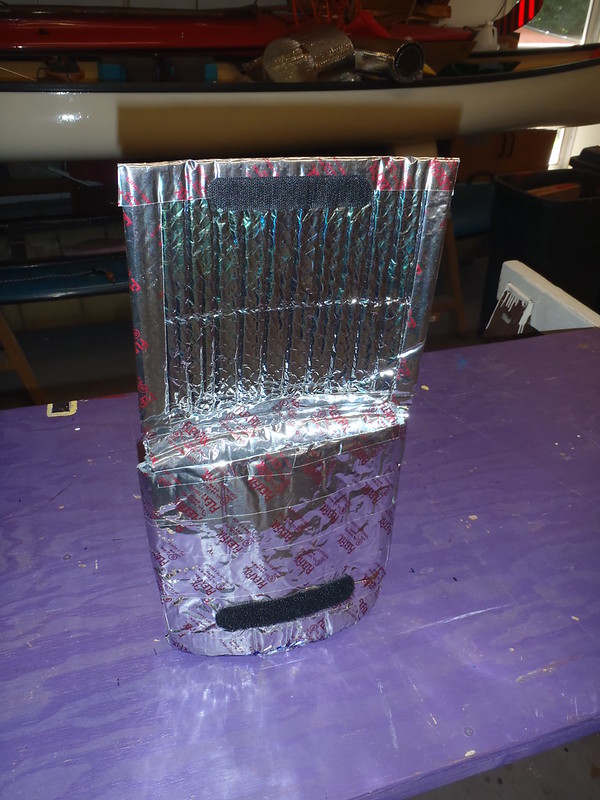
The original freeze dried meal Reflectix coozie has worked well for years, but could use some improvement. That crescented ( ) pouch shape is ideal for Mt. House packaging, but it was guesstimated a couple+ inches too tall, and lacks a decent seal over method along the open end.

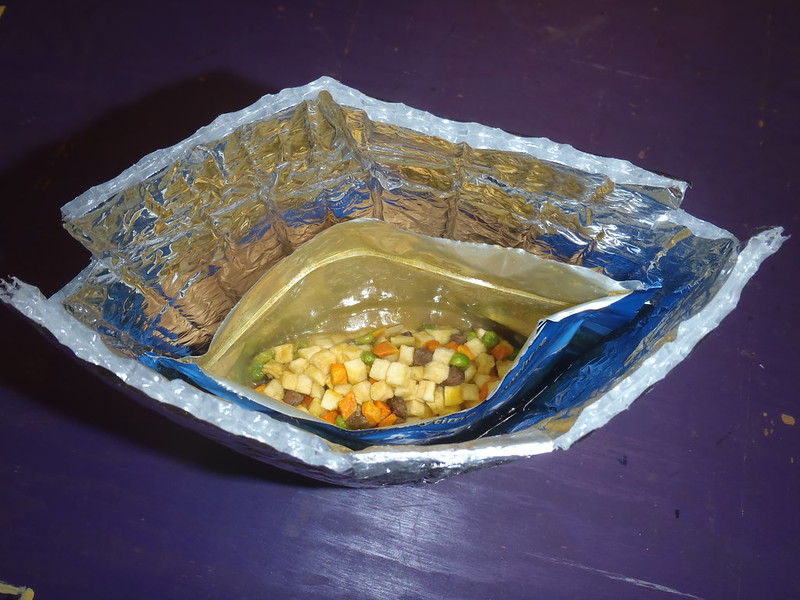
For redesign purposes I boiled water for a Beef Stew pouch, so I could measure how the hydrated swollen pouch fits. Even with the crude Mark I coozie the meal was hot 20 minutes later and burned my tongue. The coozies also make the scalding water pouches more comfortable to handle.

P6200007 by Mike McCrea, on Flickr

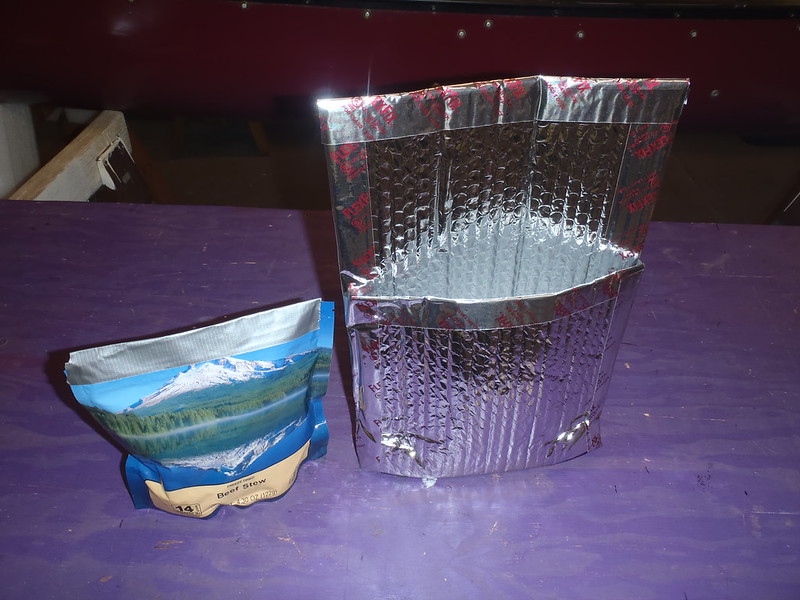
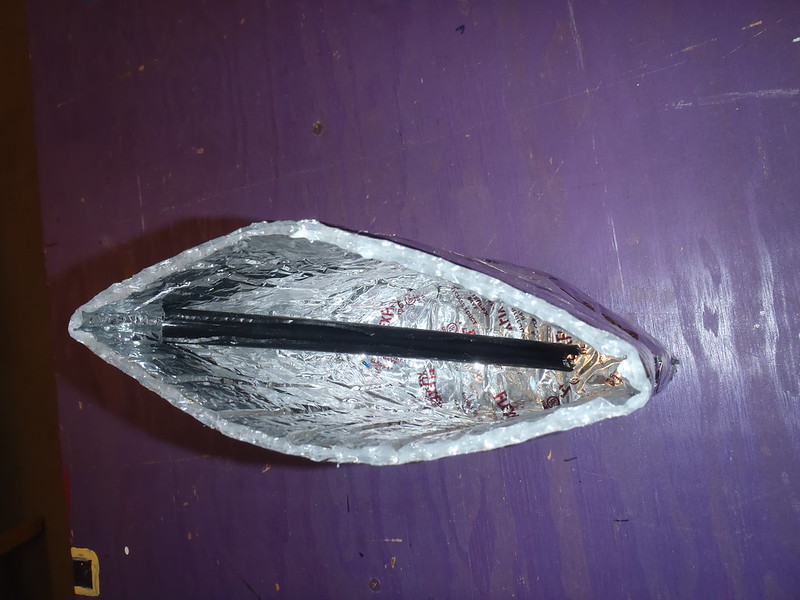
That is unnecessarily deep. An intact Mt. House pouch is nearly 10” high and the Mark I coozie is 11” tall, which seemed reasonable at the time. But once you tear off the package at the zip-lock lip a Mt. House pouch only 7” high at most, and the meal itself a several inches down from the zip lock. It requires a really long spoon to reach the bottom of the grub without in going elbow deep in the over tall coozie.

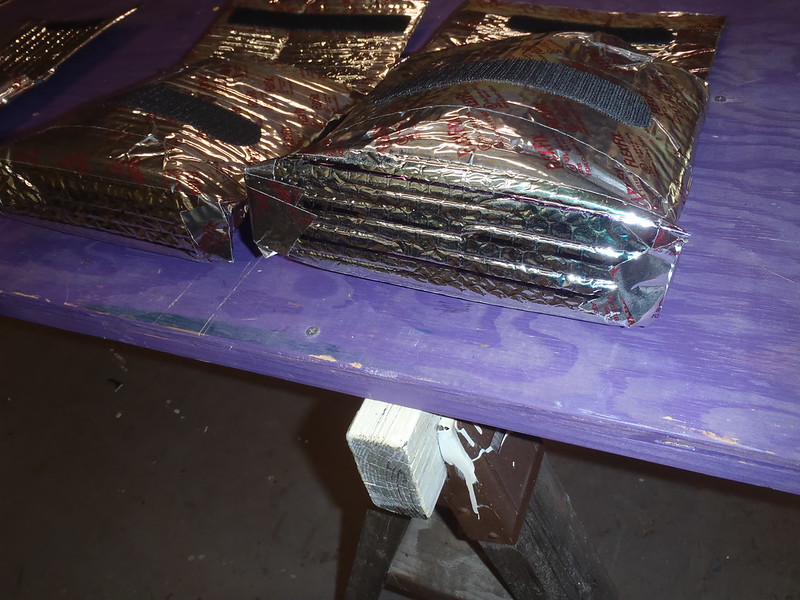
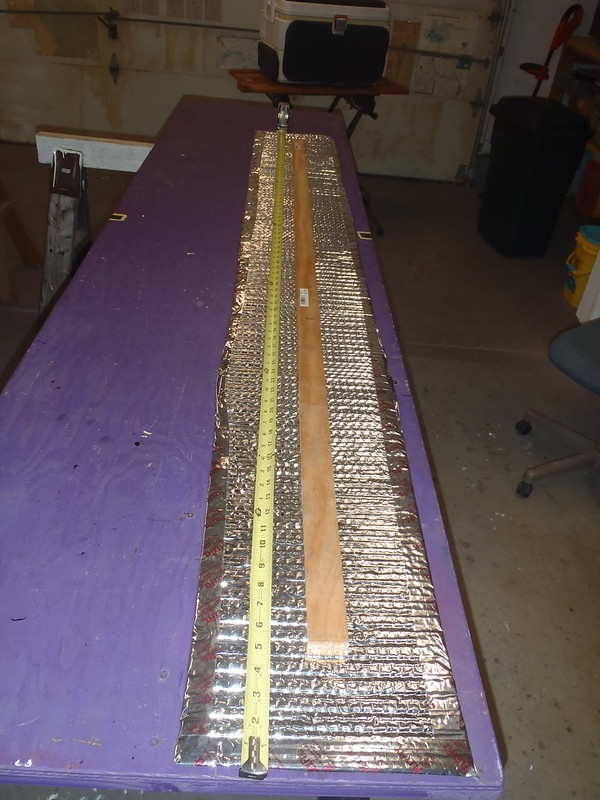
With the coozie cut down to a more reasonable 8” height my spoon needs less reach to excavate the bottom dregs, and there is still some excess Reflectix on that Cut down coozie

P6210016 by Mike McCrea, on Flickr

I needed to come up with a better coozie-closure to trap the heat. Crude binder clips work but get rusty, and a ubiquitous rubber band is dependent on folding over some extra coozie height. I really don’t want that superfluous coozie height. And don’t want Velcro as a closure; not a Velco fan, not sure how I could adhere it to the Reflectix, and don’t really want “Breakfast Skillet” dribbles encrusting Velcro.

P6200010 by Mike McCrea, on Flickr

P6200014 by Mike McCrea, on Flickr

There’s gotta be a better way. I’m thinking a piece of tubing sliced lengthwise, like a Coghlan’s squeeze tube clip.

https://www.rei.com/product/696007/coghlans-squeeze-tubes-package-of-2?sku=6960070016&store=62&cm_mmc=PLA_Google_LIA|404_1050529441|6960070016|none|72ac8e98-974a-4d35-bd96-d76d18d8e957|pla-556382995104&lsft=cm_mmc:pLA_Google_LIA|404_1050529441|6960070016|none|72ac8e98-974a-4d35-bd96-d76d18d8e957&kclid=72ac8e98-974a-4d35-bd96-d76d18d8e957&gclid=EAIaIQobChMIhpWDpY774gIVAySGCh0uiA__EAQYASABEgKDDfD_BwE

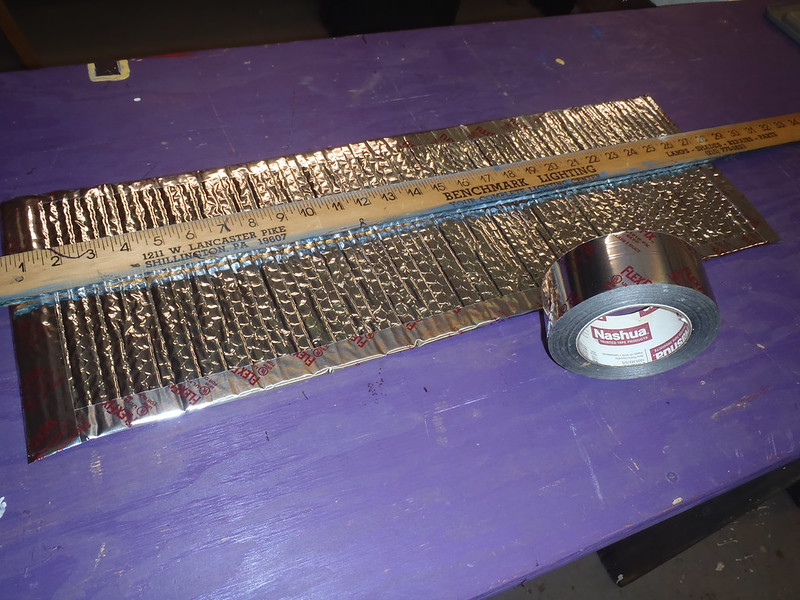
Um, not just sliced; I had to cut a 1/8” wide length of tubing out to accommodate the Reflectix width.

P6210019 by Mike McCrea, on Flickr

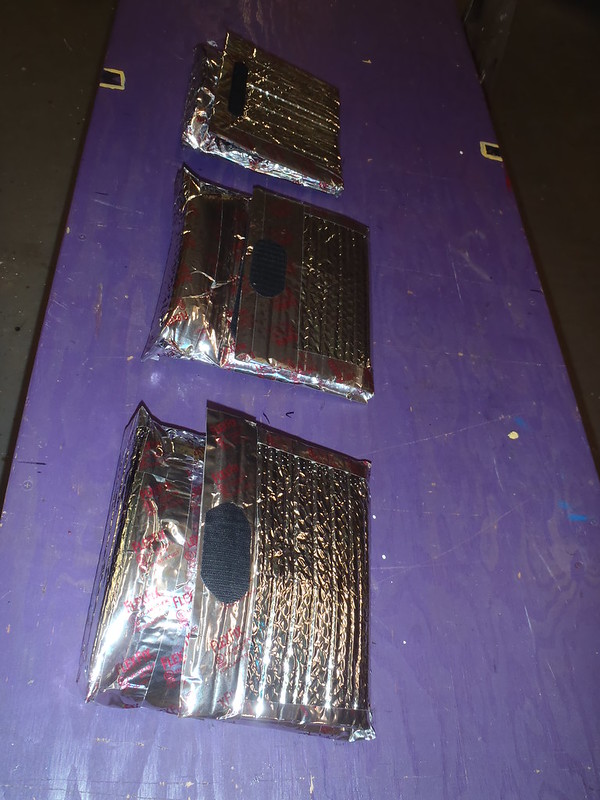
I like the Mark II version meal coozie much better, had still-hot beef stew for lunch (a half serving as usual).

The closure clip fits inside the coozie, and the whole thing weighs just over 2oz.

P6210020 by Mike McCrea, on Flickr

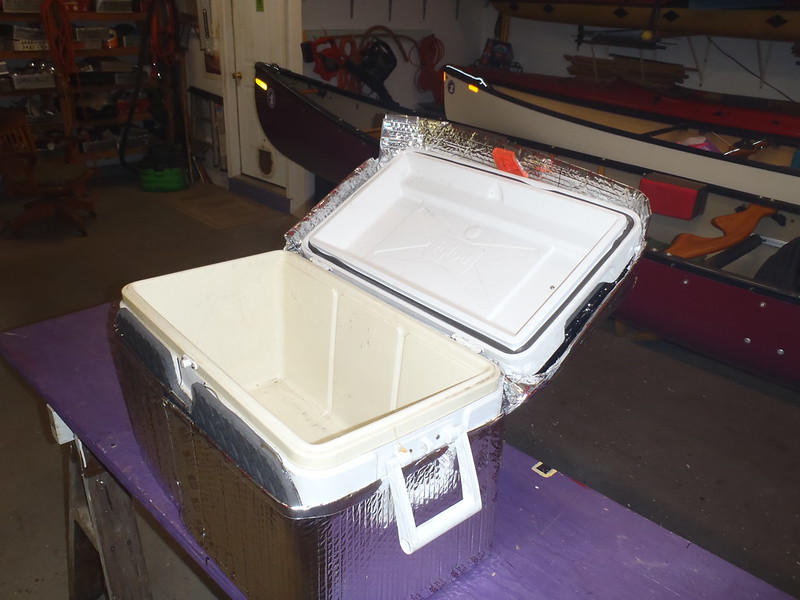
I still have a lot of Reflectix left, despite making my own stuff, making pot and pan coozies for backcountry Chef friends, and wrapping a water heater. And more FlexFix tape than I will ever use.

P6210022 by Mike McCrea, on Flickr

Now that I have a better functional size and design to use as a pattern I’m going to make a production run, and welcome any ideas for further improvement, especially to the closure clip.

The tubing is overly bendy and rubbery resistant to sliding easily across the Reflectix. I’d rather use some thin-but-stiff plastic circle I could more easily take a slice out of, and rather the closure clip be a less losable color.

I don’t want to try taking a narrow slice out of even skinny piece of PVC pipe, that is too dang hard to do, even with a Dremmel tool.

Slide clip closure ideas?
 
Mike, I used a self-adhesive velcro dot on mine. I did learn though that you had to prep the surface with an alcohol wipe because there must be a little bit of oil on the insulation.
 
I like DIY as much as the next person, but for keeping meals hot while re-hydrating I don't think you can beat this for value : https://www.mec.ca/en/product/5008-218/Hot-Pot-Cookware-Insulator

It will fit the mountain house packages easily, since I do all my own food now, it is even more convenient as the whole 1 qt pot will fut in there as well ... keeps stuff steaming for a long time.

Brian
 
I like DIY as much as the next person, but for keeping meals hot while re-hydrating I don't think you can beat this for value : https://www.mec.ca/en/product/5008-218/Hot-Pot-Cookware-Insulator

It will fit the mountain house packages easily, since I do all my own food now, it is even more convenient as the whole 1 qt pot will fut in there as well ... keeps stuff steaming for a long time.

That sure beats the price of some other manufactured versions, including Reflectix ones.

http://www.simpleoutdoorstore.com/escape_pouch.html

https://www.amazon.com/Big-Sky-Inte..._0?_encoding=UTF8&refRID=YPQGYPNA2Q2GBEDDEA1S

Mike, I used a self-adhesive velcro dot on mine. I did learn though that you had to prep the surface with an alcohol wipe because there must be a little bit of oil on the insulation.

Good to hear. I will try that in a guise that keeps the Velcro outside the pouch far from the food. I like the foldover flap & Velcro design on those manufactured versions as a coozie closure method.

Mark II expertimental plan - cut a piece of Reflectix to bag width with fold-over flap excess to use as closure. Might was well make that taped on piece full coozie with for double insulation.

If that proves satisfactory I’ll have the dimensions and pattern to make several.
 
I can’t imagine choking down another tepid but not yet thoroughly rehydrated freeze dried Mountain House meal on an off-season trip. Their beef stew is my least favorite to rehydrate, or eat when lukewarm, with the beef chunks still jerky-like and the potato bits crunchy. “Let stand 8 – 9 minutes” my arse; without a coozie it will be cold by then, and still somewhat chewy.
I took a look at the "best by" date on my MH Beef Stew: 2/2049. As tough as it is I can believe it will outlive me. Makes you think.
 
I took a look at the "best by" date on my MH Beef Stew: 2/2049. As tough as it is I can believe it will outlive me. Makes you think.

That good, because I have a half dozen beef stew Mt House packs left. I usually come back with one extra meal, and it’s always the beef stew. I wouldn’t buy a beef stew separately, but I’ll buy a Mt. House bucket occasionally and end up with some it

I cut a coozie sized piece of Reflectix with a fold over flap and taped it around the outside of the Mark I. That added piece runs full length up the back and the fold over flap down the length of the front. Used some adhesive backed Velcro at the bottom away from the food opening (did the alcohol wipe trick, thanks) to hold the closure flap snug, and put more Velcro on the backside so the flap could be secured down and wasn’t poking me in the eye while long spoon shoveling.

The Mark I is now double wall insulated, and I have the dimensions for a single wall Mt. House coozie, a simple rectangle 27” long (8.5” deep pouch, 2” fold over for a flat stand up bottom, 16.5” backside flap for closure) x 9” wide should work.

Kinda like this DIY

https://www.youtube.com/watch?v=1RjviJ0AlVI

Time to cut a few Reflectix rectangles and experiment a bit.
 
Her Highness - "Bradley, one does not simply grab the cosy by the scruff of its neck and pull, one gently plucks it with ones fingers and gracefully lifts it off thusly."
Me - "Ah, okay."
HH - "And one doesn't splosh the milk in afterwards. The milk is always gently poured into ones cup before the tea. One must think of the fine bone China, mustn't one?"
Me - "But this isn't fine bone..."
HH - "That is not the point!"

I was never entirely sure what was the point each time I dropped in to see my girlfriend. What I did know for certain was that I had a lot of rules and etiquette to learn dating the daughter of an English snob. But it was all worth it, despite my future mother-in-law trying her level best to dissuade us on our future paths together.

HH - "...and one does not tinkle ones spoon against the cup sloshing the tea about. One smoothly stirs in a gentle motion, touching the cup edge with the spoon ever so lightly to empty said spoon, and then sets it down in the saucer in a dignified manner, so."

Gentle, smooth, and dignified are words that I could never live up to but I tried. "Taking tea with Mother" was an observed ritual and a necessary hurdle for me to navigate over the years in my pursuit of family happiness. It was also the first time I'd ever seen a tea cosy. I was chastised once for calling it a tuque, but that is what it basically is. (https://en.wikipedia.org/wiki/Tea_cosy) There has been a tea cosy of some kind in our household kitchen ever since. In fact there are two currently on offer, one is a tea stained quilted affair that has seen more afternoon teas than most of us have seen clotted cream and scones, the other playfully resembles a lamb complete with tousled fleece and cute ears nose and tail...the grandkids call Lamby. Yes, the grandkids are learning the fine ritual of "Taking tea with Grandma". But many of the finer points are ignored, maybe for grandpa's sake, but I don't know.
No back door coat hooks or front door closets would be complete in any land of ice and snow without a selection of tuques, scarves and mittens. The same can be said of our own home. At least one tuque each accompanies us on our canoe trips, as they are perfect for sleeping on chilly nights and are equally perfect to serve as pot cosies regardless of the contents, whether steeping tea or rehydrating meals. But just to give my hat gear a rest several years ago I bought a pot cosy from MEC, the one Cruiser uses. No more sooty tuques.

ps There is one thing her Highness and I agreed upon, that I was never good enough for her daughter, and after 40 years and counting of marriage I'm still working on that.

pps One does not call it a coozie, it is a cosy.
Next lesson I'll tell you all about the pinky finger thing.
 
Last edited:
Thinking I need to DIY myself a tea cozy from some of that Refeflcix stuff.
I have been wearing a French Basque Beret for colder nights while sleeping for many years. Stays on my scandinavian square head better than a tuque. Does not take up much space, packed and is a warm addition under a rain jacket hood during a cold rainy day.
Looking forward to the pinkie finger lesson, I know it is done, but not why.
.
 
Brad, similarly:

His Excellency of Design – “Michael, one does not simply build a meal pouch coozie, one cuts a shapely bottom piece and cunningly tapes it in place”
Me – “Ah, okay”, watching him build it for me.
His Excellency of Design – “And one does not cut the FlexFix tape with straight ends. The tape is cut at an exacting diagonal, such that it doesn’t wrinkle in transition between the circular bottom and flat sides”
Me – “Seems like a lot of extra work. Couldn’t I just make one from a simple rectangle of Reflectix with a fold at the bottom?”
His Excellency of Design – “That is not the point

The diagonal tape cut is helpful making Reflectix coozies for pot and pan when taping on the bottom circle onto the flat sides. The Mark I coozie has His Excellency’s shapely () bottom piece taped in place.

48122682387_8267cfda2a_c.jpg
P6220016 by Mike McCrea, on Flickr

The Mark II and III have a simplified fold to create a flat standing bottom.

48122583851_8660e69376_c.jpg
P6220019 by Mike McCrea, on Flickr

Adding another piece of Reflectix to the Mark I meal pouch to make a fold over flap closure was easy enough. Since I still have a hundred yards FlexFix tape I taped all of the exposed edges of the Reflectix to seal up the now double layer walls, so I didn’t dribble Biscuits and Gravy into the interstitial spaces.

https://www.homedepot.com/p/Nashua-T...7803/100575721

Duct tape or ect would work, but that FlexFix is made for use with Reflectix and seems to hold really well, even under boiling water heat. And it comes in a lifetime’s 120 yard supply; I’ll run out of Reflectix years before I run out of Flex-fit tape.

SWF’s suggestion of sticky back Velcro seemed to hold just fine to secure the closure flap down tight across the mouth, with the flap Velcro far away from the grub opening. I didn’t want 8 inches of closure flap sticking up unmanageably, so I added Velcro to the back sides to hold the flap out of the way while chowing down straight out of the coozie.

Eh, “Seemed to hold”; I probably shouldn’t have used heavy duty Velcro, or maybe should bought new sticky back Velcro and not used 10 year old stuff. It wanted to peel off at the starting edge when opening a hot bag. I painted a little bead of G/flex around the edges of the Velcro and did some test rips; that Velcro isn’t going anywhere.

Added bonus with a Velcro closure coozie; I can flip the lid closed occasionally and not have to chow it all down in rapidly cooling minutes.

As a single walled, single piece of Reflectix coozie, simply taped closed along the sides, the pattern that worked is a 27” long X 9” wide rectangle. The 27” length includes an 8.5” deep pouch area, a full coozie length fold-over flap on the back, and a 2” crease in the bottom to create a flat, stand-up base.

Easy to tape the cut edges of the Reflectix while laid flat on the table, before folding and taping the sides together.

48122591321_1b8c7494aa_c.jpg
P6210009 by Mike McCrea, on Flickr

I wouldn’t mind a bit of extra insulation on the bottom, where the coozie might sit in cold surface convection, and have plenty of small scrap Reflectix. A couple shaped pieces of Reflectix, adhered in the bottom with E6000, and the base is thickly good to go.

48122589606_a3a65faff6_c.jpg
P6220011 by Mike McCrea, on Flickr

I liked that so much I cut a scrap piece for the bottom of the double-walled Mark I.

Dang but those are seriously quick and easy to make in that simplified manner. While I had some the Reflectix and tape out I made a full on winter Mark III version. Another Mark II Reflectix rectangle, but with a second wrap of Reflectix encircling the pouch area for double insulation (tripled at the closure flap), plus three glued-in bottom insulation layers.

48122586791_7c37587b77_c.jpg
P6220015 by Mike McCrea, on Flickr

The winter Mark III is starting to look like the Michelin Man of coozies. I guess I need to get the food thermometer and do a boiling water heat retention test. Anyone want to join me for a triple bag shop repast of Mt. House Beef Stew? Hope you are hungry.

EDIT: Forgot some photos.

Front side open

P6210002 by Mike McCrea, on Flickr

Front side closed

P6210003 by Mike McCrea, on Flickr

Back side open and ready to fold down the flap

P6210005 by Mike McCrea, on Flickr
 
Last edited:
Nice job Mike!

I use a refletix coozie as well. I have also used my single wall version (same as yours but no velcro, i simply tuck the flap into the main body) while on the ice, fishing in the teens to single digits. In my experience, the single wall version kept the food too hot to eat, even after about 30 minutes. As a matter of fact... the heat coming from the coozie also keeps your hands a little warmer while eating. I do throw an extra hoodie over it while waiting though... to help stop the wind.


triple walled!?? Way overkill for spring / fall canoe trips IMO anyways


Jason
 
Just to wobble away from the main thread a little, too danged hot is why I switched from lip blistering metal coffee cups to ugly plastic travel mugs.
I feel less authentic but so much more comfortable at 7 am. Feeling authentic at 7 am is generally not a problem.
 
Last edited:
Mark IV simplified meal pouch coozie

I use a refletix coozie as well. I have also used my single wall version (same as yours but no velcro, i simply tuck the flap into the main body) while on the ice, fishing in the teens to single digits. In my experience, the single wall version kept the food too hot to eat, even after about 30 minutes.

Jason, I like that tucked in flap idea. The Velcro closure, while it holds the flap down very tightly sealed, may be superfluous for the heat retention rehydration time needed, requires extra materials, and I’m not a fan of Velcro in most applications.

Even the loosely clipped-shut original Mark I Reflectix pouch kept food tongue-scalding hot long enough to thoroughly rehydrate.

I didn’t like the material wastage necessitated by cutting 27” long pieces lengthwise from a 24” wide roll of Reflectix, even though I could use some of the scrap. That was an ill-conceived and unnecessarily long size, with extra scissoring required and too much Reflectix wasted.

Time to try tweaking that design with a shorter tuck-in flap, cut widthwise from 24” wide Reflectix. One cut across the Reflectix, 24” long x 9” wide, which seems the ideal width for simple side-taped meal coozies.

P7190001 by Mike McCrea, on Flickr

Oh heck yes, an easier, no waste Reflectix rectangle, with the two inch foldover stand up base marked 8” and 10” up the Reflectix. All edges Flex-Fix taped while still laid flat, just ‘cause that is easy to do with a flat rectangle.

P7200003 by Mike McCrea, on Flickr

Fold in the 2” bottom crease and, while holding it pressed vee closed, tape the two vertical sides together and presto, I have this. That was too easy.

P7200006 by Mike McCrea, on Flickr

(The Beef Stew pouch is actually filled with sand)

The tucked-in top flap is 6” tall, plenty to stuff in heat retention folded over inside the 8” deep pouch.

Thanks again Latremorej, that tuck-in flap was a wonderfully simplifying suggestion. I taper cut (and retaped) the edges of the flap for easy tuck-in on the first one, but then made a pattern with that tapered top flap so I could cut and tape all of the edges while still flat.

P7200007 by Mike McCrea, on Flickr

I added a wrap around band of Flex-fix tape to the top and bottom of the pouch area for strength and durability. The Mt. House bag of sand was useful to keep the pouch engorged while taping.

P7200011 by Mike McCrea, on Flickr

Total build time maybe 5 minutes apiece, less once I had a pattern to pre-cut and pre-tape Reflectix with the flap taper.

Yes, apiece; while everything was out I made several, er, ok, five. And gave one of those away to a shop visitor while I was still in the midst of cutting and taping. I like having a supply of give-away DIY trinkets on hand for shop visitors, and I still have plenty of Reflectix and Flex-Fix tape left.

Construction side note: The adhesive on the Flex-fix tape will goo up scissor blades faster than any adhesive backed tape I have used. Even cutting the Reflectix foil seems leaves some sticky scissor residue behind. Maybe not an issue if making only one, but making a second one will be exponentially harder with the scissor blades befunked.

Doing a small production run it was easier to stop once in a while and clean 3 pairs of shop scissors before recommencing cutting.

Thanks again Jason, the tuck-in flap is no-waste, three-simple-cuts design function at its finest. I do not see much room for simplified construction in the Mark IV, and I have uber-insulated Mark 1’s, 2’s and 3’s should I ever elect to sit out on the ice.
 
Glad it worked for you Mike, I like your wide bottom! I have to lean my version against somthing. All I did was fold it once and made a simple envelope. I'll be using that fer sure.

Jason
 
That extra reflectix looks just big enough to make a liner for under you pad in the winter! I've got a few cozies kicking around made from the stuff too, but the best use I've found is a bag to keep my thermos in overnight in the winter- no frozen water for me!
 
That extra reflectix looks just big enough to make a liner for under you pad in the winter! I've got a few cozies kicking around made from the stuff too, but the best use I've found is a bag to keep my thermos in overnight in the winter- no frozen water for me!

I have wrapped up (no pun intended) making a ready supply of freeze dried meal coozies as give aways. I really like the construction simplicity and no-Reflectix waste of the Latremorej inspired Mark IV flap model.

I am considering Reflectix sleeves to fit cylindrical SS water bottles and may make one as a trial. Some of our Kleen Kanteens have form fitting neoprene huggies. Those were a gift from CT’er Will Derness; he found he didn’t much like them, and I’m undecided. While they insulate well, the once the canteen huggie sleeve gets wet it stays damp for a long time, and in truck console use where the Kleen Kanteens once fit perfectly they are now too wide. And they make the canteen base unstable. Maybe I know why Willie gave them to me.

In preparation for a desert trip a friend encased his hard side cooler with Reflectix. I wonder about the wear and tear on the Reflectix in cooler use, and my hard side cooler is already encased with insulating exercise foam. In sunny climes I sometimes wrap a heavy duty Mylar blanket around that cooler for reflectivity, but the blanket is PITA to tuck/untuck when opening the cooler.

PA183916 by Mike McCrea, on Flickr

I’m thinking it would be easy enough to make a huge Reflectix coozie for that cooler. I don’t want to make four versions of that before I get it right, and cogitating the design features would be a fun challenge.

Let’s see. I want to be able to open the lid without removing the cooler coozie, and a Latremiorej flap that wraps over the top of the lid to Velcro down in front would work.

I need to be able to grasp the handles while the cooler coozie is in place; instead of handle access flap maybe just leave the handles outside the Reflectix.

I might even make coozies for the more-often-in-canoe soft side daypack coolers.

http://www.canoetripping.net/forums...ng-discussions/diy/47898-diy-soft-side-cooler

If nothing else the ice retention tests proved the value of a reflective skin in sun exposure.
 
Cooler Coozie (getting a little Reflectix-cover crazy)

I’m thinking it would be easy enough to make a huge Reflectix coozie for that cooler. I don’t want to make four versions of that before I get it right, and cogitating the design features would be a fun challenge.

Let’s see. I want to be able to open the lid without removing the cooler coozie. I want to be able to grasp the handles while the cooler coozie is in place. I want to be able to open and close the latch without undue fuss.

Well dang, that took a lot of Reflectix, ever bit of what remained of the oft-used roll. I hope I got the Mark I cooler coozie right, ‘cause I’m not cutting another 7 foot length of Reflectix to make the Mark II version, especially for a cooler than rarely leaves the back of the tripping truck.

One 10” tall (to fit under the handles and latch) by all the length I had left 82” piece wraps fully around the cooler, with 3” inches of overlap for some Velcro. Per best learned practices all edges Flex-Fix taped first as a flat rectangle.

P7250014 by Mike McCrea, on Flickr

That 3” wrap around overlap for a Velcro closure should be just enough.

P7250020 by Mike McCrea, on Flickr

I had an oppositional Velcro idea for that wrap around closure, a couple pieces adhered on the vertical, a couple or three adhered horizontally, for easy # Velcro adjustability.

P7250016 by Mike McCrea, on Flickr

I like it simple to install so far. The lift-able lid may be trickier, lest I mis-cut what Reflectix I have left. I still have lots of Flex-fix tape left on the roll, and may need to tape some leftover Reflectix together for the desired lid size and shape.

Starting with a narrow extension piece in the back, to raise the wrap-around backside up to hinge level. And a shaped Reflectix “lid” that clings raised in place on the hinges, and allows shaded but unobstructed access to the latch.

P7270025 by Mike McCrea, on Flickr

Yup, that worked, the cooler lid opens with the coozie cover held in place.

P7270026 by Mike McCrea, on Flickr

That reflectivity is largely unnecessary in the shaded truck bed, but why not. “Er, no officer, that’s just a cooler, not weapons grade uranium or body parts”

That’ll do, giant car camping cooler coozie, that’ll do.

P7270032 by Mike McCrea, on Flickr

P7270033 by Mike McCrea, on Flickr

I appreciate how effective a reflective cover is in sunny weather. The dry-bag day-pack coolers, used far more often in the canoe, are next. After I buy another roll of Reflectix. Somehow, despite some vigorously extreme taping, I still have a half roll of Flex-Fix tape left. Mismatched hot dogs and hot dog buns to the Nth degree.

Not complaining; it was worth buying that giant roll of Flex-Fix tape, it is amazing stuff, made for adhering that material.
 
How durable is that Reflectix stuff?

I’m not sure I have a durability yardstick to judge by.

My original Reflectix meal pouch is 7 or 8 or maybe 10 years old, and I didn’t fancily Flex-fix tape all of the edges closed or reinforce it when it was first made. It has been used and abused, crushed, misshapen smushed and wrinkled in the food barrel for years and was still going strong.

The outside of a cooler wrapped in Reflectix probably sees more opportunity for abuse, especially in tripping use. For canoe use I may never know with that one, the Igloo never comes in the canoe anymore, I take one of the DIY dry bag coolers, or the Solar Bear, which is already reflective.

Reflectix is usually stocked back with the HVAC or building supplies at Home Depot or Lowes; take a look/see/feel/, or glance around sneaky and try-to-rip next time you are there. Seems fairly tough.

I doubt that the giant coozie, loosely covering the cooler, does much in the way of added insulation, but sometimes hard blazing sun is the enemy and I know reflectivity helps.

FWIW, if I understood him correctly, the inspiration for this, a friend who “permanently” taped Reflectix to his cooler, found the tape less than “permanent”. The Flex-fix didn’t want to stick to the cooler’s poly plastic, even with alcohol wipe prep. And that was before exposing it to baking desert sun (or back of a frying pan truck bed).

I know cheap duct tape, or even moderately priced duct tape, will go gooey in those oven conditions. Not sure about Flex-Fix tape.

I’ll soon know; I’m fixing to make Reflectix cooler coozies for oft canoe-carried day pack dry bag coolers, and for the missus 20 qt. hard side beachfront tripper.
 
Back
Top