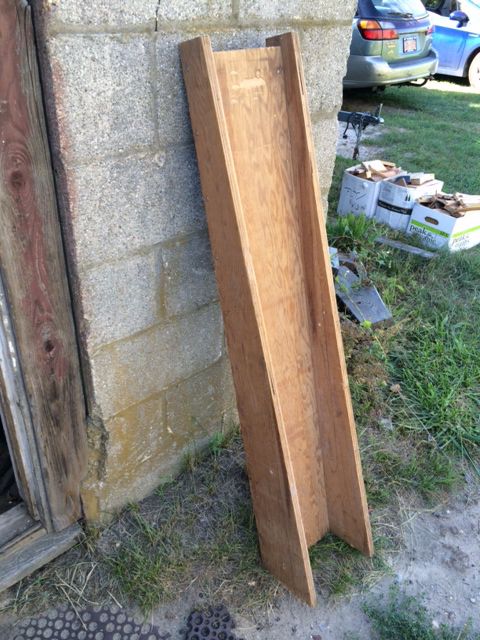
I offered to give a tutorial on hooked scarfs and nibbed hook scarfs so I took the time yesterday to put it together. A plane scarf joint can slide apart when it is clamped, a hooked doesn't. The jig I made almost thirty years ago is a bit big for this size work although I have done it, I decided I needed a new jig more appropriately sized. So this is my old one it is 52" long and can scarf a 4" piece at 12 to 1.
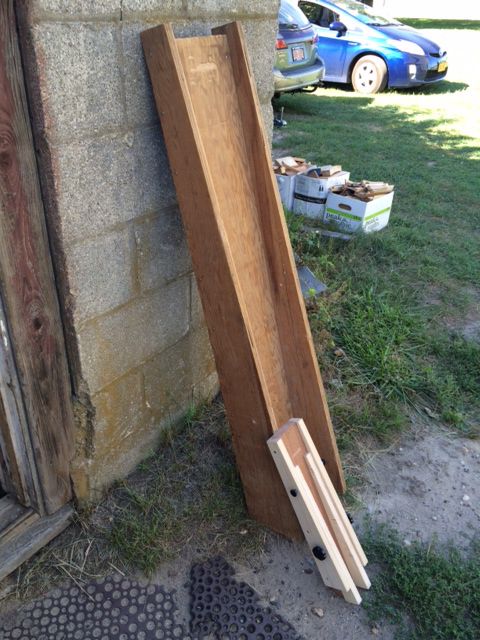
The new one is but 19" overall and let me state right now, although it looks like it was all thought out ahead of time that is not the case. There were a lot of happy accidents, but that is the way I seem to work. Here are the two side by side.
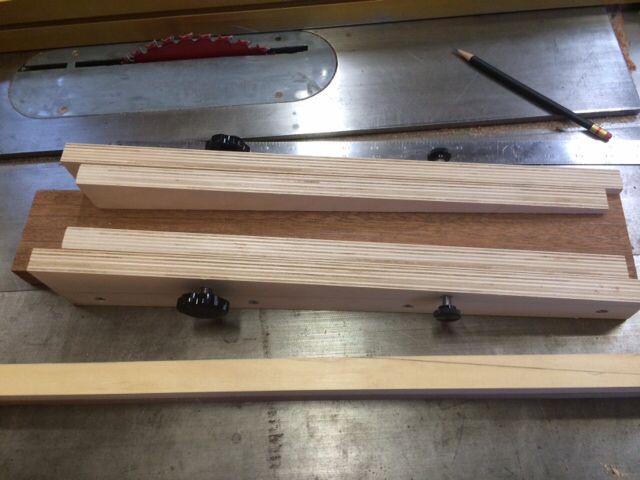
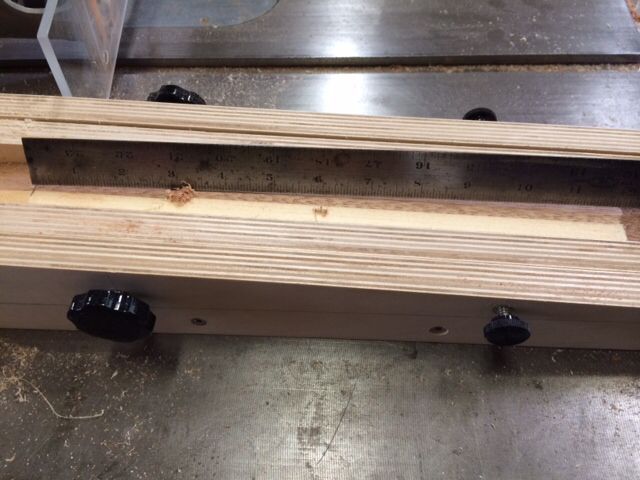
Here is a close up of the jig. I've alway clamped and wedged the pieces into the big jig, and that is what I thought I would be doing with the little one. So I drew on the 12 to 1 slope (I like that ratio, but you could shorten it if you like, it doesn't matter and everything will work the same.) on some Baltic Birch plywood scrap I had. It was just the length I needed. Rummaged around for a piece of wood for the base and found a nice piece of mahogany with a good thickness and just a bit longer than the plywood. I cut the long tapers on the plywood aligned the pieces on the base board and glued and screwed everything together. Then I saw the cut off wedges from the plywood ants thought they might work for my usual wedging as I did with the big jig. But then I had the thought to put threaded inserts for screws use to clamp everything. Luckily the base piece was the perfect width to accommodate, totally unplanned. The base and side connection must be strong because the wedges and now screws on the little one try and wedge it apart. Here is the competed jig. All the pieces I had around the shop, I had the knobs, but bolts or screws could be used.
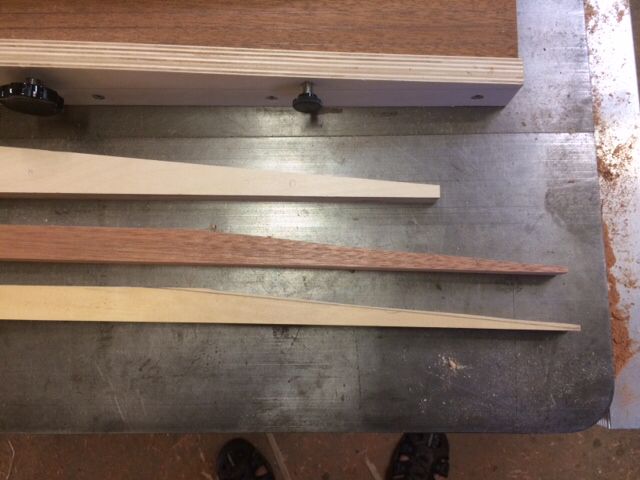
I used the clamping caul to draw a rough taper on the rail stock samples.
Rough cut them on the band saw.
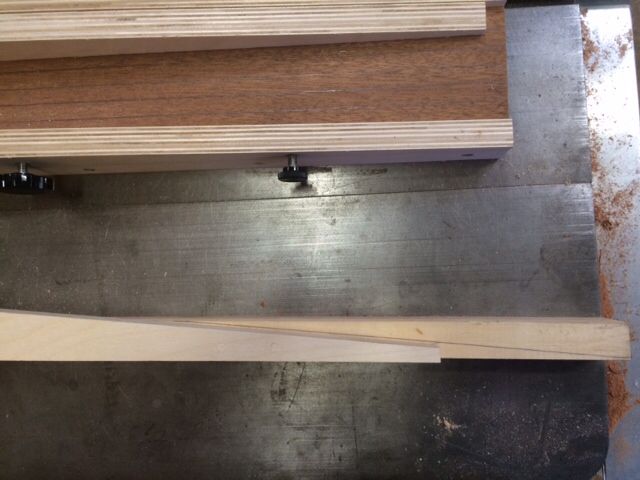
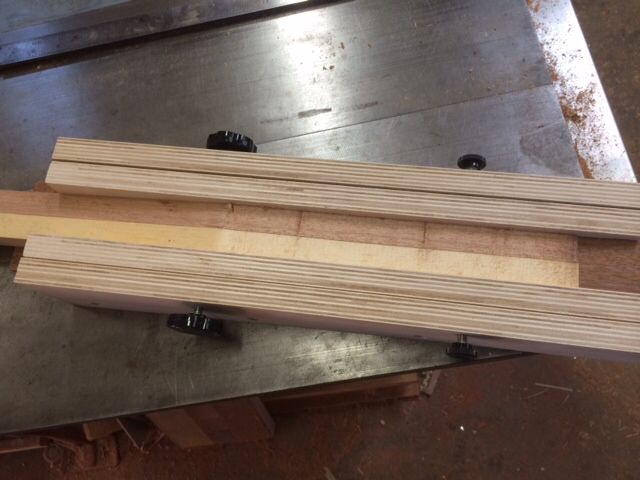
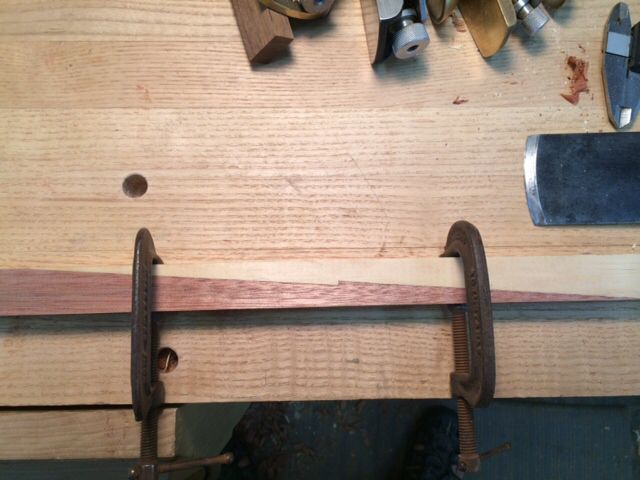
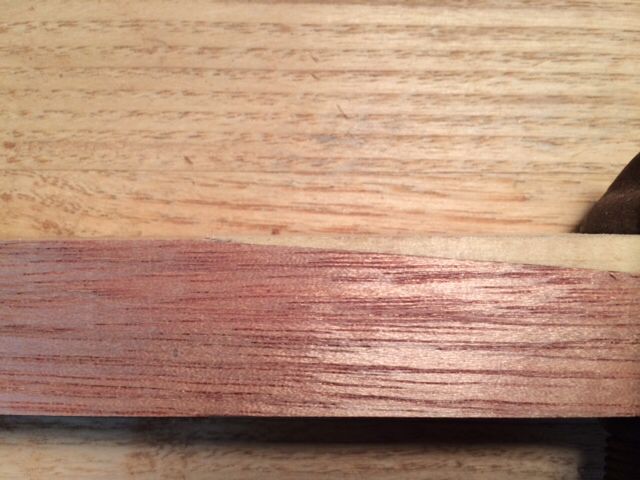
Both pieces get clamped in the jig at the same time. I used pine and mahogany so the contrast shows the joint better. You can also see how close the jig pieces fit, totally unplanned.
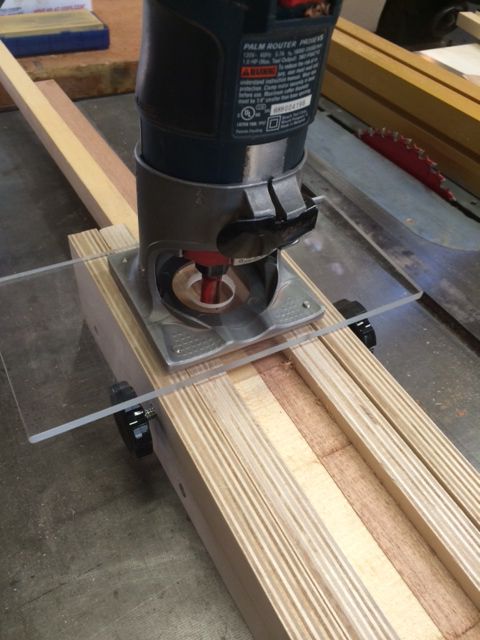
I set up a little trim router with a wider base that I can see through, bit size doesn't matter but I used a 1/2" straight bit. Set the bit to trim the entire length smooth.
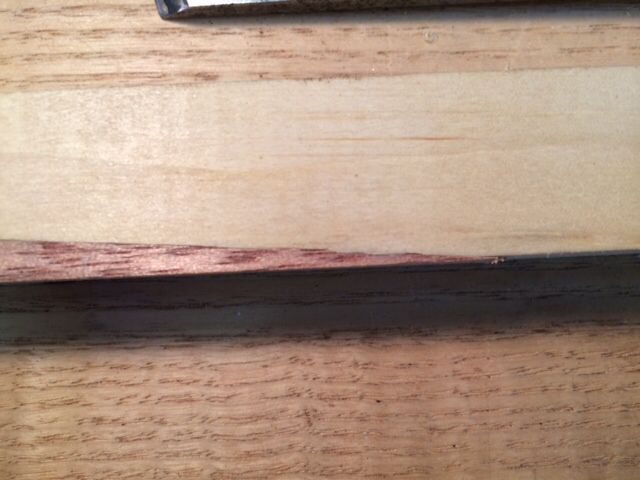
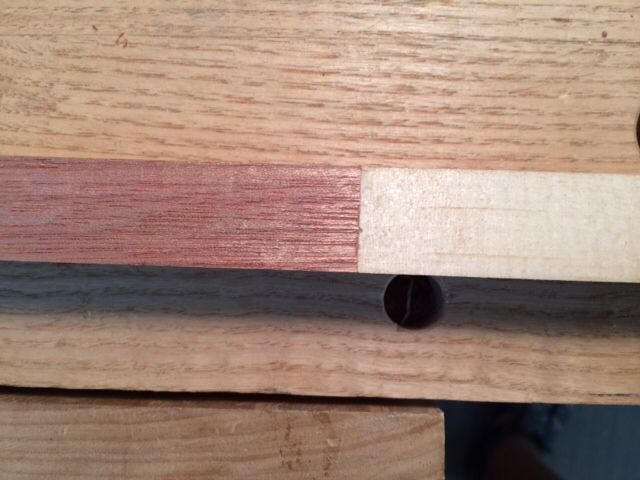
It now looks like this.


Next drop the bit a small amount. I didn't measure but it turns out it was about 3/32" and 1/8" I think would be too big but it doesn't matter. Then start another cut from the top going down into the scarf and that extends the length. Just do a little bit and stop.
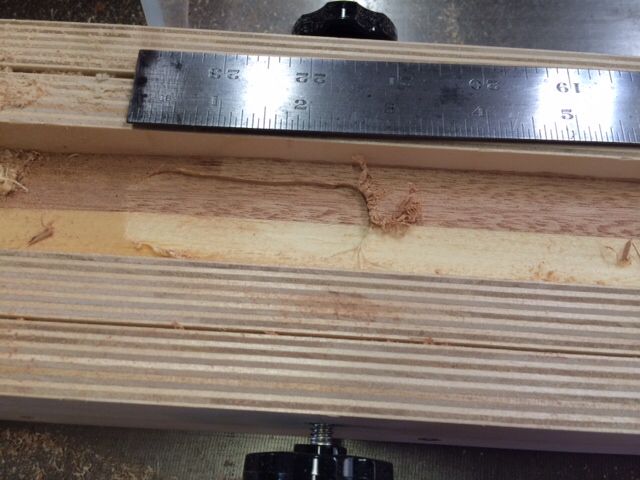
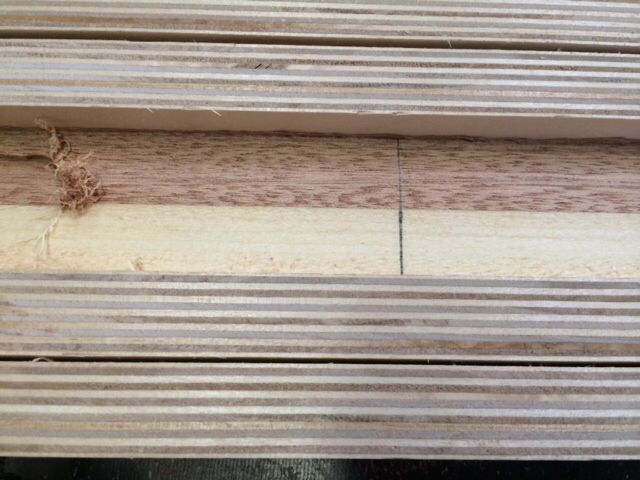
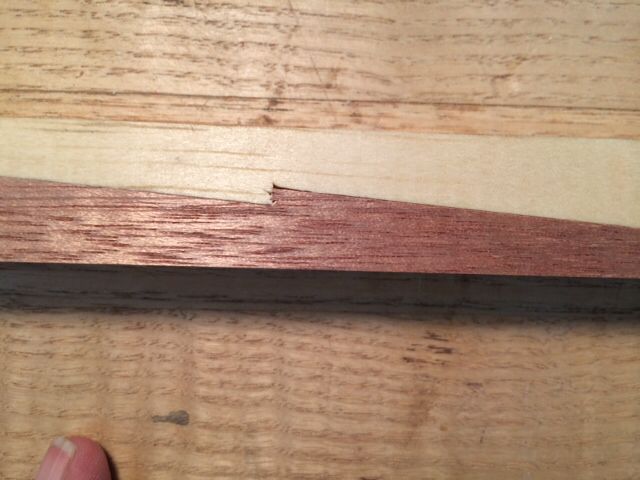
Then measure the now total length from the feather ends to the new top end. Divide that length by two and draw a line across the scarf face.
Now continue routing down to the line. I never go all the way to the line, the next step is to chisel to the line after it is removed from the jig.
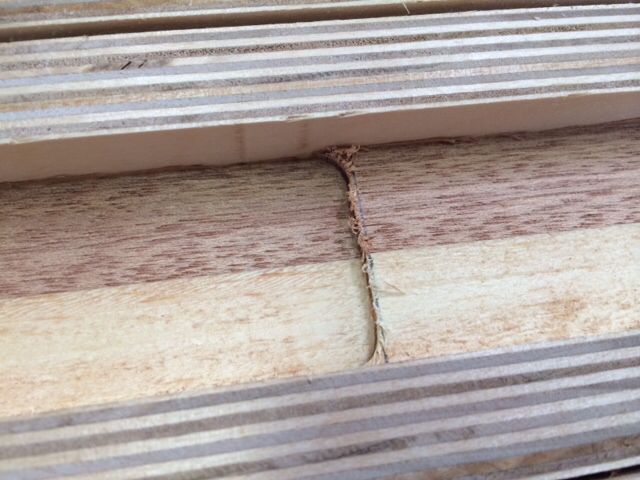
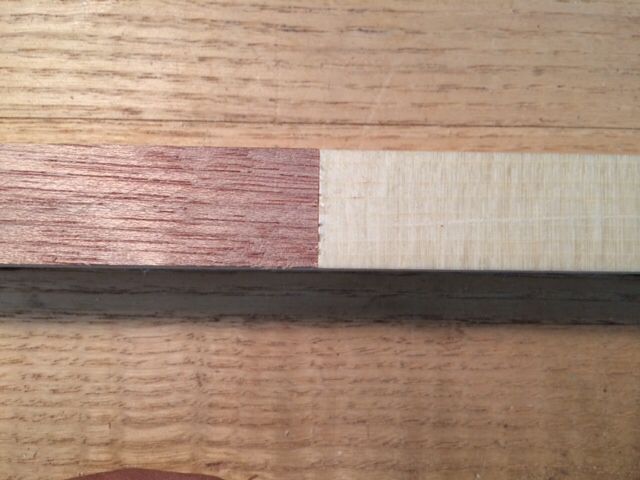
As I said the next step is to remove it from the jig and chisel to the line. It should now fit like this if you measured correctly.
So there you have it, a hooked scarf. It took longer to photograph the process than to do the jiont. It will satisfy most needs for a scarf joint so I'm going to stop here for now while the process sinks in and I'll show a nibbed hook scarf later. It truly interlocks and is mechanically stronger but not sure it is necessary for a canoe. Questions and comments of course are welcomed.
Jim
The new one is but 19" overall and let me state right now, although it looks like it was all thought out ahead of time that is not the case. There were a lot of happy accidents, but that is the way I seem to work. Here are the two side by side.
Here is a close up of the jig. I've alway clamped and wedged the pieces into the big jig, and that is what I thought I would be doing with the little one. So I drew on the 12 to 1 slope (I like that ratio, but you could shorten it if you like, it doesn't matter and everything will work the same.) on some Baltic Birch plywood scrap I had. It was just the length I needed. Rummaged around for a piece of wood for the base and found a nice piece of mahogany with a good thickness and just a bit longer than the plywood. I cut the long tapers on the plywood aligned the pieces on the base board and glued and screwed everything together. Then I saw the cut off wedges from the plywood ants thought they might work for my usual wedging as I did with the big jig. But then I had the thought to put threaded inserts for screws use to clamp everything. Luckily the base piece was the perfect width to accommodate, totally unplanned. The base and side connection must be strong because the wedges and now screws on the little one try and wedge it apart. Here is the competed jig. All the pieces I had around the shop, I had the knobs, but bolts or screws could be used.
I used the clamping caul to draw a rough taper on the rail stock samples.
Rough cut them on the band saw.
Both pieces get clamped in the jig at the same time. I used pine and mahogany so the contrast shows the joint better. You can also see how close the jig pieces fit, totally unplanned.
I set up a little trim router with a wider base that I can see through, bit size doesn't matter but I used a 1/2" straight bit. Set the bit to trim the entire length smooth.
It now looks like this.
Next drop the bit a small amount. I didn't measure but it turns out it was about 3/32" and 1/8" I think would be too big but it doesn't matter. Then start another cut from the top going down into the scarf and that extends the length. Just do a little bit and stop.
Then measure the now total length from the feather ends to the new top end. Divide that length by two and draw a line across the scarf face.
Now continue routing down to the line. I never go all the way to the line, the next step is to chisel to the line after it is removed from the jig.
As I said the next step is to remove it from the jig and chisel to the line. It should now fit like this if you measured correctly.
So there you have it, a hooked scarf. It took longer to photograph the process than to do the jiont. It will satisfy most needs for a scarf joint so I'm going to stop here for now while the process sinks in and I'll show a nibbed hook scarf later. It truly interlocks and is mechanically stronger but not sure it is necessary for a canoe. Questions and comments of course are welcomed.
Jim